Electrolux EKM 60150 X - User Manual
Electrolux EKM 60150 X Range – User Manual, read for free online in PDF format. We hope this helps you resolve any issues you may have. If you have further questions, please contact us through the contact form.
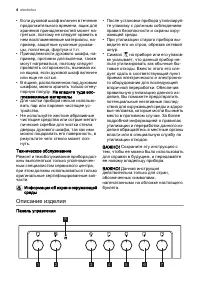
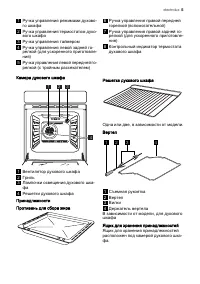
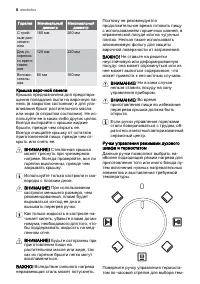
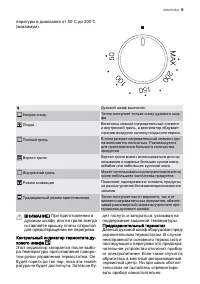
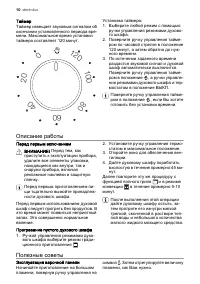
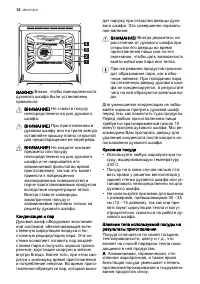
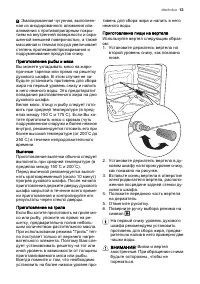
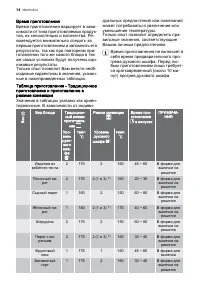
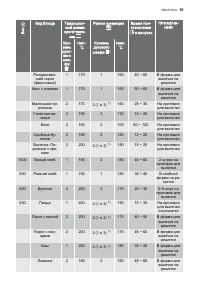
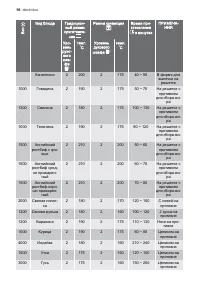
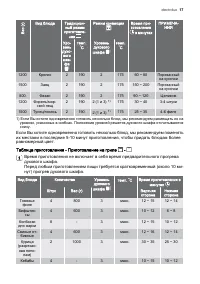
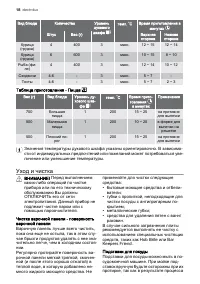
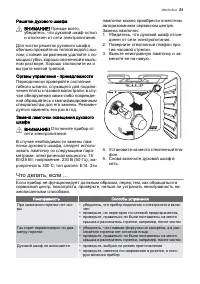
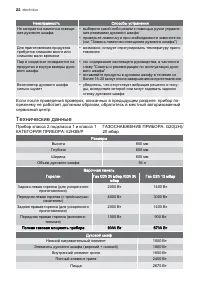
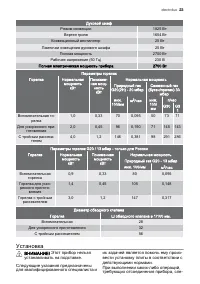
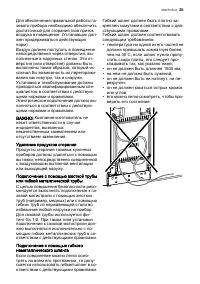
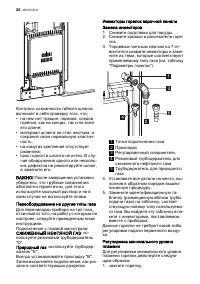

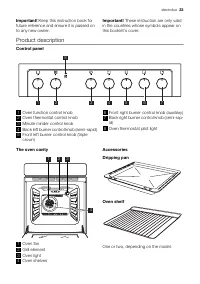


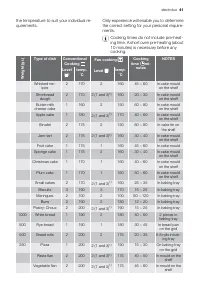
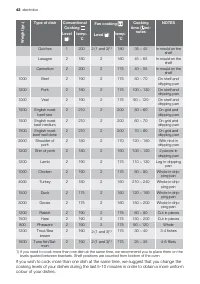
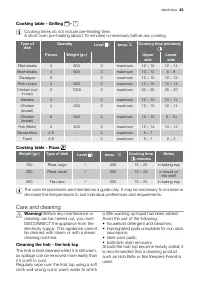
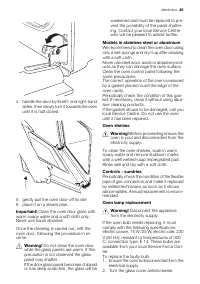

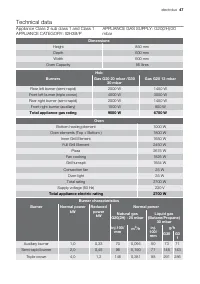
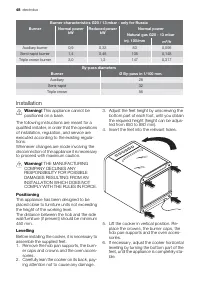
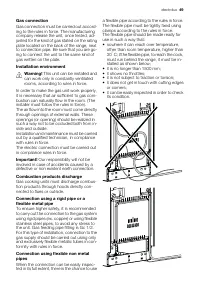


Table of Contents:
- Page 4 – Описание изделия
- Page 18 – Уход и чистка
- Page 22 – Технические данные; Прибор класса 2 подкласса 1 и класса 1
- Page 23 – Установка
- Page 31 – Installation
- Page 33 – Product description; Control panel
- Page 36 – The hob lid
- Page 37 – When cooking with the oven; Oven thermostat pilot light; the oven function control knob
- Page 38 – Operation; Before the first use; Helpful hints and tips; Using the hob
- Page 40 – C and; Baking; Insert the spit frame on the second guide; Cooking times
- Page 42 – ight
- Page 43 – Care and cleaning; Before any maintenance or; Cleaning the hob - the hob top
- Page 45 – Models in stainless steel or aluminium; Before proceeding ensure the; Oven lamp replacement; Disconnect the appliance
- Page 46 – Remove the faulty bulb and replace it with; What to do if...; Symptoms
- Page 47 – Technical data; Total appliance gas rating
- Page 48 – Positioning
- Page 49 – This unit can be installed and; Combustion products discharge; • it can be easily inspected in order to check
- Page 52 – European Guarantee; • The appliance guarantee is for the same
Инструкция по
эксплуатации
user manual
Кухонная плита на разных видах топлива
Mixed-Fuel Cooker
EKM60150
"Loading the manual" means you need to wait until the file loads and becomes available for online reading. Some manuals are very large, and the time they take to appear depends on your internet speed.
Summary
• Если духовой шкаф включен в течение продолжительного времени, ящик для хранения принадлежностей может на‐ греться, поэтому не следует хранить в нем воспламеняемые материалы, на‐ пример, защитные кухонные рукави‐ цы, полотенца, фартуки и т.п. • Принадлежности духового шкафа, на‐ пример, противни дл...
Вид блюда Количество Уровень духового шкафа темп. ° C Время приготовления в минутах Штук Вес (г) Верхняя сторона Нижняя сторона Курица (грудка) 4 400 3 макс. 12 ~ 15 12 ~ 14 Курица (грудка) 6 600 3 макс. 10 ~ 15 8 ~ 10 Рыба (фи‐ ле) 4 400 3 макс. 12 ~ 14 10 ~ 12 Сэндвичи 4-6 - 3 макс. 5 ~ 7 - Тосты ...
Неисправность Способы устранения Не загорается лампочка освеще‐ ния духового шкафа • выберите какой-либо режим с помощью ручки управле‐ ния режимами духового шкафа • проверьте лампочку и при необходимости замените ее (см. "Замена лампочки освещения духового шкафа") Для приготовления продукто...