Page 2 - Installation
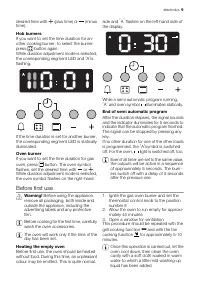
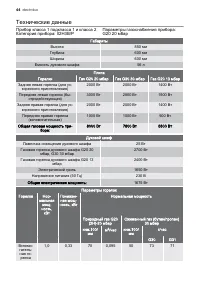
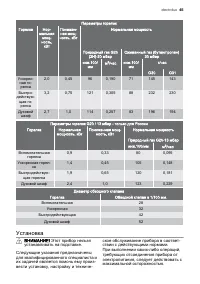
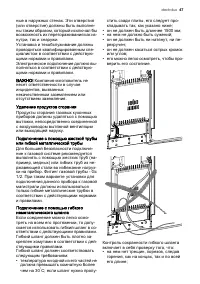
Electrolux. Thinking of you. Share more of our thinking at www.electrolux.com Contents Safety information 2 Product description 4 Accessories 5 Operating instructions 5 Electronic programmer 8 Before first use 9 Helpful hints and tips 10 Care and cleaning 14 What to do if… 17 Technical data 18 Insta...
Page 4 - Product description; Control panel
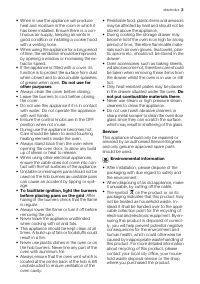
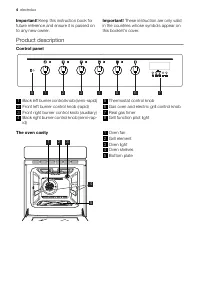
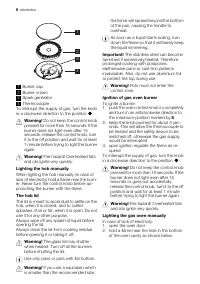
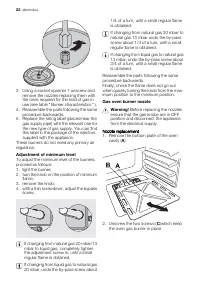
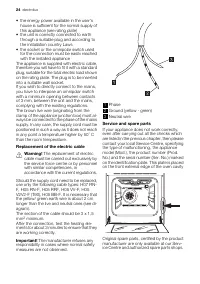
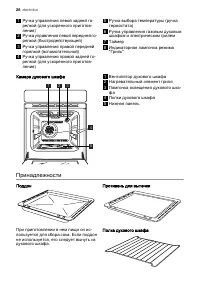
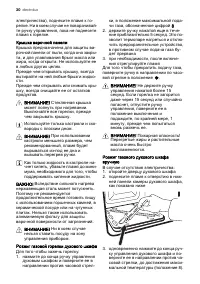
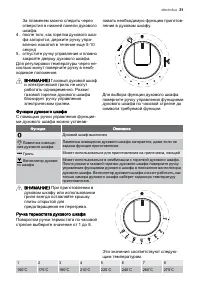
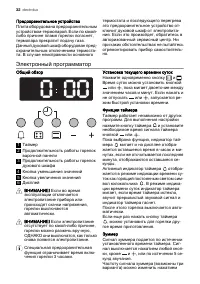
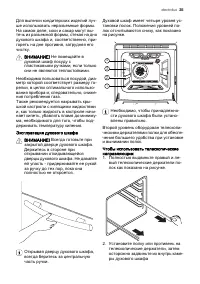
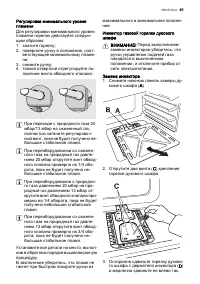
Important! Keep this instruction book for future reference and ensure it is passed onto any new owner. Important! These instruction are only valid in the countries whose symbols appear onthis booklet’s cover. Product description Control panel 1 8 2 3 4 5 6 7 1 Back left burner control knob (semi-rap...
Page 5 - Accessories; Dripping tray; During cooking the storage; Operating instructions; Control knobs on the gas hob; Minimum gas supply; Ignition of hob burners; upon ignition regulate the flame as re-
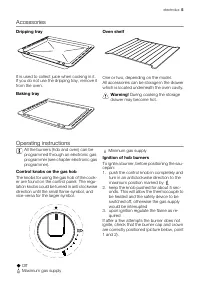
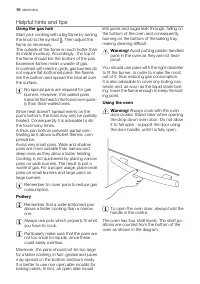
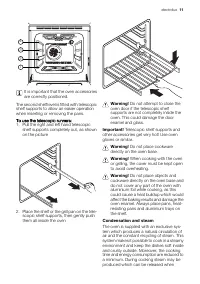
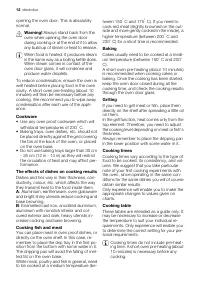
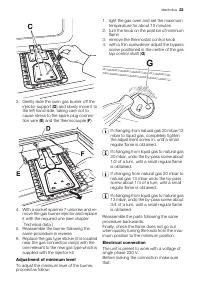
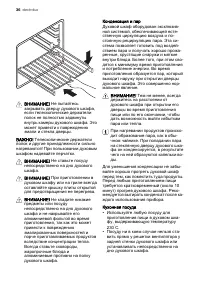
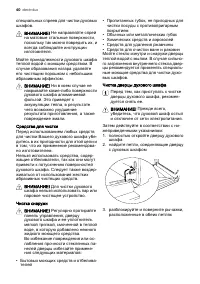
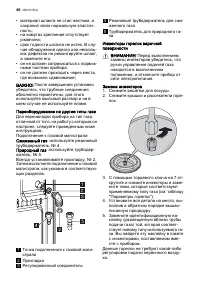
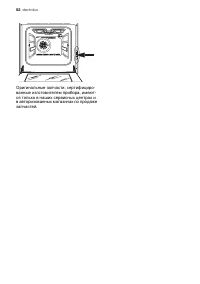
Accessories Dripping tray It is used to collect juice when cooking in it.If you do not use the dripping tray, remove itfrom the oven. Baking tray Oven shelf One or two, depending on the model.All accessories can be storage in the drawerwhich is located underneath the oven cavity. Warning! During coo...
Page 7 - Oven functions; Oven thermostat control knob
3. at the same time push oven control knob in completely and turn it anticlockwise,until the maximum temperature isreached (position 8).It is possible to check the flame throughthe holes in the bottom of the oven. 4. when the oven burner is lit, keep the oven control knob in for approximately 5-10se...
Page 8 - The safety device; Electronic programmer; General overview
1 2 3 4 5 6 7 8 160 ° C 175 ° C 190 ° C 210 ° C 225 ° C 240 ° C 260 ° C 275 ° C The safety device The cooker is equipped with a safety device-thermocouple. If for any reason the flame willextinguish, the thermocouple will stop thegas flow.This oven is provided with a safety thermo-stat cut-out. In c...
Page 9 - Before first use; Heating the empty oven
desired time with (plus time) or (minus time). Hob burners If you want to set the time duration for an-other cooking burner, to select the burnerpress button again. While duration adjustment mode is selected,the corresponding segment LED and " A " is flashing. If the time duration is set for...
Page 10 - Helpful hints and tips; Using the gas hob; Avoid putting plastic-handled; Using the oven; Always cook with the oven
Helpful hints and tips Using the gas hob Start your cooking with a big flame by turningthe knob to the symbol . Then adjust theflame as necessary.The outside of the flame is much hotter thanits inside (nucleus). Accordingly , the top ofthe flame should lick the bottom of the pan.Excessive flames mea...
Page 11 - Condensation and steam
4 3 2 1 It is important that the oven accessoriesare correctly positioned. The second shelf level is fitted with telescopicshelf supports to allow an easier operationwhen inserting or removing the pans. To use the telescopic runners:1. Pull the right and left hand telescopic shelf supports completel...
Page 13 - Grilling table
Type of dish Tempera- ture °C Oven shelf level Cooking time Black and white flour cake 175 2 60-70 Royal flat bread-cake 175 3 60-70 Margherita cake 175 3 35-40 Bottom of cake to be garnished 200 3 15-20 Butter-milk curd cake 200 2 35-40 Jam cake 200 2 35-40 Brioche 200 2 35-40 Pastry 200 3 10-15 Cr...
Page 14 - Care and cleaning
Type of dish Quantity Oven shelf level Cooking time Pieces Weight Upper side Lower side Toast 4-6 - 3 2 ~ 4 2 ~ 3 Care and cleaning Warning! Before any maintenance or cleaning can be carried out, you mustDISCONNECT the appliance from theelectricity supply. This appliance cannotbe cleaned with steam ...
Page 17 - When cleaning the shelf; Oven lamp replacement; Disconnect the appliance; What to do if...
Warning! When cleaning the shelf supports, take care not to remove thelubricating grease behind the telescopicrunners. This is meant to ensure theirgood operation. Controls - sundries Periodically check the condition of the flexiblepipe of gas connection and make it replacedby skilled technicians as...
Page 18 - Technical data; Appliance gas supply: G20 20 mbar
Symptoms Solutions The cooker produces smoke • check if the oven cavity is clean, no splashes of fat should be presented on the oven cavity The oven lamp does not work • the oven bulb has burnt out. To replace it follow the instruc- tions given in the previous chapter. Technical data Appliance Class...
Page 19 - This appliance cannot be; Positioning
Burner characteristics Burner Normal power kW Reduced power kW Normal power Natural gas G20(2H)-20 mbar Liquid gas (Butane/Propane) 30 mbar inj.100/ mm m 3 /h inj.100/ mm g/h G30 G31 Oven 2,7 1,0 114 0,257 83 196 194 Burner characteristics G20 / 13 mbar - only for Russia Burner Normal power kW Reduc...
Page 20 - Gas connection; The use of a gas cooking; Installation environment; This appliance is not; Combustion products discharge
Gas connection Warning! The use of a gas cooking appliance results in the production ofheat and moisture in the room in whichit is installed. Ensure that the kitchen iswell ventilated. Keep natural ventilationholes open or install a mechanicalventilation device (mechanical extractorhood).Prolonged i...
Page 22 - Adjustment of minimum level; Before replacing the nozzles
3. Using a socket spanner 7 unscrew and remove the nozzles replacing them withthe ones required for the kind of gas inuse (see table " Burner characteristics " ). 4. Reassemble the parts following the same procedure backwards. 5. Replace the rating label (placed near the gas supply pipe) wit...
Page 27 - Описание изделия
• Во время приготовления пищи при ин‐ тенсивном и длительном использова‐ нии духового шкафа ящик для хране‐ ния принадлежностей может нагре‐ ваться, следовательно, легковоспла‐ меняющиеся предметы, такие как ку‐ хонные перчатки, полотенца, полиэти‐ леновые фартуки и т.д. не следует хранить в нем. • ...
Page 28 - Принадлежности
1 Ручка управления левой задней го‐ релкой (для ускоренного приготов‐ ления) 2 Ручка управления левой передней го‐ релкой (быстродействующей) 3 Ручка управления правой передней горелкой (вспомогательной) 4 Ручка управления правой задней го‐ релкой (для ускоренного приготов‐ ления) 5 Ручка выбора тем...
Page 29 - Инструкции по эксплуатации
Одна или две в зависимости от модели. Все принадлежности можно хранить в ящике, расположенном под камерой ду‐ хового шкафа. ВНИМАНИЕ! Во время приготовления пищи ящик для хранения принадлежностей может нагреваться. Инструкции по эксплуатации Все горелки (варочной панели и ду‐ хового шкафа) можно зап...
Page 32 - Электронный программатор
Предохранительное устройствоПлита оборудована предохранительным устройством-термопарой. Если по какой- либо причине пламя горелки погаснет, термопара прекратит подачу газа. Данный духовой шкаф оборудован пред‐ охранительным отключением термоста‐ та. В случае неисправности основного термостата и посл...
Page 33 - Перед первым использованием
кнопки в режиме индикации времени суток.Полуавтоматическая программа с установкой продолжительности приготовленияПолуавтоматические программы можно устанавливать нажатием кнопки для горелок варочной панели или для го‐ релок духового шкафа. Установите не‐ обходимое время кнопкой (увеличе‐ ние времени...
Page 34 - Полезные советы
Перед первым приготовлением пи‐ щи тщательно вымойте принадлеж‐ ности духового шкафа.Духовой шкаф будет работать толь‐ ко после установки текущего време‐ ни суток. Прогревание пустого духового шкафаПеред вводом в эксплуатацию духовой шкаф следует нагреть без продуктов. В это время может появиться не...
Page 38 - Таблица приготовления на гриле
Блюдо Темпера‐ тура °C Уровень полки ду‐ хового шкафа Время приготов‐ ления "Черно-белый" торт 175 2 60-70 Лепешки 175 3 60-70 Торт "Маргарита" 175 3 35-40 Корж 200 3 15-20 Пахтово-творожный пирог 200 2 35-40 Торт с джемом 200 2 35-40 Булочка 200 2 35-40 Выпечка 200 3 10-15 Заварное ...
Page 39 - Уход и чистка
Блюдо Количество Уровень полки духо‐ вого шкафа Время приготовления Штук Вес Верхняя сторона Нижняя сто‐ рона Гамбургеры 6 600 3 10 ~ 15 8 ~ 10 Рыба (филе) 4 400 3 12 ~ 14 10 ~ 12 Сэндвичи 4-6 - 3 5 ~ 7 - Тосты 4-6 - 3 2 ~ 4 2 ~ 3 Уход и чистка ВНИМАНИЕ! Перед выполнением каких-либо операций по чист...
Page 44 - Технические данные; Прибор класса 1 подкласса 1 и класса 2
Технические данные Прибор класса 1 подкласса 1 и класса 2 Категория прибора: II2H3B/P Параметры газоснабжения прибора: G20 20 мбар Габариты Высота 850 мм Глубина 600 мм Ширина 600 мм Емкость духового шкафа 56 л Плита Горелки Газ G20 20 мбар Газ G30 30 мбар Газ G20 13 мбар Задняя левая горелка (для у...
Page 45 - Установка
Параметры горелок Горелка Нор‐ мальная мощ‐ ность, кВт Понижен‐ ная мощ‐ ность, кВт Нормальная мощность Природный газ G20 (2H)-20 мбар Сжиженный газ (бутан/пропан) 30 мбар инж.100/ мм м 3 /час инж.100/ мм г/час G30 G31 Ускорен‐ ная го‐ релка 2,0 0,45 96 0,190 71 145 143 Быстро‐ действую‐ щая го‐ рел...