Page 2 - Visit our website for:; CUSTOMER CARE AND SERVICE
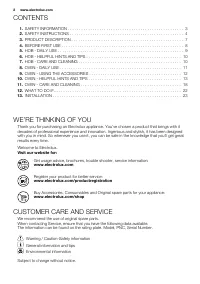
CONTENTS 1. SAFETY INFORMATION . . . . . . . . . . . . . . . . . . . . . . . . . . . . . . . . . . . . . . . . . . . . . . . . . . . 3 2. SAFETY INSTRUCTIONS . . . . . . . . . . . . . . . . . . . . . . . . . . . . . . . . . . . . . . . . . . . . . . . . . . 4 3. PRODUCT DESCRIPTION . . . . . . . . ....
Page 4 - SAFETY INSTRUCTIONS; Installation
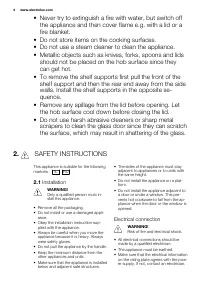
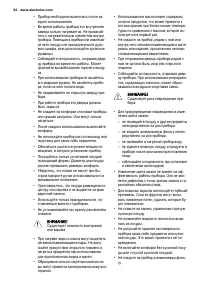
• Never try to extinguish a fire with water, but switch off the appliance and then cover flame e.g. with a lid or afire blanket. • Do not store items on the cooking surfaces.• Do not use a steam cleaner to clean the appliance.• Metallic objects such as knives, forks, spoons and lids should not be pl...
Page 7 - PRODUCT DESCRIPTION; General overview
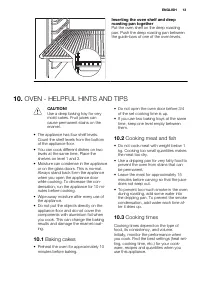
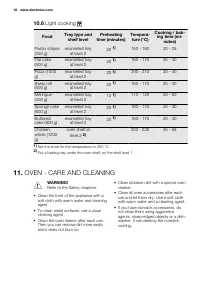
• Clean the appliance with a moist soft cloth. Only use neutral detergents. Donot use abrasive products, abrasivecleaning pads, solvents or metal ob-jects. • If you use an oven spray, obey the safe- ty instructions on the packaging. • Do not clean the catalytic enamel (if ap- plicable) with any kind...
Page 8 - Oven shelf; BEFORE FIRST USE; Initial Cleaning
3.2 Cooking surface layout 1 4 2 3 1 Semi-rapid burner (71 mm) 2 Semi-rapid burner (71 mm) 3 Auxiliary burner (55 mm) 4 Triple Crown burner (126 mm) 3.3 Accessories • Oven shelf For cookware, cake tins, roasts. • Flat aluminized baking tray For cakes and biscuits. • Deep roasting pan To bake and roa...
Page 10 - HOB - HELPFUL HINTS AND TIPS; Energy savings; Burner; Triple; HOB - CARE AND CLEANING; are not
WARNING! Always turn the flame down orturn the burner off before you re-move the pans from the burner. 6. HOB - HELPFUL HINTS AND TIPS 6.1 Energy savings • If possible, always put the lids on the cookware. • When the liquid starts to boil, turn down the flame to barely simmer the liquid. WARNING! Us...
Page 11 - Activating and deactivating; Oven function
8. OVEN - DAILY USE WARNING! Refer to the Safety chapters. 8.1 Activating and deactivating the appliance 1. Turn the knob for the oven functionsto an oven function. 2. Turn the knob for the temperature toa temperature.The temperature indicator comes onwhile the temperature in the applianceincreases....
Page 12 - Timer - Minute minder; OVEN - USING THE ACCESSORIES; Inserting the baking tray
8.4 Timer - Minute minder Use it to set a countdown time.First turn the Minute minder control knob(refer to "Product description") clockwiseas far as it goes. Then turn it counter-clockwise to necessary time period. A sig-nal sounds after the time period is com-pleted and the appliance autom...
Page 13 - OVEN - HELPFUL HINTS AND TIPS; Baking cakes
Inserting the oven shelf and deeproasting pan together Put the oven shelf on the deep roastingpan. Push the deep roasting pan betweenthe guide-bars of one of the oven levels. 10. OVEN - HELPFUL HINTS AND TIPS CAUTION! Use a deep baking tray for verymoist cakes. Fruit juices cancause permanent stains...
Page 14 - Conventional cooking
10.4 Conventional cooking Food Tray type and shelf level Tempera- ture (°C) Preheat- ing time (min) Cook- ing / baking time (min) Pastry stripes (250 g) enamelled tray at lev-el 3 150 - 25 - 30 Flat cake (1000 g) enamelled tray at lev-el 2 160 - 170 10 30 - 35 Yeast cake with ap-ples (2000 g) enamel...
Page 15 - Fan cooking
Food Tray type and shelf level Tempera- ture (°C) Preheat- ing time (min) Cook- ing / baking time (min) Quiche Lorraine(1000 g) 1 round tray (diame-ter: 26 cm) at level 1 220 - 230 10 - 15 40 - 50 Peasant bread (750 +750 g) 2 round aluminizedtrays (diameter: 20cm) at level 1 180 - 200 18 3) 60 - 70 ...
Page 18 - Light cooking; Food; OVEN - CARE AND CLEANING
10.6 Light cooking Food Tray type and shelf level Preheating time (minutes) Tempera- ture (°C) Cooking / bak- ing time (mi- nutes) Pastry stripes(250 g) enamelled tray at level 2 20 1) 150 - 160 20 - 25 Flat cake(500 g) enamelled tray at level 2 20 1) 160 - 170 35 - 40 Pizza (1000g) enamelled tray a...
Page 21 - Before you change the oven lamp:
90° 6. Turn the two fasteners by 90° and re-move them from their seats. 1 2 7. Carefully lift (step 1) and remove (step2) the glass panel. 8. Clean the glass panel with water andsoap. Dry the glass panel carefully. Installing the door and the glass panel When the cleaning is completed, installthe gl...
Page 22 - Replacing the oven lamp:; WHAT TO DO IF...; Problem; Switch on the oven
• Put a cloth on the bottom of the oven. This prevents from damage to the ovenlight and glass cover. Replacing the oven lamp: 1. Find the lamp glass cover at the backof the cavity.Turn the lamp glass cover counter-clockwise to remove it. 2. Clean the glass cover. 3. Replace the oven lamp with an app...
Page 23 - INSTALLATION; Location of the appliance
We recommend that you write the data here: Model (MOD.) ......................................... Product number (PNC) ......................................... Serial number (S.N.) ......................................... 13. INSTALLATION WARNING! Refer to the Safety chapters. 13.1 Location of the...
Page 27 - How to install the anti-tilt protection; Electrical installation; ENVIRONMENT CONCERNS
110-115 mm 232- 237 mm How to install the anti-tilt protection 1. Set the correct height and area forthe appliance before you attach theanti-tilt protection. 2. Make sure that the surface behind theappliance is smooth. 3. Install the anti-tilt protection 232-237mm down from the top surface of theapp...
Page 28 - ПОДДЕРЖКА ПОТРЕБИТЕЛЕЙ И СЕРВИСНОЕ ОБСЛУЖИВАНИЕ
СОДЕРЖАНИЕ 1. СВЕДЕНИЯ ПО ТЕХНИКЕ БЕЗОПАСНОСТИ . . . . . . . . . . . . . . . . . . . . . . . . . . . . . . . . . . . . . . . . . . . . . . 292. УКАЗАНИЯ ПО БЕЗОПАСНОСТИ . . . . . . . . . . . . . . . . . . . . . . . . . . . . . . . . . . . . . . . . . . . . . . . . . . . . . . . 303. ОПИСАНИЕ ИЗДЕЛИЯ...
Page 30 - УКАЗАНИЯ ПО БЕЗОПАСНОСТИ
• Не эксплуатируйте данный прибор с помощью внешнего таймера или отдельной системы дистанционного управле‐ ния. • Оставление на варочной панели продуктов, готовящихся на жире или масле, может представлять опасность и привести к пожару. • Ни в коем случае не пытайтесь залить пламя водой; вместо этого...
Page 34 - Функциональные элементы варочной панели
3. ОПИСАНИЕ ИЗДЕЛИЯ 3.1 Общий обзор 10 1 2 3 5 4 6 7 8 1 2 3 4 9 1 Ручки управления варочной панелью 2 Ручка управления таймером 3 Ручка регулировки температуры 4 Индикатор температуры 5 Ручка выбора режимов духового шкафа 6 Нагревательный элемент 7 Лампа освещения духового шкафа 8 Вентилятор и нагр...
Page 35 - ПЕРЕД ПЕРВЫМ ИСПОЛЬЗОВАНИЕМ; Предварительный нагрев; ВАРОЧНАЯ ПАНЕЛЬ - ЕЖЕДНЕВНОЕ ИСПОЛЬЗОВАНИЕ
4. ПЕРЕД ПЕРВЫМ ИСПОЛЬЗОВАНИЕМ ВНИМАНИЕ! См. Главу «Сведения по технике безопасности». ПРЕДУПРЕЖДЕНИЕ! Открывая дверцу духового шкафа, всегда беритесь за центральную часть ручки. 4.1 Первая чистка • Извлеките все дополнительные принадлеж‐ ности и съемные направляющие для полок (если они есть). • Пер...
Page 36 - Выключение горелки
A B CD A) Крышка горелки B) Рассекатель горелки C) Свеча зажигания D) Термопара ВНИМАНИЕ! Если горелка не загорается через 10 секунд, отпустите ручку управления и поверните ее в положение «Выкл». Подождите одну минуту, прежде чем попытаться вновь включить конфор‐ ку. Горелку можно разжечь без помощи...
Page 37 - ДУХОВОЙ ШКАФ - ЕЖЕДНЕВНОЕ ИСПОЛЬЗОВАНИЕ; Включение и выключение
7. ВАРОЧНАЯ ПАНЕЛЬ - УХОД И ЧИСТКА ВНИМАНИЕ! См. Главу «Сведения по технике безопасности». ВНИМАНИЕ! Перед каждой очисткой выключайте прибор и давайте ему остыть. Перед проведением технического обслужи‐ вания или чисткой прибора отсоеди‐ ните его от сети электропитания. ВНИМАНИЕ! Чистка прибора стру...
Page 38 - Режимы духового шкафа
ВНИМАНИЕ! Предохранительный термостат сра‐ батывает только в случае неисправ‐ ности термостата духового шкафа. При этом температура духового шка‐ фа может быть настолько высокой, что все блюда могут сгореть. Вам не‐ обходимо обратиться в сервисную службу для замены термостата духо‐ вого шкафа. 8.3 Р...
Page 42 - Режим конвекции
Продукты Тип и положение про‐ тивня Температу‐ ра (°C) Время предвари‐ тельного прогрева (мин) Время приготов‐ ления / выпека‐ ния (мин) Крестьянский хлеб (750 г + 750 г) 2 круглых противня с алюминиевым покры‐ тием (диаметр: 20 см) на уровне 1 180 - 200 18 3) 60 - 70 Румынский бисквит (600 г + 600 ...
Page 54 - Защита от опрокидывания
13.8 Выравнивание Для выравнивания по высоте верхней части прибора с другими поверхностями используй‐ те маленькие ножки в нижней части прибора. 13.9 Защита от опрокидывания ВНИМАНИЕ! Установка защиты от опрокидывания обязательна. Установите защиту от опрокидывания, чтобы не допустить падения прибор...
Page 55 - Электрическое подключение; ОХРАНА ОКРУЖАЮЩЕЙ СРЕДЫ
110-115 mm 232- 237 mm Установка защиты от опрокидывания 1. Перед установкой защиты от опрокиды‐ вания правильно выберите площадку для установки прибора и его высоту. 2. Убедитесь, что поверхность за прибором является ровной. 3. Установите кронштейн защиты от опроки‐ дывания, воспользовавшись круглы...