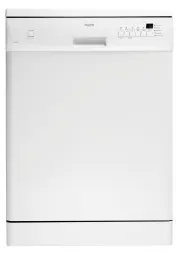
Page 2 - Correct use
Contents Safety information _ _ _ _ _ _ _ _ _ _ _ _ _ _ _ _ _ 2Control panel _ _ _ _ _ _ _ _ _ _ _ _ _ _ _ _ _ _ _ _ 4Washing programs _ _ _ _ _ _ _ _ _ _ _ _ _ _ _ _ _ 6Use of the appliance _ _ _ _ _ _ _ _ _ _ _ _ _ _ _ _ 7Use of rinse aid _ _ _ _ _ _ _ _ _ _ _ _ _ _ _ _ _ _ 7Loading cutlery and di...
Page 4 - Control panel; Indicator lights; Button Lock
Control panel 1 On/off button 2 Button Lock 3 Program selection buttons 4 Delay start button 5 Indicator lights 6 Digital display Indicator lights Washing The indicator light comes on when the washing phaseor the rinsing phase operates. Drying The indicator light comes on when the drying phaseoperat...
Page 5 - Delay start button; CL; Setting mode
Follow these steps to set the Button Lock function: 1. Switch on the appliance.2. Set a washing program.3. Start the washing program.4. Press Button Lock for approximately 5 seconds, or until the Button Lock indicator light flashes. 5. Button Lock indicator light flashes for approximate- ly 15 secon...
Page 6 - Consumption values; Program
Washing programs Washing programs Program Degree of soil Type of load Program description Pots Heavy soil Crockery, cutlery,pots and pans PrewashMain wash up to 70°C2 intermediate rinsesFinal rinseDrying Auto 1) Any Crockery, cutlery,pots and pans PrewashMain wash up to 50°C or 65°C1 or 2 intermedia...
Page 7 - Adjusting the rinse aid dosage; Loading cutlery and dishes; Helpful hints and tips
The pressure and temperature of the water, thevariations of power supply and the quantity of dishes can change these values. Use of the appliance Refer to specified instructions for each step of the pro-cedure.1. Fill the rinse aid dispenser with rinse aid.2. Load cutlery and dishes into the dishwas...
Page 8 - Adjustment of the height of the upper basket
• While you load cutlery and dishes, do these steps: – Load hollow items (e.g. cups, glasses and pans) with the opening down. – Make sure that water does not collect in the con- tainer or in a deep base. – Make sure that cutlery and dishes do not lie inside one another. – Make sure that cutlery and ...
Page 9 - Use of detergent
Maximum height of the dishes upper basket lower basket Upper position 20 cm 31 cm Lower position 24 cm 27 cm Follow these steps to move the upper basket to theupper position:1. Pull the basket out until it stops.2. Carefully lift the two sides until the mechanism is engaged and the basket is stable....
Page 10 - Use of combi detergent tablets
5 6 Different brands of detergent dissolve in differenttimes. Some detergent tablets do not have the best cleaning results during short washing programs.Use long washing programs when you use detergenttablets to fully remove the detergent. Use of combi detergent tablets These products are detergents...
Page 11 - Select and start a washing program; Cancelling delay start; Only interrupt or cancel a washing; Interrupting a washing program
Select and start a washing program Set the washing program with the door ajar. Thewashing program only starts after you close the door. Until then it is possible to modify the settings. 1. Press the on/off button.2. Make sure that the appliance is in setting mode.3. Press one of the program buttons....
Page 12 - Care and cleaning; Cleaning the filters
• There can be water on the sides and door of the appliance. Stainless steel becomes cool more quick-ly than the dishes. Care and cleaning Warning! Switch the appliance off before you clean it. Cleaning the filters Important! Do not use the appliance without the filters. Make sure that the installat...
Page 13 - Moving the machine; What to do if...; Fault code and malfunction
If not possible, empty the appliance and close the door.Disconnect the water inlet hose and remove water fromthe water inlet hose. Moving the machine Do these steps to move the appliance: 1. Disconnect the mains plug from the mains socket.2. Close the water tap.3. Remove the appliance and the hoses....
Page 14 - The cleaning results are not satisfactory
For these data, refer to the rating plate.Write the necessary data here:Model description : .......... Product number : ..........Serial number : .......... The cleaning results are not satisfactory The dishes are not clean • The selected washing program is not applicable for the type of load and so...
Page 15 - Old appliance
Technical data Dimensions Width (mm) 596 Height (mm) 850 Depth (mm) 610 Electrical connection - Voltage -Overall power - Fuse Information on the electrical connection is given on the rating plate on theinner edge of the dishwasher door. Water supply pressure Minimum 50 kPa (7 psi) Maximum 800 kPa (1...
Page 16 - Installation; Fitting under a counter; Water connection; Water inlet hose; Inlet water supply
Installation Fitting under a counter Warning! Make sure that mains plug is disconnected from the mains socket during installation. Put the appliance adjacent to a water tap and a waterdrain.The plinth on freestanding appliance is not adjustable.Do not remove the appliance worktop if you want to uset...
Page 17 - Water drain hose; Electrical connection
The water pressure must be in the limits (refer to 'Tech-nical data'). Make sure that the local water authoritygives you the average mains pressure in your area.Make sure that there are no kinks in the water inlet hoseand that the water inlet hose is not squashed or entan-gled.Fit the hose nut corre...
Page 19 - Warranty
Warranty FOR SALES IN AUSTRALIA AND NEW ZEALAND This document sets out the terms and conditionsof product warranties for Electrolux branded ap-pliances. It is an important document. Please keepit with your proof of purchase documents in a safeplace for future reference should you require serv-ice fo...