DeLonghi ESAM04110B Coffee Machine – User Manual, read for free online in PDF format. We hope this helps you resolve any issues you may have. If you have further questions, please contact us through the contact form.
1
2
3
4
5
6
7
8
9
10
11
12
13
14
15
16
17
18
19
20
21
22
Table of Contents:
Page 8 – CONTENTS
Page 9 – INTRODUCTION; Symbols used in these instructions; SAFETY; Fundamental safety warnings
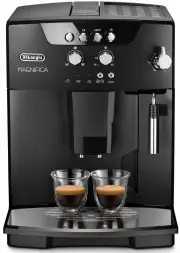
Page 10 – Description of the appliance
Page 11 – ECO; PRELIMINARY CHECKS; Checking the appliance; TURNING THE APPLIANCE ON
Page 12 – TURNING THE APPLIANCE OFF; ENERGY SAVING; MAKING COFFEE; Selecting the coffee taste
Page 14 – UÊ iÛiÀÊ ÕÃiÊ ÀiÊ Ì >Ê iÊ iÛiÊ; MAKING CAPPUCCINO; Cleaning the cappuccino maker after use.; Important! Danger of burns
Page 17 – DESCALING; SETTING WATER HARDNESS; Measuring water hardness
Page 18 – Set water hardness; TECHNICAL SPECIFICATION
Page 21 – TROUBLESHOOTING; PROBLEM; The coffee is not hot; The milk is not frothed
Page 22 – ELECTRICAL REQUIREMENTS; when the machine is not in use.; Warning - this appliance must be earthed
Loading the manual
"Loading the manual" means you need to wait until the file loads and becomes available for online reading. Some manuals are very large, and the time they take to appear depends on your internet speed.
Summary
Page 8 - CONTENTS
6 CONTENTS INTRODUCTION .................................. 7 Symbols used in these instructions ................. 7Letters in brackets ............................................ 7Troubleshooting and repairs ............................. 7 S AFETY ............................................ 7 Fund...
Page 9 - INTRODUCTION; Symbols used in these instructions; SAFETY; Fundamental safety warnings
7 INTRODUCTION Thank you for choosing the ESAM04.110 Bean to cup coffee maker.To get the best result of your new coffee machi-ne please readthese instructions carefully before use. This should ensure optimum results and maximum safety. Symbols used in these instructions Important warnings are identi...
Page 10 - Description of the appliance
8 DESIGNATED USE This appliance is designed and made to prepare coffee and heat drinks. All other use is considered improper.This appliance is not suitable for commercial use.The manufacturer is not liable for damage deri-ving from improper use of the appliance. This is a household appliance only. I...
Page 11 - ECO; PRELIMINARY CHECKS; Checking the appliance; TURNING THE APPLIANCE ON
9 B12. light: grounds container full B13. light: general alarm B14. Rinsing or descaling button with light B15. ECO energy saving mode button with light PRELIMINARY CHECKS Checking the appliance After removing the packaging, make sure the product is complete and undamaged and that all accessories ar...
Page 12 - TURNING THE APPLIANCE OFF; ENERGY SAVING; MAKING COFFEE; Selecting the coffee taste
10 The appliance is ready for use only after comple-tion of this cycle. Danger of burns! During rinsing, a little hot water comes out of the coffee spouts and is collected in the drip tray underneath.Avoid contact with splashes of water. UÊ /ÊÌÕÀÊÌ iÊ>««>ViÊ]Ê«ÀiÃÃÊÌ iÊ but- ton (fig. 4...
Page 14 - UÊ iÛiÀÊ ÕÃiÊ ÀiÊ Ì >Ê iÊ iÛiÊ; MAKING CAPPUCCINO; Cleaning the cappuccino maker after use.; Important! Danger of burns
12 damage the appliance. UÊ iÛiÀÊ ÕÃiÊ ÀiÊ Ì >Ê iÊ iÛiÊ measure or it could dirty the inside of the machine or block the funnel. Please note: If you use pre-ground coffee, you can only make one cup of coffee at a time. 1. Turn the coffee taste selection knob to the position. 2. Make sure t...
13 2. Wait for a few minutes for the cappuccino maker to cool down. Grip the handle of the cappuccino maker tube firmly in one hand and with the other rotate the cappuccino maker anticlockwise (fig. 14) and remove by pulling downwards (fig. 15). 3. Wash all parts of the cappuccino maker tho- roughly...
Page 17 - DESCALING; SETTING WATER HARDNESS; Measuring water hardness
15 red buttons have snapped out. 8. Close the infuser door. 9. Replace the water tank. DESCALING Descale the appliance when the light on the panel flashes. Important! Descaler contains acids which may irritate the skin and eyes. It is vital to respect the manufacturer’s safety warnings given on the ...
Page 18 - Set water hardness; TECHNICAL SPECIFICATION
16 Level 3 Level 4 Set water hardness 1. Make sure the appliance is off (but connec- ted to the mains electricity supply and with the main switch in the I position); 2. Press and hold the button for at least 6 seconds. The lights come on; 3. Confirm the selection by pressing the button. 4. Turn the ...
Page 21 - TROUBLESHOOTING; PROBLEM; The coffee is not hot; The milk is not frothed
19 TROUBLESHOOTING Below is a list of some of the possible malfunctions. If the problem cannot be resolved as described, contact Customer Services. PROBLEM POSSIBLE CAUSE SOLUTION The coffee is not hot UÊ / iÊVÕ«ÃÊÜiÀiÊÌÊ«Ài i>Ìi`°Ê UÊ 7>ÀÊÌ iÊVÕ«ÃÊLÞÊÀÃ}ÊÌ iÊÜÌ Ê ÌÊÜ>ÌiÀÊ ° °ÊÞ...
Page 22 - ELECTRICAL REQUIREMENTS; when the machine is not in use.; Warning - this appliance must be earthed
20 ELECTRICAL REQUIREMENTS Before using this appliance ensure that the voltage indicated on the product corresponds with the main voltage in your home, if you are in any doubt about your supply contact your local electricity company.The flexible mains lead is supplied connected to a B.S. 1363 fused ...