Page 2 - Shoot the image; Quick Start
3 2 When you have finished shooting photos Installing the software Software Starter Guide Connecting the camera to a computer This guide Downloading images to a computer Software Starter Guide Shoot the image (p. 34) Press the shutter button all the way down. The camera beeps once when the image is ...
Page 3 - Back View; Front View; Components Guide
5 4 Back View Viewfinder (p. 33) LCD Monitor (p. 29) Tripod Socket Strap Eyelet* CF Card Slot / Battery Cover (p. 19) ● Components Guide ● * Be careful when carrying the camera by the strap. Don’t swing the camera on the strap, and keep the strap and camera body clear of obstacles. Front View Shutte...
Page 4 - About this Camera User Guide; Symbols Used; Adjusting the Exposure; Operation Panel; Indicators
7 6 About this Camera User Guide Icons on the right end of title bars show the operationsmode. As in the example below, the shooting modeshould be set to , , or . Question? Look here first. Selecting Menus and Settings (p. 36) Functions Available in Each ShootingMode (p. 57) About Printing (p. 67) R...
Page 5 - Table of Contents
8 9 ● Table of Contents ● Movie Mode .............................................. 49 Using the Focus Lock ............................... 50 Switching Between Autofocus Modes ....... 51 Adjusting the Exposure ....................... 52 Setting the White Balance ................. 53 Switching Betwe...
Page 6 - List of Menu Options and Messages; Read this First; Accessories
11 10 ● Table of Contents ● List of Menu Options and Messages 87 Rec. Menu ................................................ 87 Play Menu ................................................. 89 Set up Menu ............................................. 90 Resetting the Settings to Default .............. ...
Page 7 - Safety Precautions
13 12 Safety Precautions Before using the camera, please ensure that you have read and understood the safety precautions described below. Always ensure that the camera is operated correctly. The safety precautions noted on the following pages are intended to instruct you in the safe and correct oper...
Page 9 - CAUTIONS
17 16 CAUTIONS • A v o i d u s i n g , p l a c i n g o r s t o r i n g t h e e q u i p m e n t i n p l a c e s s u b j e c t t o s t r o n g s u n l i g h t o r h i g h temperatures, such as the dashboard or trunk (boot) of a car. Exposure to intense sunlight and heat maycause the batteries to leak,...
Page 10 - Preventing Malfunctions; Installing the Battery and CF Card; Be sure that the camera power is off.; Preparing the Camera
19 18 Preventing Malfunctions ● Avoid Strong Magnetic Fields Never place the camera in close proximity to electric motors or other equipment generating strongelectromagnetic fields.Exposure to strong magnetic fields may cause malfunctions or corrupt image data. ● Avoid Condensation Related Problems ...
Page 11 - Proper Battery Handling
21 20 Never mix unused and partially used batter-ies. Always load two fresh (or fully recharged)batteries at the same time.Never mix batteries of different types or fromdifferent manufactures. Both batteries shouldbe identical.Before inserting the batteries, wipe thebattery terminals well with a dry...
Page 12 - About CF Cards; Battery Status Indications
23 22 About CF Cards C F c a r d s a r e h i g h - p r e c i s i o n e l e c t r o n i cdevices. Do not bend them, apply force tothem, or subject them to shocks or vibration.Do not attempt to disassemble or alter a CFcard.Moving a CF card rapidly between tempera-ture extremes will cause condensation...
Page 13 - SET; Setting the Language; Setting the Date / Time; MENU
25 24 5 Set the date and time. Press or button to select the item to be set.Press or button to set the date and time. 6 Press the SET button. 7 Press the MENU button. Setting the Language Sets the display language for LCD monitormenus and messages. 1 Press the MENU button. The Rec. or Replay menu wi...
Page 14 - Shooting Mode; Replay Mode; Basic Functions; Turning the Power ON / OFF
27 26 Shooting Mode 1 Open the lens cover. The camera powers up in Shooting mode (still). Close the lens cover. The power goes off. Open Open close open Replay Mode 1 Press the button until the image is displayed on the LCD monitor. The camera powers up in Replay mode. Press the button again to turn...
Page 15 - Using the LCD Monitor; Switching between Shooting/Replay
29 28 Using the LCD Monitor Use the LCD monitor for shooting images, whilstchecking images, for menu operations and re-playing images. The image in the LCD monitor may darkenwhen the monitor is used under sunlight orother strong lighting. This is not a defect. Shooting Mode The display changes as sh...
Page 17 - Using the Viewfinder
33 32 Using the Viewfinder Yo u c a n r e d u c e p o w e r c o n s u m p t i o n b yshooting images with the viewfinder. 1 Align the subject with the center of theoptical viewfinder and shoot. The viewfinder has a field of vision* of ap-proximately 80% of the actual shooting im-age. * The ratio of ...
Page 18 - Reviewing an Image Right After Shooting; Using the Digital Zoom; Adjust Zoom; Pressing the Shutter Button
35 34 You can press the shutter button all the waydown or halfway. Pressing Halfway A u t o m a t i c a l l y s e t s t h eexposure, focus and whiteb a l a n c e . T h e c a m e r abeeps twice when settingsare completed, then theu p p e r i n d i c a t o r g l o w sgreen (orange when theflash has be...
Page 19 - Selecting Menus and Settings
36 37 Menu Display Change the Menu Set and Confirm End Open the lens cover. Rec. Menu Play Menu Set up Menu Press the button. Menu can be switched whenever the or button is pressed. ON ● Basic Functions ● Selecting Menus and Settings Use the menus as shown below to operate thevarious shooting and re...
Page 20 - Menu Settings and Default Settings
39 38 ● Basic Functions ● Menu Items Available Settings Reference Pages Pla y Men u (Blue) Set up Men u (Y ello w) p. 64 p. 62 p. 65 p. 63 p. 71 p. 82 p. 90 p. 27 p. 24 p. 66 p. 25 Protect Rotate Erase All Auto Play Print Order Transfer Order Beep Auto Power Down Date / Time Format Language Turns im...
Page 21 - Changing the Resolution / Compression; Resolution; Selecting the Shooting Mode; Open the lens cover to turn the power on.; Selecting
41 40 ● Shooting ● Changing the Resolution / Compression You can change the resolution and compression(excluding movies) settings to suit your purpose. Resolution The resolution gets higher in the order (Small), (Medium), (Large). Use a higher resolution if you want to make a large print. Use a lowe...
Page 22 - Using the Flash; Press
43 42 ● Shooting ● Using the Flash Auto Slow-Synchro Red-EyeReduction,Auto On Off The flash fires automatically as required by the light level. The flash may fire automatically as required by the light level. The red-eye reduction lamp fires with each shot. The flash will fire. The flash will not fi...
Page 23 - Infinity Modes
45 44 ● Shooting ● Macro / Infinity Modes Macro Infinity Use this mode when the distances from the lens tip to the subject is 5 to 20 cm (2 to 7.9 in.). Use this mode to shoot land-scapes. Also use this mode for compositions combining both near and distant objects. 1 Press the / button to display or...
Page 24 - Stitch Assist Mode; Framing a Subject; Continuous Mode
47 46 ● Shooting ● Stitch Assist Mode Use this mode when taking shots that you wantto combine into a panorama. To create the pan-orama itself, you must stitch the images togetheron your computer. There are two stitch assist modes based on theshooting direction as shown in the following. Shoots horiz...
Page 25 - Movie Mode; Shoot the first image.; button to end the
49 48 ● Shooting ● Movie Mode The clip will end automatically after thesetimes have elapsed or when the CF cardbecomes full. The exposure, focus and white balance arefixed to the settings value (of the first frame)when shooting starts.After shooting, the green indicator flashes whilerecording to the...
Page 26 - Switching Between Autofocus Modes; Using the Focus Lock
51 50 ● Shooting ● Switching Between Autofocus Modes 1 In the [Rec.] menu, select (AiAF). See “Selecting Menus and Settings” (p. 36). 2 Press or button to select [On] or [Off]. 3 Press the MENU button. Press the shutter button instead of the MENU button to shoot an image with the set auto fo-cus mod...
Page 27 - Setting the White Balance
53 52 ● Shooting ● Setting the White Balance When the white balance is set to match the lightsource, the camera can reproduce colors moreaccurately. Auto Daylight Cloudy Tungsten Fluorescent Fluorescent H The camera sets the white balance automatically according to shooting conditions. Use when shoo...
Page 28 - Changing the ISO Speed; Switching Between Photo Effect Modes
55 54 ● Shooting ● Changing the ISO Speed Change the ISO speed when shooting imagesin dark places or when you want to raise theshutter speed. 1 In the [Rec.] menu, select (ISO Speed). See “Selecting Menus and Settings” (p. 36). e.g. PowerShot A100 2 Press or button to select the ISO speed. 3 Press t...
Page 29 - Functions Available in Each Shooting Mode; Resetting the File Number
57 56 ● Shooting ● Function Reference Pages Resolution Compression Flash Large Medium Small Movie Movie SuperFine Fine Normal Auto Red-eye reduction, Auto On p. 41 p. 41 p. 43 Continues on next page Functions Available in Each Shooting Mode The following chart shows the functions and settings availa...
Page 30 - Replaying; Magnifying Images; Displaying Images Individually
59 58 ● Shooting ● Function Reference Pages Flash Macro Mode Infinity Mode Exposure Compensation White Balance Photo Effect ISO Speed Auto Focus Frame Digital Zoom AF-assist Beam Single Continuous Self-Timer Off Slow-Synchro p. 43 p. 45 p. 45 p. 46 p. 52 p. 53 p. 54 p. 55 p. 51 p. 35 p. 34 ShootingM...
Page 31 - Viewing Movies; Pausing and Resuming Play; Fast Forwarding / Rewinding; Viewing Images in Sets of 9; Changing the Displayed Images
61 60 Viewing Movies Pausing and Resuming Play • Press the SET button to pause the movie. Press it again to resume play. Fast Forwarding / Rewinding • Press or button to stop the movie and display the previous or next image or movie. You may experience frame dropping whenreplaying a movie on a compu...
Page 32 - Auto Play; Pausing and Resuming Auto Play; Stopping Auto Play; Rotating Images in the Display
63 62 Auto Play Use this feature to automatically replay all ofthe images in the CF card (Auto Play). The LCDmonitor displays each image for approximately3 seconds. 1 In the [Play] Menu, select (Auto Play) and press the SET button. See “Selecting Menus and Settings” (p. 36). Auto play starts.• As wi...
Page 33 - Erasing; Erasing Images Individually; Erasing All Images; Protecting Images
65 64 Erasing Erasing Images Individually 1 Press the or button to select the image you want to erase andpress the button. 2 Press the or button to select [Erase] and press the SET button. Select [Cancel] instead of [Erase] and pressthe SET button if you decide you do not want to erase the image. Er...
Page 34 - Formatting a CF Card; Printing; About Printing
67 66 Formatting a CF Card You should format new CF cards before usingthem. Formatting a CF card will permanently erase alldata already on it, including all of its protectedimages. Check the contents before formattingcards that were previously used. 1 In the [Set up] Menu, select (For- mat) and pres...
Page 35 - Connecting the Camera to a Printer; Selecting from the Print Order Menu
69 68 ● Printing ● Connecting the Camera to a Printer Two direct interface cables are included withCanon printers having the direct print function.Use the DIF-100 cable with the mark on the connector when connecting to this camera. If you plan to print out many prints in a singlesession, it is recom...
Page 37 - Setting the Number of Copies; Setting the Print Style
73 72 ● Printing ● 1 While displaying the image, press the SET button. Press or button to select [Style], then press the SET button. 2 P r e s s o r b u t t o n t o s e l e c t [Image], [Borders], or [Date]. 3 Select with or button. Select [Borderless] or[Bordered]. Select [On] or [Off]. Select [Sta...
Page 38 - Specifying the Printing Area
75 74 ● Printing ● 2 Press or button to select the printing area from , or . • The selectable print area may move left orright for L size paper or when the screensetting for the print style is [Multiple]. The printing area setting only applies to oneimage.The printing area setting is cancelled with ...
Page 39 - DPOF Print Settings; Selecting Images for Printing
77 76 ● Printing ● You can set with the same method even if the button is pressed and changed to index replay (3-image index replay). For setting all images on the CF card • Press the button to switch to index replay (3-images display) • After pressing the SET button, press or button to select [Mark...
Page 40 - Resetting the Print Settings
79 78 ● Printing ● File No. Select [On] or [Off]. 5 Press the MENU button. If you have chosen (index) as the print type, you cannot set [Date] and [File No.] to [On] atthe same time.If you have chosen [Both] as the print type, youcan set both [Date] and [File No.] to [On],however, only the file numb...
Page 41 - Printing with DPOF Print Settings; Set the print style as required.
81 80 ● Printing ● To print the date, set the [Date] setting in theprint order menu in Step 2 on the previous pageto [On]. You cannot set the date to print with the[Style] menu in Step 3 on the previous page(p. 78). If the print type is set to [Index], the datewill not print even if the [Date] setti...
Page 42 - Setting the Image Transfer; Selecting Images for Transferring; Image Transfer Settings (DPOF Transfer Order)
83 82 3 Select images for transferring. For setting images one by one • Press or button to select the image and mark or remove from images using or button. The check marks are displayedwhen set. • Pressing the button allows you to set with the same method even if changed toindex replay (3-images). F...
Page 43 - Connecting the Camera to a Computer Via the USB Cable; Downloading Directly from a CF Card; Downloading Images to a Computer
85 84 Connecting the Camera to a Computer Via the USB Cable Installing the included software in advanceallows you to download images automaticallys i m p l y b y c o n n e c t i n g t h e c a m e r a t o t h ecomputer with the included USB cable. 1 Connect the supplied USB interfacecable to the comp...
Page 46 - Resetting the Settings to Default; button for longer; Set up Menu
90 91 Resetting the Settings to Default You can reset all of the menu and button opera-tion settings to default except for [Date / Time]and [Language]. 1 Turn on the camera. Can be performed from shooting, replay orany other mode. 2 Press the MENU button for longer than 5 seconds. The message "R...
Page 47 - List of Messages
93 92 Image too large : You attempted to replay an image whose resolution exceeded 3200 x 2400 pixels or whose file size was too large. Incompatible JPEG format : You attempted to replay an incompatible JPEG file. Corrupted data : You attempted to replay an image with corrupted data. RAW : You attem...
Page 48 - Appendices; Replacing the Date Battery; Be sure that the camera is turned off.
95 94 ● List of Menu Options and Messages ● The following table lists and explains the messages that may be on the LCD monitor when printingto an optional direct print function compliant printer. (Some of these messages may not appeardepending on the printer.) No Paper : Paper cassette is empty or i...
Page 49 - Using the Optional Battery Kits; Using Rechargeable Batteries
97 96 This charger can be used only to charge CanonAA-size NiMH batteries. Please do not attemptto charge any other type of batteries with thischarger.Never mix unused batteries together withbatteries that have been used in other devices.When recharging batteries from the camera,always recharge both...
Page 50 - Using the Household Power Source
99 98 Using the Household Power Source (AC Adapter Kit ACK800) Use of the ACK800 optional AC adapter kit isr e c o m m e n d e d w h e n u s i n g t h e c a m e r acontinuously for prolonged periods of time andwhen connecting to a computer. Be sure that the camera is turned off beforeconnecting or d...
Page 51 - Troubleshooting
101 100 The camera is turned off. The CF card slot / battery cover is open. Batteries are loaded in the wrong direction. Batteries are depleted. Batteries are not the right type. Batteries are not making good electrical contact with the camera. The camera doesn’t function. Cause Solution Problem • T...
Page 54 - Specifications
107 106 PowerShot A200 PowerShot A100 Sensitivity White Balance Flash Flash Range Shooting Modes Continuous Shooting Self-Timer Recording Media File Format Image Recording Format Compression Exposure Compensation ± 2 EV (in 1 / 3 - step increments) TTL auto / preset (daylight, cloudy, tungsten, fluo...
Page 55 - Battery Performance
109 108 <Test Conditions>Shooting : Room temperature (23 ° C, 73 ° F), alternating the shots every 20 seconds, flash used once every four shots, power turned off and on again after every 8 shots. Replay : Room temperature (23 ° C, 73 ° F), continuous replay at 3 seconds per image. • For inform...
Page 56 - CF Cards and Estimated Capacities (Recordable Images); Approximate File Size for One Image
110 111 ● Specifications ● Movie FC-8M FC-16M FC-32M FC-64M FC-128M 7 15 31 64 128 11 24 49 100 200 24 48 99 200 401 10 21 43 88 177 16 32 67 135 271 32 64 131 263 528 16 32 67 135 271 24 49 102 205 412 46 92 189 379 760 35 70 143 288 577 50 99 206 415 831 87 172 353 707 1417 18 sec. 36 sec. 76 sec....
Page 57 - Battery Charger CB-3AH; Compact Power Adapter CA-PS800; CompactFlash; Card
112 NiMH Battery NB-1AH Supplied with the optional NiMH Battery NB4-100 setand the Battery / Charger Kit CBK100. Type R e c h a r g e a b l e n i c k e l h y d r i d ebattery Nominal Voltage 1.2 V DC Typical Capacity 1600 mAh (min.:1550 mAh) Cycle Life Approx. 300 times Operating Temperature 0 - 35 ...
Page 58 - Index
113 ● Index ● Index A Adjusting the Exposure ........................... 52AF-assist Beam ................................... 4, 34AiAF ........................................................ 51Autofocus .......................................... 33, 51 B Batteries Battery Performance ................
Page 60 - MEMO
117 116 ● Index ● Disclaimer While every effort has been made to ensure that the information contained in this guide is accurate andcomplete, no liability can be accepted for any errors or omissions. Canon reserves the right to changethe specifications of the hardware and software described herein a...
Page 61 - FCC Notice
119 118 FCC Notice (Digital Camera, Model PC1021 and PC1025) This device complies with Part 15 of the FCC Rules. Operation is subject to the following two conditions;(1) this device may not cause harmful interference, and(2) this device must accept any interference received, including interference t...


 Canon PowerShot A20 Manual
 Canon Powershot A50 User Manual
 Canon Power Shot A70 Manual
 Canon Power Shot A80 Manual
 Canon POWERSHOT A80 User Manual
 Canon PowerShot A85, A75 Manual
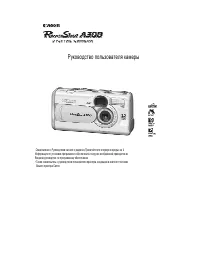 Canon PowerShot A300 User Manual
 Canon Power Shot A400 User Manual
 Canon PowerShot A400 User Manual
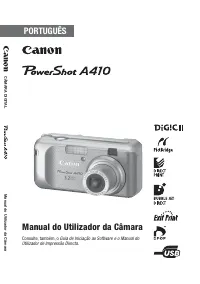 Canon PowerShot A410 User Manual
 Canon PowerShot A420 User Manual
 Canon PowerShot A430 User Manual