Page 2 - Digital Camera Operating Steps and Reference Guides; PowerShot A50 Software Starter Guide
Prepare the Camera for Use Start Taking Pictures Load Images onto a Computer Digital Camera Operating Steps and Reference Guides Install the Software PowerShot A50 Solutions Disk(s) Hardware Guide (This Guide) PowerShot A50 Software Starter Guide
Page 3 - or
3 Processing Images with the Software On-screen "Help" or "Using [ software name ] " On-screen Guide or PowerShot A50 Software Stater Guide Read This First Camera Setup Quick Start Basic Functions Buttons Mode Dial Functions Stitch Assist Mode Menu Features Other Functions Appendices...
Page 4 - Introduction; Carefully read this guide and the accompanying
4 Introduction Thank you for purchasing a Canon PowerShot A50, the easy-to-use digital camera with a wide-anglezoom lens and a large range of built-in functions incorporated into a compact, completely flat body. Carefully read this guide and the accompanying PowerShot A50 Software Starter Guide to e...
Page 5 - FCC Notice; Digital Camera, Model PS1026
5 FCC Notice Digital Camera, Model PS1026 This device complies with Part 15 of the FCC Rules. Opera-tion is subject to the following two conditions: (1) This de-vice may not cause harmful interference, and (2) this devicemust accept any interference received, including interferencethat may cause und...
Page 6 - Table of Contents; Quick Start; Image Size and Quality
6 Table of Contents Read This First ..................................... 9 Handling and Safety Precautions .......... 9Guide to Components .......................... 15 Camera Setup .................................... 18 Charging the Battery Pack ................... 18Installing the Battery Pack ....
Page 7 - Procedures for Shooting Horizontal/
7 Zoom Buttons ....................................... 49Continuous/Self-Timer/+ Button ......... 49Flash/- Button ........................................ 51MACRO/JUMP Button ........................... 52LCD/VIDEO Button ................................ 54MENU Button .................................
Page 9 - Read This First; Handling and Safety Precautions; Please Read; Test Shots
9 Read This First Read This First Handling and Safety Precautions Please read the handling and safety precautions that appear in the following pages of this guideand the PowerShot A50 Software Starter Guide . When you read through the remaining pages, we recommend that you have the camera at hand to...
Page 10 - Safety Precautions
10 Read This First Safety Precautions • Before using the camera, please ensure that you have read and understood the safety precautions described below. Always ensure that the camera is operated correctly. • The safety precautions noted on the following pages are intended to instruct you in the safe...
Page 13 - Caution
13 Read This First • Use of batteries not expressly recommended for this equipment may cause explosions or leaks, resulting in fire, injury and damage to the surroundings. Use only recommended batteries and accessories. • Use only Compact Power Adapter CA-PS100/100E to charge Battery Pack NB-5H. Use...
Page 14 - Preventing Malfunctions; Avoid Strong Magnetic Fields
14 Read This First Preventing Malfunctions Avoid Strong Magnetic Fields Never place the camera in close proximity to electric motors or other equipment generating strongelectromagnetic fields. Exposure to strong magnetic fields may cause malfunctions or corrupt imagedata. Avoid Condensation Related ...
Page 15 - Guide to Components; Front View
15 Read This First Guide to Components • Viewfinder (p. 44) • Autofocus (AF) Auxiliary Light Emitter • Flash (p. 51) • Red-Eye Reduction Lamp (p. 51) • VIDEO Terminal (p. 90) • DIGITAL Terminal (see Software Starter Guide) • Lens Front View
Page 16 - Back View
16 Read This First Back View • Viewfinder (p. 44) • CF Card Slot Cover (p. 24) • Lock for CF Card Slot Cover (p. 24) • Strap Holder (p. 27) • LCD Panel* • DC Coupler Cable Cover (p. 23) • Battery Cover (p. 20) • Battery Cover Lock (p. 20) • Tripod Socket *The LCD panel is produced with extremely hig...
Page 17 - Operation panel
17 Read This First Display Panel•(p. 43) Operation panel Indicators •(p. 45) SET Button •(pp. 55, 69) MENU Button •(pp. 54, 69) • MACRO/JUMP Button (p. 52) • LCD/VIDEO Button (p. 54) • Zoom Buttons (p. 49) • Continuous/Self-Timer/+ Button (p. 49) • Flash/- Button (p. 51) • Shutter Button (p. 46) • M...
Page 18 - Camera Setup; Charging the Battery Pack; Attach the AC power cord to Compact
18 Camera Setup Camera Setup Battery Pack NB-5H, Compact Power AdapterCA-PS100/100E, power cords, DC CouplerDR-100A and 2CR5 lithium batteries are soldseparately in some regions. To confirm the package contents, see theback of the System Map packaged withyour camera. Charging the Battery Pack Follow...
Page 20 - Install the battery pack into the battery; Installing the Battery Pack
20 Camera Setup 3. Install the battery pack into the battery chamber with the terminals oriented inthe direction shown. 4. Close the battery cover and slide the lock into the locked position. The following describes how to insert Battery PackNB-5H or 2CR5 lithium battery into the camera. Fully charg...
Page 21 - CR5 Lithium Batteries
21 Camera Setup • Make sure that the battery cover lock is in the lock position. The camera will notoperate unless the lock is secured. • Remove the battery pack from the camera whenever you will not use it foran extended period. Do not remove thebutton battery because it is used as thereserve power...
Page 22 - Battery Performance; • This data is generated according to our
22 Camera Setup Battery Performance Battery Pack NB-5H 2CR5 Lithium Batteries (Fully charged) (New, Sanyo Brand) Shooting Capacity LCD Panel On Approx. 70 shots Approx. 80 shots LCD Panel Off Approx. 280 shots Approx. 500 shots Replay Capacity Approx. 70 min. Approx. 100 min. • This data is generate...
Page 23 - Using the Camera with an AC Power Source
23 Camera Setup Using the Camera with an AC Power Source • The DC output indicator on the compact power adapter will shine redwhile in use as a DC power source forthe camera. • Please note that the compact power adapter will not charge a battery packwhile in use as a DC power source forthe camera. •...
Page 24 - Inserting a CF Card; Slide the lock for the CF card slot cover
24 Camera Setup Inserting a CF Card Follow the procedures below to insert a CFcard into the camera. • Please note that using CF cards in this camera that have been used in othermanufacturers’ cameras or edited withother application software may causemalfunctions. 1. Slide the lock for the CF card sl...
Page 25 - CF Cards and Estimated Capacities
25 Camera Setup • Do not remove the battery or remove a CF card while the camera is writing to aCF card, erasing images or reading froma CF card. • A CF card is a high-precision electronic component. Do not bend, apply force to,or subject it to shocks or vibrations. CF Cards and Estimated Capacities...
Page 26 - Precautions with CF Cards; standard driver and install the; How to Remove the Windows Standard Driver
26 Camera Setup Precautions with CF Cards Please note that the PC card icon may take amoment (about 1 minute) to appear on theTaskbar of certain computers after insertion ina PC card slot. If this occurs, you should deletethe Windows ® standard driver and install the SanDisk ATA FlashDisk device dri...
Page 27 - Attaching the Wrist Strap; Insert the thin part of the wrist strap
27 Camera Setup Attaching the Wrist Strap A wrist strap is supplied with this camera.Follow the procedures below to attach it. 1. Insert the thin part of the wrist strap through the strap holder. 2. Insert the other end of the wrist strap through the loop of the thin part thatyou inserted through th...
Page 28 - Setting the Menu Language; Turn the Mode Dial to the PLAY
28 Camera Setup Setting the Menu Language You can change the language in whichmessages are displayed. The Language menu may appear differ-ently on cameras in some regions. SET Button MACRO/JUMPButton +/- Buttons LCD Panel 1. Turn the Mode Dial to the PLAY position. 2. Press and hold the SET button, ...
Page 29 - Setting the Date and Time; Press the MENU button to display the
29 Camera Setup Setting the Date and Time Set the correct date and time with thefollowing procedures. SET Button MENU Button +/- Buttons LCD Panel 1. Turn the Mode Dial to the (Auto) position. 2. Press the MENU button to display the Rec. menu. Mode Dial
Page 30 - Press the SET button to move between
30 Camera Setup 5. Press the SET button to move between fields and the +/- buttons to advancevalues. 6. Once the settings are adjusted to your satisfaction, press the MENU button tosave your selection and exit. 7. Turn the Mode Dial to the L (Lock) position to shut off the power. 3. Press the +/- bu...
Page 32 - Taking Pictur; Taking Pictures; Taking Pictures in Auto Mode; About Power Save
32 Taking Pictur es Mode Dial Taking Pictures Taking Pictures in Auto Mode 1. Turn the Mode Dial to the (Auto) position. 2. Look into the viewfinder and frame the subject. 3. Use the Zoom buttons to make the subject appear closer or farther away. 4. Press the shutter button halfway and wait until th...
Page 33 - Other Shooting Features
33 Taking Pictur es Two-Stage Shutter Button The camera features a two-stage shutterbutton. Press the button lightly (depress to thehalfway point) to activate the first stage, thefocus and auto exposure lock. Pressing morefirmly to the second stage will activate theshutter, recording an image. Previ...
Page 34 - Turn the Mode Dial to the PLAY; Replaying Images in PLAY Mode; Turn the Mode Dial to the MULTI; Replaying Images
Replaying Images 34 LCD Panel +/- Buttons 1. Turn the Mode Dial to the PLAY position. 2. Press the + button to display the next image or the - button to display theprevious image. 3. When you have finished viewing images, turn the Mode Dial to the L(Lock) position. Replaying Images in PLAY Mode Repl...
Page 35 - When you have finished viewing
35 Replaying Images 2. Select image (green frame) by pressing the +/- buttons. • Display the selected image at full size by turning the Mode Dial to the PLAYposition. • Display the next or previous nine images by pressing the MACRO/JUMPbutton and +/- buttons. To select animage, press the MACRO/JUMP ...
Page 36 - Erasing Images from a CF Card; Turn the Mode Dial to the PLAY or; then press the SET button.; Erasing Images
36 Erasing Images Erasing Images from a CF Card Follow the procedures below to erase animage. 1. Turn the Mode Dial to the PLAY or MULTI position. 2. Press the +/- buttons to select the image to be erased. 3. Press the MENU button. 4. Press the +/- buttons to select [Erase], then press the SET butto...
Page 37 - Shortcut
37 Erasing Images • To delete all the images at once, select [All] in Step 5. • If you want to stop the erase procedure, select [Cancel]. • To display the previous menu, press the MENU button. Shortcut In Play mode, you can erase the currentlydisplayed image by pressing and holdingthe SET button and...
Page 40 - Basic Functions; Image Size and Quality Specifications; JPEG High Quality
40 Basic Functions • Large and Small sizes cover the exact same scope but reproduce the imageswith differing numbers of pixels. Oncomputer monitors the Large format isdisplayed at 1280 x 960 pixels, while theSmall is displayed at 640 x 480 pixels. • You can change the size and quality settings with ...
Page 42 - Camera Modes; Shooting Modes; : Stitch Assist Mode; Playback Modes
42 Basic Functions Camera Modes The PowerShot A50 features six operatingmodes that you select with the Mode Dial. Shooting Modes : Auto Mode Auto mode is for taking standard pictures.The focus, exposure and white balancesettings as well as the flash are automati-cally selected or activated by the ca...
Page 43 - Display Panel
43 Basic Functions Display Panel The Display panel on the camera top showsthe status of camera settings, battery levelsand the approximate number of images thatcan be stored in the CF card at the currentsize and quality settings. • Changing size and quality settings will alter the number of images t...
Page 44 - Viewfinder; Viewfinder Frame Marks
44 Basic Functions Viewfinder The camera is equipped with an opticalviewfinder for image composition. • The field of the viewfinder will change as the Zoom button is pressed. • In Macro mode (subject 6.7 to 20in. (17 to 50cm) from the lens), the actual areashot by the lens is slightly lower than the...
Page 45 - Indicators; Flashing Green: Recording to and reading; Lower Indicator; Macro Mode On
45 Basic Functions Indicators Two indicators appear to the left of theviewfinder. These lights shine or flash toconfirm various actions and camera modeswhen you press the shutter button. Upper Indicator Green: Ready to take picture(no flash) Flashing Green: Recording to and reading from CF card. Tra...
Page 46 - Shutter Button; Pressing Halfway; Buttons
46 Buttons Shutter Button The camera features a two-stage shutterbutton. Pressing Halfway Press the shutter button halfway to automati-cally set the focus, exposure and whitebalance to the optimal setting. When thecamera finishes metering, it will beep and lockthe shutter. • When the camera is ready...
Page 47 - Rapid Shot Function
47 Buttons • If the LCD panel is turned off and the Review function is set to On, a previewof the photographic subject will brieflyappear in the LCD panel while theshutter button is fully depressed. • In low light conditions, the shaking hands icon ( ) may display in the middle of the LCD panel as y...
Page 48 - Focus Lock; objects in the center of the viewfinder
48 Buttons when these signals are on. Doing socould corrupt the image data. Focus Lock Pressing the shutter button halfway locks thefocus until the button is released. This allowsyou to focus on a particular object while freelychanging the image composition. A momentafter depressing the shutter butt...
Page 49 - Zoom Buttons
49 Buttons Zoom Buttons The zoom can be set from wide angle, 4.3mm (35 mm film equivalent: 28 mm), totelephoto, 10.8 mm (35 mm film equivalent:70 mm). Press the right side of the button to zoom in (telephoto) and the left side to zoom out (wide angle). Wide Angle Telephoto • The zoom setting can not...
Page 52 - This button turns the Macro mode on or off.; • The icon indicates that
52 Buttons Play Mode: This button displays the previous storedimage. Multi Mode: This button selects the previously storedimage. Menu Button: This button moves the selection to theprevious option. MACRO/JUMP Button Auto, Program or Stitch Assist Mode: This button turns the Macro mode on or off. • Th...
Page 53 - Play Mode and Multi Mode:; This button turns the Jump mode on or off.
53 Buttons • In Macro mode, the subject can be shot within a range of 6.7 to 20in. (17 to 50cm)and remain in focus. • When shooting in Macro mode, check the LCD panel to confirm that the focusand scope of the image are correct. Play Mode and Multi Mode: This button turns the Jump mode on or off. Jum...
Page 54 - This button turns the LCD panel on or off.; MENU Button
54 Buttons LCD/VIDEO Button Auto Mode and Program Mode: This button turns the LCD panel on or off. Play Mode and Multi Mode: With the TV connected, this button turns theVideo Output function on or off. • The LCD panel automatically turns on in Program mode, except when the WhiteBalance function is s...
Page 56 - Mode Dial Functions; Lock; Auto Mode; icon displays in the Display
56 Mode Dial Functions The Mode Dial allows you to select between the various shooting and playback modes featured onthe PowerShot A50. Mode Dial Functions Lock The Mode Dial should beset to the L (Lock) positionwhen the camera is not inuse. In this mode the lens cover will close andthe camera power...
Page 57 - Program Mode; icon indicates that; Macro Button; icon is
57 Mode Dial Functions Program Mode In Program mode, you canmanually select the Singleor Continuous mode aswell as the image size and quality. • Be sure to select this mode to use the CCD RAW function (no compression) forshooting. Buttons Available in Program ModeFlash Button The Flash On, Flash Off...
Page 58 - Stitch Assist Mode; What is Stitch Assist?
58 Mode Dial Functions Stitch Assist Mode What is Stitch Assist? The Stitch Assist mode isdesigned to make it easierto merge separate panoramic images into asingle, seamless image using a softwareprogram on a computer. You can shoot aphotographic subject that won’t fit into asingle frame, such as a ...
Page 59 - Play Mode; Multi Mode
59 Mode Dial Functions Play Mode In Play mode, you candisplay images from the CFcard one at time on theLCD panel. • Press the + or - button to display the next or previous recorded image. • You can jump 9 images ahead or behind by selecting the Jump mode with theMACRO/JUMP button and then pressingth...
Page 60 - PC Mode
60 Mode Dial Functions button in Jump mode followed by the +button or - button displays the last orfirst set of nine images, respectively. PC Mode In PC mode, you canconnect the camera to acomputer to load imagesinto an image processing application program. • The Display panel will display [PC] when...
Page 61 - Set the Mode Dial to the; FLASH Button; Retaking a Picture; When a Sequence is Complete
61 Stitch Assist Mode Set the Mode Dial to the (Stitch Assist) position and follow the procedures below tomerge several images into one large panoramicscene. In Stitch Assist mode, images can beshot in horizontal, vertical or 2x2 (matrix)sequences. The merged image cannot beviewed in the camera’s LC...
Page 63 - Procedures for Shooting Horizontal/Vertical Sequences; Turn the Mode Dial to
63 Stitch Assist Mode Procedures for Shooting Horizontal/Vertical Sequences Horizontal Sequence Vertical Sequence 1. Turn the Mode Dial to the (Stitch Assist) position. 2. Select [Horizontal] or [Vertical] with the +/- buttons and press the SET button. To change the direction, press the + button. 3....
Page 64 - Orient the camera so that the second
64 Stitch Assist Mode 4. Orient the camera so that the second frame overlaps a small portion of thephotographic subject of the first imageand press the shutter button to takethe next image. After the indicator stops flashing green, thesecond recorded image will display beside apreview of the new pho...
Page 65 - Procedures for Shooting 2x2 (Matrix) Sequences; Turn the Mode Dial
65 Stitch Assist Mode Procedures for Shooting 2x2 (Matrix) Sequences 1. Turn the Mode Dial to the (Stitch Assist) position. 2. Select [2x2] with the +/- buttons and press the SET button. 3. Shoot the first image. After the indicator stops flashing green,the recorded image will display in theupper ri...
Page 66 - Orient the camera so that the third
66 Stitch Assist Mode • By default, images are recorded in a clockwise direction starting from theupper right. To change the startingposition, press the + button beforetaking the first shot. 4. Overlap a small portion of the photo- graphic subject of the first image andshoot the next image in the se...
Page 67 - Orient the camera so that the fourth; Finish the sequence by pressing the SET
67 Stitch Assist Mode 6. Orient the camera so that the fourth image will correctly overlap a portionof the third image and take the shot. After the indicator stops flashing green, thefourth recorded image will display in theupper left, and a preview of a new photo-graphic subject captured by the len...
Page 68 - Menu Featur; Menu Features; Record Menu
68 Menu Featur es Menus can be used to select image size and quality settings (Record menu), to select the display options,such as information formats and the Slide Show option (Play menu), and to select date, time and othercamera settings, such as the LCD panel brightness (Setup menu). Menu Feature...
Page 69 - Basic Menu Operations
69 Menu Featur es Basic Menu Operations Menu functions are operated by the MENU,+/- and SET buttons. MENU Button This button turns the menu display on or off.This button also displays the previous menuwhen a submenu has been selected. +/- Buttons These buttons move the selection from oneoption to an...
Page 70 - Quality
70 Menu Featur es Record Menu Pressing the MENU button in the Auto,Program or Stitch Assist mode displays theRecord menu on the LCD panel. • In Auto mode, the Exposure Compensation is set to [0], the WhiteBalance to [Auto] and the Slow Shutterto [Off]. No other settings are availablefor these functi...
Page 73 - White Balance; Icons
73 Menu Featur es White Balance The White Balance function can be set to suitthe shooting conditions when the flash is notused and an image is taken only with natural orartificial ambient light. The [Auto], [Day Light],[Cloudy], [Tungsten], and [Fluorescent] settingsare available. Settings other tha...
Page 74 - Slow Shutter
74 Menu Featur es Icons On: For intentionally settingthe shutter to a slow speed. Off: Camera selects a settingautomatically. Night Scene: For night scene. • In the [On] or [Night Scene] mode, hand tremors and camera movement mayprevent a clear image from being shot.Affix the camera to a tripod to s...
Page 75 - Play Menu
75 Menu Featur es Play Menu Pressing the MENU button in the Play or Multimode displays the Play menu on the LCDpanel. Show/Hide Info. This function displays information about animage, such as its shooting date and filenumber. • Selecting this option causes the LCD panel to display the image data. Th...
Page 76 - Erase
76 Menu Featur es Erase This function can be used to erase image filesfrom a CF card. • Selecting the [Single] option allows you to scroll through images with the +/-buttons and select single images forerasing. • Selecting the [All] option erases all the images on a CF card with the exceptionof prot...
Page 77 - Rotate
77 Menu Featur es Rotate The Rotate function can be used to rotate arecorded image 90˚ clockwise or counterclock-wise for playback. This allows you to playimages with the correct orientation in slideshows. Protect The Protect function locks an image file toprevent accidental deletion from the CF car...
Page 78 - Start; Slide Show
78 Menu Featur es • With each successive press of the SET button, the image is rotated 90˚clockwise, 90˚ counterclockwise andback to its original orientation. • The Rotate function has no effect upon the recorded image data. Start Begin the slide show by selecting the Startoption.The All Images opti...
Page 81 - Print Order
81 Menu Featur es Repeat Selecting this option enables you to automati-cally repeat the slide show once it reaches thelast image. • When it is set to on, the power save function will not power down thecamera while a slide show is playing.Since playing slide shows for extendedperiods of time will use...
Page 82 - Print Type; The print type can be specified.
82 Menu Featur es each page. The [Index] setting prints an indexof the images like a contact sheet. The [Both]setting prints both individual images and anindex sheet. Order Prints You can specify the images to be printed andthe number of copies. There are two ways tomark images: singly [select] or a...
Page 83 - • All Images
83 Menu Featur es • Use the +/- buttons to scroll through images and the SET button to mark orunmark an image. A check markappears beside the marked images. • A maximum of 998 images can be marked at once. • Hold the SET button down and press one of the +/- buttons to specify thenumber of print copi...
Page 84 - Cancel Orders; This setting deletes the print mark data.; Property
84 Menu Featur es The options are [Off], which omits all data,[Date], [File No.] and [Both], which prints boththe date and file number. • The date is printed in the format setwith the [Date Style] function. (p. 86) • The first three digits of the file number represent the folder name and the lastfou...
Page 85 - Setup; LCD
85 Menu Featur es Setup Selecting the Setup option in either the Recordor Play menu displays the Setup submenu. • The [Review] and [File No. Reset] options do not appear in the Setupsubmenu accessed from the Play menu. • The [Format] and [Language] options do not appear in the Setup submenuaccessed ...
Page 86 - Review
86 Menu Featur es Date/Time Use this setting to adjust the camera’s dateand time settings and display formats. The factory default date style may differbetween regions. • Press the SET button to move between the Style, Day, Month, Year, Hour andMinute fields. • Press the +/- buttons to advance the n...
Page 87 - About File Numbers
87 Menu Featur es File No. Reset The method by which the camera assigns filenumbers can be selected. The file no. reset [On] setting resets the startingfile number to 1 (100-0001) each time a newCF card is inserted. On cards with existing files,the next available number is assigned. The [Off] settin...
Page 88 - Format
88 Menu Featur es Format This function enables you to format a CF cardfor use with the camera. If the camera ceasesto operate correctly, a corrupted CF card maybe the cause. Solve the problem by selecting[Format] from the Setup menu to reformat theCF card. • Images shot in Continuous or Stitch Assis...
Page 89 - Language
89 Menu Featur es Language Use the Language option to change thelanguage in which messages on the LCDpanel are displayed. The Language menu may appear differ-ently on cameras in some regions. • If you are having difficulty with a CF card made by a manufacturer otherthan Canon, reformatting it may so...
Page 90 - Connecting to a TV; Turn the camera’s Mode Dial to the L; Other Functions; Turn the camera’s Mode Dial to the
90 Other Functions Connecting to a TV You can connect your camera to a televisionto display the images you have recorded byfollowing the procedures below. 1. Turn the camera’s Mode Dial to the L (Lock) position and ensure that the TVpower switch is off. 2. Insert one end of the video cable shipped w...
Page 91 - If the Clock Not Set icon (; Changing the Button Battery
91 Other Functions 6. Play images using the normal proce- dures. 7. When you finish viewing, turn the camera Mode Dial to the L (Lock)position before disconnecting the cablefrom both devices. • When you are using the +/- buttons to switch images, the display resolutionwill drop slightly until the ne...
Page 92 - Ensure that the Mode; Place the new button battery into the
92 Other Functions 1. Ensure that the Mode Dial is set to the L(Lock) position. 2. Slide the battery cover lock to therelease positionand slide thebattery coveropen. 3. Remove the battery pack. 4. Take out the button battery holder and remove the spent battery. To remove the buttonbattery holder fro...
Page 93 - Close the battery cover and slide the
93 Other Functions NB-5H 2CR5 6. Place the button battery holder (with the new button battery installed) backinto place in the battery chamber. 7. Replace the battery pack. Align thebutton batteryholder with itsslot and lightlypress itforward intoplace withyour fingertip. 8. Close the battery cover ...
Page 94 - Changing the Recording Format; press the SET button.
94 Other Functions Changing the Recording Format The PowerShot A50 records images in the“Design rule for Camera File system” industrystandard format. The recording format can beswitched to the CIFF format to meet your filemanagement needs if you so wish. 1. Turn the Mode Dial to the P (Program) posi...
Page 95 - Camera Maintenance; Camera Body; Appendices
95 Appendices Camera Maintenance Follow the procedures below to clean thecamera body, lens, viewfinder and LCD panelwhen they become dirty. • Never use thinners, benzene, synthetic cleansers or water to clean the camera.The use of these substances may distortor damage the equipment. Camera Body Gent...
Page 96 - Troubleshooting
96 Appendices Troubleshooting Problem Cause(s) Solution(s) • Slide the battery cover lock into the locked position. • Install the 2CR5 lithium battery with the terminals oriented toward the back ofthe chamber. • Use a fully charged battery pack.• Replace the battery.• Use an approved AC power source...
Page 100 - List of Message Codes
100 Appendices The following codes may appear in the Display Panel. The significance of the message is explainedalongside. Pb: Image data is being read for display. CF: No CF card installed, CF card slot cover is open or unlocked, or CF card error. Lb: Insufficient battery charge to operate camera. ...
Page 101 - List of Messages
101 Appendices The following messages may appear on the LCD Panel. Busy: Image is recording on CF card. Or image data is being read for display. CF card full!: CF card is too full to accommodate more images. Cannot Record!: You attempted to shoot an image without a CF card installed. No Image.: No i...
Page 102 - Specifications
102 Appendices Specifications PowerShot A50 Image Sensor: 1,310,000-pixel (total), 1/2.7-inch charge coupled device (effective pixels 1,250,000) Gradation Reproduction: 8 bits x 3 colors (10-bit data processing)Sensitivity: Equivalent to ISO 100 to 400 (ISO 400 for Small mode in low light only) Imag...
Page 105 - Index
105 Appendices Symbols 2x2 (Matrix) Sequence (Stitch Assist Mode) 58, 65+/- (Exp.) 72+/- Buttons 69 A All Images 83Auto Exposure 32, 46, 72Auto Flash mode 51Auto Mode 32, 42Auto Mode (Mode Dial) 56Auto White Balance 73Autofocus 48, 56Autofocus (AF) Auxiliary Light Emitter 15 B Battery Cover 16, 20Ba...
Page 107 - Customer Support; EUROPE; Canon Customer Support; NORTH AMERICA
107 Customer Support Customer Support EUROPE Canon (UK) Ltd. HelpdeskTel No.: 0990 143 723 (Calls may be recorded.)Fax No.: 0990 143 340 BBS No.: 0990 143 350 Canon France S.A. Hotline: (1) 41 99 70 70Tél: (1) 41 99 77 77 Télécopie: (1) 41 99 79 51 Canon S.A.V. Photo Video France Hotline: (1) 49 04 ...
Page 108 - OCEANIA; ASIA; Ulead Customer Support; INTERNATIONAL
108 Customer Support OCEANIA Canon Australia Pty. Ltd. Info-Line: (02) 9805 2864 Canon New Zealand Ltd. Info-Line: 0900-522666 ASIA Canon Singapore Pte. Ltd. 79 Anson Road, #09-01 / 06, Singapore 079906Phone: (65) 532 4400 Fax: (65) 221 7577 Canon Hongkong Co., Ltd. Phone: 852-2739-0802 Fax: 852-236...


 Canon PIXMA TS9551C User Manual
 Canon Powershot Manual
 Canon POWERSHOT 220 HS User Manual
 Canon PowerShot 350 User Manual
 Canon PowerShot A10 User Manual
 Canon PowerShot A20 Manual
 Canon Power Shot A70 Manual
 Canon Power Shot A80 Manual
 Canon POWERSHOT A80 User Manual
 Canon PowerShot A85, A75 Manual
 Canon PowerShot A200 User Manual
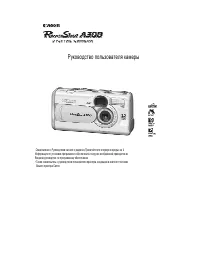 Canon PowerShot A300 User Manual