Maxx Ice MIB580 - Manuals
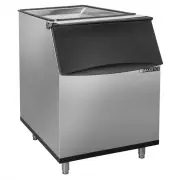
User Manual Maxx Ice MIB580


Summary
Page | 2 Contents ICE MAKER SAFETY 3 IMPORTANT SAFEGUARDS 4-5 MAJOR FEATURES 5 TECHNICAL INFORMATION 6 INTRODUCTION 6 COMPONENT INFORMATION 6 ICE MAKER INSTALLATION Unpacking 7 Remove Packaging Material 7 Location Requirements 8-9 Typical Installation of Ice Storage Bin 9 Electrical Requirements 9 C...
Page | 3 ICE MAKER SAFETY Always read and obey all safety messages. This is the Safety Alert Symbol This symbol alerts you to potential hazards that can injure or kill you and others All safety messages will follow the Safety Alert Symbol and either the words “DANGER”, “WARNING” OR “CAUTION” DANGER ...
Page | 4 IMPORTANT SAFEGUARDS Before the ice maker is used, it must be properly positioned and installed as described in this manual, so read the manual carefully We strongly recommend that you have a professional install your new machine The warranty may be affected or voided by an incorrect instal...
Maxx Ice Ice Makers Manuals
-
 Maxx Ice MIB580N
User Manual
Maxx Ice MIB580N
User Manual
-
 Maxx Ice MIM100
User Manual
Maxx Ice MIM100
User Manual
-
 Maxx Ice MIM1000
User Manual
Maxx Ice MIM1000
User Manual
-
 Maxx Ice MIM100R
User Manual
Maxx Ice MIM100R
User Manual
-
 Maxx Ice MIM120
User Manual
Maxx Ice MIM120
User Manual
-
 Maxx Ice MIM125H
User Manual
Maxx Ice MIM125H
User Manual
-
 Maxx Ice MIM130
User Manual
Maxx Ice MIM130
User Manual
-
 Maxx Ice MIM130R
User Manual
Maxx Ice MIM130R
User Manual
-
 Maxx Ice MIM200N
User Manual
Maxx Ice MIM200N
User Manual
-
 Maxx Ice MIM200NH
User Manual
Maxx Ice MIM200NH
User Manual
-
 Maxx Ice MIM250
User Manual
Maxx Ice MIM250
User Manual
-
 Maxx Ice MIM250R
User Manual
Maxx Ice MIM250R
User Manual
-
 Maxx Ice MIM260N
User Manual
Maxx Ice MIM260N
User Manual
-
 Maxx Ice MIM260NH
User Manual
Maxx Ice MIM260NH
User Manual
-
 Maxx Ice MIM265H
User Manual
Maxx Ice MIM265H
User Manual
-
 Maxx Ice MIM320N
User Manual
Maxx Ice MIM320N
User Manual
-
 Maxx Ice MIM320NH
User Manual
Maxx Ice MIM320NH
User Manual
-
 Maxx Ice MIM50-O
User Manual
Maxx Ice MIM50-O
User Manual
-
 Maxx Ice MIM50-OR
User Manual
Maxx Ice MIM50-OR
User Manual
-
 Maxx Ice MIM50P
User Manual
Maxx Ice MIM50P
User Manual