Page 2 - TABLE OF CONTENTS; Page
TABLE OF CONTENTS Page ICE MAKER SAFETY....................................................................................................................2 IMPORTANT SAFEGUARDS ............................................................................................... 2 - 4 TECHNICAL INFORMATIO...
Page 3 - ICE MAKER SAFETY; Your safety and the safety of others are very important.; IMPORTANT SAFEGUARDS
1 ICE MAKER SAFETY Your safety and the safety of others are very important. We have provided many important safety messages in this manual and on your appliance. Always read and obey all safety messages. This is the Safety Alert Symbol. This symbol alerts you to potential hazards that can injure or ...
Page 5 - SAVE THESE INSTRUCTIONS; Electrical Connection
3 batch of cubes must be discarded. If the ice maker will not be used for a long time, before the next use it must be thoroughly cleaned. Follow carefully any instructions provided for cleaning or use of sanitizing solution. Do not leave any solution inside the ice maker after cleaning. DO NOT t...
Page 6 - Technical Information; 5 lbs maximum; Introduction; are subject to change without notice.
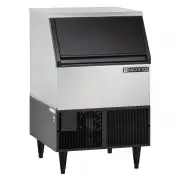
4 Technical Information Model: MIM250 Electrical input: 115VAC ~ 60Hz Power consumption: 9.4 kW · h / 100 lbs of ice Ice-making/Ice-harvest rated current: 9.2A/12A Refrigerant: R404a, 22.9 oz. High/Low side pressure: 350psig/190psig Unit width x depth x height: 24” x 24” x 39” Unit weight: 136 lbs m...
Page 7 - Component Locations; Back view
5 Component Locations Back view Top view Power supply line Ice maker drain 1/2” FPT Bin drain 1/2” FPT Water inlet 3/8” FPT (Female Pipe Thread) Water pump Float Stability brackets Top panel Door Evaporator (ice mold) Bin full probe Water tank Water tank screw nut Ice storage bin Front bottom louver...
Page 8 - Ice Maker Installation; Unpacking; Remove packaging materials; Cleaning and Maintenance; Installing the adjustable feet; At least two persons are required to install the adjustable feet.; degrees
6 Ice Maker Installation Unpacking Remove packaging materials IMPORTANT: Do not remove any permanent instruction labels or the data label on your ice maker. Remove tape and glue from your ice maker before using, To remove any remaining tape or glue, rub the area briskly with your thumb. Tape or gl...
Page 9 - Installing the stability brackets; This operation requires at least two persons.; Location Requirements; This ice maker should be installed by qualified personnel; Installation clearance; Top view Side view
7 Installing the stability brackets This operation requires at least two persons. If you wish to install the ice maker in a free-standing mode rather than enclosed, it is necessary to attach the two metallic stability brackets that can be found packed inside the ice storage bin. Keeping the machine ...
Page 10 - servicing if necessary.; IT IS STRONGLY RECOMMENDED TO USE A WATER FILTER. A FILTER, IF IT; state and local codes.; Electrical Requirements
8 To ensure proper ventilation for your ice maker, the front of the unit must be completely unobstructed. When installing the ice maker under a counter, follow the recommended spacing dimensions shown. Allow at least 6” (150 mm) clearance at rear, and 1” (25 mm) at the sides and at the top for p...
Page 11 - Recommended grounding method; -prong wall receptacle installed by a qualified electrician.; Leveling the Ice Maker; by rotating the under block (see below) until the machine is level.; Water Supply; be a minimum of 15 psig with a static pressure not more than 80 psig.
9 Before you move your ice maker into its final location, it is important to make sure you have the proper electrical connection. A standard electrical supply, properly grounded in accordance with the National Electrical Code and local codes and ordinances, is required. The ice maker should always b...
Page 12 - Connecting the water line:; Installation Types; Enclosed Installation:
10 IMPORTANT: 1. All installations must be in accordance with local plumbing code requirements. Professional installation is recommended. 2. Water inlet fitting: 3/8” FPT (Female Pipe Thread); drain line connection: 1/2” FPT. 3. Make certain you have a suitable water supply hose and two suitable dra...
Page 13 - Operation; Final Check List before Operation; storage, the first batch of cubes must be discarded.
11 Operation Final Check List before Operation 1. Have all packing materials and tape been removed from the interior and exterior of the ice maker? 2. Did you clean the ice storage bin? (See pages 15 - 17.) 3. Have the installation instructions been followed, including connecting the machine to wate...
Page 14 - How the Machine Makes Ice; minutes, it will automatically proceed to the ice-making stage.; Freeze; the ice maker stops the Freeze cycle and begins the Harvest cycle.; How the machine uses water:; water from the trough freezes continuously on the evaporator.; Normal Sounds; on top of the ice cube machine can also make noises.
12 Evaporator Never turn the water supply tap off when the ice maker is working. Never touch the evaporator when the machine is running. Except to take ice from the unit, keep the door closed to reduce melting and insure proper ice formation. How the Machine Makes Ice When the power switch is ...
Page 15 - Preparing the Ice Cube Machine for Long Storage; Do not touch the power plug when your hands are wet.; What shouldn’t be done?
13 You may hear air being forced over the condenser by the condenser fan. During the Harvest cycle, you may hear the sound of ice cubes falling into the ice storage bin. Preparing the Ice Cube Machine for Long Storage If the ice cube machine will not be used for a long time, or it is to be moved...
Page 16 - Exterior Cleaning; steel looking like new:
14 Exterior Cleaning Commercial grades of stainless steel are susceptible to rusting if not properly maintained. It is important that you properly care for the stainless steel surfaces of your ice machine and bin to avoid the possibility of rust or corrosion. Use the following recommended guidelines...
Page 17 - Interior Cleaning; Clean
15 Interior Cleaning It is the USER’S RESPONSIBILITY to see that the unit is properly maintained. It is always preferable and less costly in the long run, to avoid possible down time by keeping it clean and adjusted as needed; and by replacing worn components before they can cause failure. The follo...
Page 18 - Press the; controller to OFF; Control Panel; (located at left side of front bottom louver panel)
16 machine splash areas, plus the interior surfaces of the bin, deflector and door with the remaining sanitizing solution. Inspect to insure that all functional parts, fasteners, thermostat bulbs (if used), etc. are in the correct position. 12. Press the Clean button for 6 seconds and the water will...
Page 21 - Troubleshooting; Before Calling for Service; Problem; Possible Cause
19 Troubleshooting Before Calling for Service If the unit appears to be malfunctioning, read through the OPERATION section of this manual first. If the problem persists, check the Troubleshooting Guide below and on the following page. The problem may be something very simple that can be solved witho...