Makita XMU05Z - Manuals
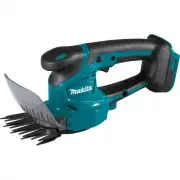
User Manual Makita XMU05Z


Summary
2 ENGLISH ENGLISH (Original instructions) SPECIFICATIONS Model: XMU05 Cutting width 110 mm (4-5/16") Strokes per minute 2,500/min Dimensions (L x W x H) 330 mm x 120 mm x 130 mm (13" x 4-3/4" x 5-1/8") Rated voltage D.C. 18 V Net weight 1.4 kg - 1.8 kg (3.1 lbs - 4.0 lbs) • Due to ou...
4 ENGLISH 7. Follow all charging instructions and do not charge the battery pack or tool outside the temperature range specified in the instruc - tions. Charging improperly or at temperatures outside the specified range may damage the battery and increase the risk of fire. Service 1. Have your power...
5 ENGLISH 30. When servicing an appliance, use only identi- cal replacement parts. Follow instructions in the Maintenance section of this manual. Use of unauthorized parts or failure to follow Maintenance instructions may create a risk of shock or injury. 31. Before cutting grass, remove foreign mat...
Makita Brush Cutters Manuals
-
 Makita DUM604ZX
User Manual
Makita DUM604ZX
User Manual
-
 Makita GAU02Z
User Manual
Makita GAU02Z
User Manual
-
 Makita GHU01M1
User Manual
Makita GHU01M1
User Manual
-
 Makita GHU01Z
User Manual
Makita GHU01Z
User Manual
-
 Makita GHU02M1
User Manual
Makita GHU02M1
User Manual
-
 Makita GHU02M1-BL4040
User Manual
Makita GHU02M1-BL4040
User Manual
-
 Makita GHU02Z
User Manual
Makita GHU02Z
User Manual
-
 Makita GHU03M1
User Manual
Makita GHU03M1
User Manual
-
 Makita GHU03Z
User Manual
Makita GHU03Z
User Manual
-
 Makita GHU04M1
User Manual
Makita GHU04M1
User Manual
-
 Makita GHU04Z
User Manual
Makita GHU04Z
User Manual
-
 Makita GHU05M1
User Manual
Makita GHU05M1
User Manual
-
 Makita GHU05Z
User Manual
Makita GHU05Z
User Manual
-
 Makita GRU02M1
User Manual
Makita GRU02M1
User Manual
-
 Makita GRU02Z
User Manual
Makita GRU02Z
User Manual
-
 Makita GRU05PM
User Manual
Makita GRU05PM
User Manual
-
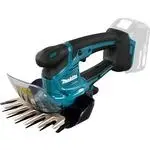
 Makita MU04Z
User Manual
Makita MU04Z
User Manual
-
 Makita UH004G
User Manual
Makita UH004G
User Manual
-
 Makita UH005G
User Manual
Makita UH005G
User Manual
-
 Makita UH4261
User Manual
Makita UH4261
User Manual