Makita 5007MG - Manuals

User Manual Makita 5007MG


Summary
2 ENGLISH SPECIFICATIONS • Due to our continuing programme of research and development, the specifications herein are subject to change without notice. • Note: Specifications may differ from country to country. GENERAL SAFETY RULES USA002-2 (For All Tools) WARNING: Read and understand all instructio...
3 13. Do not overreach. Keep proper footing and bal- ance at all times. Proper footing and balance enables better control of the tool in unexpected situ-ations. 14. Use safety equipment. Always wear eye protec- tion. Dust mask, non-skid safety shoes, hard hat, or hearing protection must be used for ...
6 17. Never attempt to saw with the circular saw held upside down in a vise. This is extremely danger-ous and can lead to serious accidents. 18. WARNING: Blade coasts to stop after switch is released. Contact with coasting blade can causeserious injury. Before setting the tool down aftercompleting a...
Manual Makita 5007MG


Summary
2 ENGLISH SPECIFICATIONS • Due to our continuing programme of research and development, the specifications herein are subject to change without notice. • Note: Specifications may differ from country to country. GENERAL SAFETY RULES USA002-2 (For All Tools) WARNING: Read and understand all instructio...
3 13. Do not overreach. Keep proper footing and bal- ance at all times. Proper footing and balance enables better control of the tool in unexpected situ-ations. 14. Use safety equipment. Always wear eye protec- tion. Dust mask, non-skid safety shoes, hard hat, or hearing protection must be used for ...
6 17. Never attempt to saw with the circular saw held upside down in a vise. This is extremely danger-ous and can lead to serious accidents. 18. WARNING: Blade coasts to stop after switch is released. Contact with coasting blade can causeserious injury. Before setting the tool down aftercompleting a...
Makita Circular Saws Manuals
-
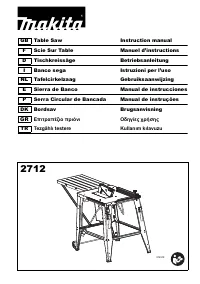 Makita 2712
User Manual
Makita 2712
User Manual
-
 Makita 4131
User Manual
Makita 4131
User Manual
-
Makita 4131
Manual
-
 Makita 5104
User Manual
Makita 5104
User Manual
-
Makita 5104
Manual
-
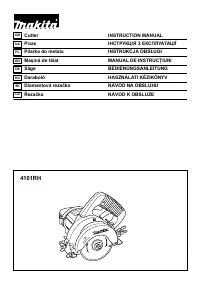 Makita 4101 RH
User Manual
Makita 4101 RH
User Manual
-
 Makita 5007F
User Manual
Makita 5007F
User Manual
-
Makita 5007F
Manual
-
 Makita 5007FA
User Manual
Makita 5007FA
User Manual
-
Makita 5007FA
Manual
-
 Makita 5007NK
User Manual
Makita 5007NK
User Manual
-
 Makita 5008MGA
User Manual
Makita 5008MGA
User Manual
-
Makita 5008MGA
Manual
-
 Makita 5057KB
User Manual
Makita 5057KB
User Manual
-
Makita 5057KB
Manual
-
 Makita 5143R
User Manual
Makita 5143R
User Manual
-
Makita 5143R
Manual
-
 Makita 5377MG
User Manual
Makita 5377MG
User Manual
-
Makita 5377MG
Manual
-
 Makita 5402NA
User Manual
Makita 5402NA
User Manual