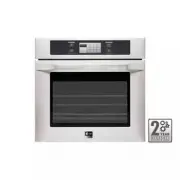
Page 2 - Product Registration Information
2 IMPORTANT SAFETY INFORMATION Safety Precautions .......................................................3-4Electrical Safety ..............................................................4Safety During Use ...........................................................5Child Safety .......................
Page 3 - ENGLISH; READ ALL INSTRUCTIONS BEFORE USE; SAFETY PRECAUTIONS; • DO NOT TOUCH HEATING ELEMENTS OR; This symbol will alert you to hazards or unsafe practices which; CAUTION; cause bodily injury or property damage.; • NEVER use your appliance for warming or; WARNING
3 ENGLISH READ ALL INSTRUCTIONS BEFORE USE SAFETY PRECAUTIONS • Be certain your appliance is properly installed and grounded by a qualified technician. • Do not repair or replace any part of the appliance unless specifically recommended in the manual. • All other servicing should be referred to a qu...
Page 5 - SAFETY DURING USE
5 ENGLISH SAFETY DURING USE • Oven Racks. Always place oven racks in desired position while oven is cool. • Always use pot holders or oven mitt when removing food from the oven. You can be burned because cookware and plateswill be hot. • Use caution with the TIMED BAKE or DELAYED TIMED BAKE features...
Page 6 - SAFETY WHEN CLEANING
6 SAFETY WHEN CLEANING • Do Not Clean Door Gasket. The door gasket is essential for a good seal. Care should be takennot to rub, damage, or move the gasket. • Do Not Use Oven Cleaners. No commercial oven cleaner or oven liner protective coating ofany kind should be used in or around any part ofthe o...
Page 7 - PARTS AND FEATURES
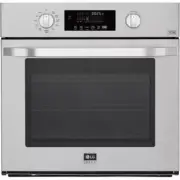
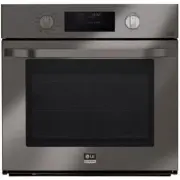
7 ENGLISH PARTS AND FEATURES Broiler pan Grid Standard racks (2 ea) Telescopic rack (1 ea) 30 ” (76.2 cm) Metal Bottom Trim (1 ea) Meat Probe 6 Wood Screws For Mounting (4 needed for installation and 2 extras) 6 Screws For Bottom Trim (3 needed for installation and 3 extras) Oven door Meat probe Mod...
Page 8 - CONTROL PANEL FEATURES; READ THE INSTRUCTIONS CAREFULLY BEFORE USING THE OVEN.; Main Menu
8 CONTROL PANEL FEATURES READ THE INSTRUCTIONS CAREFULLY BEFORE USING THE OVEN. For satisfactory use of your oven, become familiar with the various features and functions of the oven as described below. NOTE: • Press CLEAR/OFF pad. Allow the oven to cool for one hour. Put back into operation. • If t...
Page 9 - OK; INITIAL SET UP; Feature
9 ENGLISH When the oven is first powered ON, the oven needs tobe programmed for the language and time of day. To set the clock (example below for for 3:30 pm): NOTE: When the power supply to the oven has been interrupted, the time in the display will show when thepower failure occurred. Touch 12HR t...
Page 10 - LANGUAGE SELECTION; To set language selection; TEMPERATURE UNIT; To set temperature unit.; DISPLAY BRIGHTNESS; To set display brightness
10 LANGUAGE SELECTION (ENGLISH, ESPAÑOL OR FRANÇAIS) English, French or Spanish can be set as the display language. To set language selection The following options can be found by touching SET UP on the main menu. TEMPERATURE UNIT (FAHRENHEIT OR CELSIUS) Touch Set Up. Touch 1 for language selection....
Page 11 - SOUND VOLUME; To set sound volume; CONVECTION AUTO CONVERSION
11 ENGLISH SOUND VOLUME (MUTE, NORMAL OR LOUD) The sound volume feature allows you to adjust the volumes to a more acceptable volume. There are threepossible volume levels. To set sound volume To set the feature Disable/Enable CONVECTION AUTO CONVERSION (ENABLE OR DISABLE) Touch Set Up. Touch 4 for ...
Page 12 - To adjust the oven temperature; RESET
12 TEMPERATURE ADJUSTMENT CLOCK TIME (12 HR, 24 HR) The oven cavity temperature can be adjusted if it isrunning too hot or too cool. If needed, the temperature can be adjusted +/- 35degrees. NOTE: The temperature adjustments made with this feature will change Bake, Convection Bake,Convection Roast, ...
Page 13 - Clear
ENGLISH 13 TIMER ON/OFF The TIMER ON/OFF serves as an extra timer in the kitchen that will beep when the set time has run out. It does not start or stop cooking. The TIMER ON/OFF feature can be used during any of the other oven control functions. To set the timer (example for 5 minutes): Touch TIMER...
Page 14 - TELESCOPIC RACK; Installing the Telescoping Rack
14 Rack guides TELESCOPIC RACK The sliding shelf telescopic rack can be used in anyrack position. Open Position Closed and Engaged Position Installing the Telescoping Rack Step. 1 Start with the rack in the "Closed" position. Place onehand in the front near the center, and place your otherha...
Page 15 - BAKE; To set the Bake Temperature to 375 ̊F; START
ENGLISH 15 BAKE Baking results will be better if baking pans arecentered in the oven as much as possible. If bakingwith more than one pan, place the pans so each hasat least 1” to 1-1/2” of air space around it.If cooking on multiple racks,place the oven racks inpositions B and D (For 2 racks) Place ...
Page 16 - TIMED BAKE; Options; When the Timed Bake finishes:
16 TIMED BAKE The oven will turn on immediately and bake for aselected length of time. At the end of the cookingtime, the oven will turn off automatically. To set the oven to begin cookingimmediately and shut off automatically:(example below to bake at 375˚F for 30minutes): Touch CLEAR/OFF . The dis...
Page 17 - DELAYED TIMED BAKE
ENGLISH 17 DELAYED TIMED BAKE • Use caution with the TIMED COOK orDELAYED TIMED COOK features. Use theautomatic timer when cooking cured or frozenmeats and most fruits and vegetables. Foodsthat can easily spoil, such as milk, eggs, fish,meat or poultry, should be chilled in therefrigerator first. Ev...
Page 18 - BROIL; To set the oven to Broil.; Broil; RECOMMENDED BROILING GUIDE
18 BROIL Broiling uses an intense, radiant heat to cook food.Both the inner and outer broil elements heat duringfull broiling. Only the inner broil element heats duringcenter broiling. The element(s) cycle on and off inintervals to maintain the oven temperature. The meatprobe cannot be used with thi...
Page 19 - • DO NOT put water or flour on the fire.
19 ENGLISH • Should an oven fire occur, leave the oven doorclosed and turn the oven off. If the firecontinues, throw baking soda on the fire oruse a fire extinguisher. • DO NOT put water or flour on the fire. - Flour may be explosive and water can cause a grease fire to spread and cause personal inj...
Page 20 - ROAST
20 ROAST 3 7 5 The oven can be programmed to roast.The meat probe may be used in this feature. To set the Roast feature (example for Meatsto cook at 375˚F): Touch CLEAR/OFF . Touch Roast. Touch 3, 7, and 5. Touch START. To change the Temperature while cooking(example changing from 375˚F to 425˚F): T...
Page 21 - Benefits of Convection Bake:; CONVECTION BAKE; To set the oven for Convection Bake 375 ̊F:
21 ENGLISH Benefits of Convection Bake: Some foods cook up to 25 to 30% faster, savingtime and energy. Multiple rack baking. No special pans or bakeware needed. Convection baking uses a fan to circulate the oven’sheat evenly and continuously within the oven. Thisimproved heat distribution allows for...
Page 22 - CRISP CONVECTION; Benefits of Crisp Convection:; Crisp Conv
22 CRISP CONVECTION Benefits of Crisp Convection: This crisp convection feature is best for light coloredand delicate baked goods like cakes, tarts, cookies,puff pastries, scones, muffins, biscuits, free fromyeast breads etc. The fan circulated hot air continuallydistributes heat more evenly than th...
Page 23 - CONVECTION ROAST
23 ENGLISH This Convection Roast feature is designed to giveoptimum cooking performance for roasting meats andpoultry. Preheating is not necessary for meats andpoultry. Heated air circulates around the food from allsides, sealing in juices and flavors. Foods are crispybrown on the outside while stay...
Page 24 - RECIPE BANK
24 The Recipe bank features 100 recipes, with 10categories, for the at home chef. Preset cookingcycles are available on many of these recipes. To set the Recipe Bank feature for anautomatic cooking (example Black Bean and AvocadoCrostini): To set the Recipe Bank feature only(example Guacamole): IMPO...
Page 25 - PROOF; To set the Warm feature; WARM
25 ENGLISH The proof feature maintains a warm environmentuseful for rising yeast-leavened products.The proof feature automatically provides the optimumtemperature for the proof process, and therefore does nothave a temperature adjustment. Touch START without touching the numeric keys if you don’t wa...
Page 26 - HEALTHIER ROASTING CHART; HEALTHIER ROAST; Cycle
26 This Healthier Roast feature is designed to givecooking results of low fat, low calorie for roastingmeats and poultry. Healthier Roasting can reduce thefat up to 20% compared to regular roasting. Fatreduction rate may vary according to the kinds or cutsof meat. This test results based on roast be...
Page 27 - MY MENU; To set the My Menu feature during setting:
27 ENGLISH MY MENU My Menu feature is used to record and recall yourfavorite recipe settings. This feature may store andrecall up to 10 different settings. The My Menu settingmay be used with Timed Bake feature. This featurewill not work with any other function including DelayTimed Cook feature. To ...
Page 28 - • Always use an oven mitt to remove temperature; MEAT PROBE; Cycle completed
28 COOK & WARM • Always use an oven mitt to remove temperature probe. Do NOT touch broil element. - Failure to do so can result in severe personal injury. WARNING 3 7 5 1 6 0 The Cook & Warm feature can only be used withTimed Cook or Delayed Timed Cook feature. Thisfeature is not designed to...
Page 29 - To activate the Control Lock feature:; CONTROL LOCK FEATURE; Pork
29 ENGLISH To activate the Control Lock feature: To Deactivate the Control Lock feature: To change the Meat Probe temperatureduring cooking: RECOMMENDATION CHART FOR PROBETEMPERATURE IMPORTANT NOTE: Touch CLEAR/OFF to cancel Meat Probe at any time. To avoid breaking the probe, make sure food iscompl...
Page 30 - Before a self-clean Cycle; • DO NOT leave small children unattended near
30 The self-clean cycle uses above normal cookingtemperatures to clean the oven’s interiorautomatically. It is normal for smoking to occur during cleaning if theoven is heavily soiled. It is better to clean the ovenregularly rather than to wait until there is a heavybuild-up of soil in the oven. Dur...
Page 31 - To set a delay start time of 12:00 am
31 ENGLISH SELF-CLEAN (cont.) This SELF-CLEAN key is used to start a self-cleancycle. When used with Start Time key, a delayed self-clean cycle may also be programmed. The self-cleanfunction has cycle times of 2 (Light), 3 (Normal) or 4(Heavy) hours. To start an immediate self-clean cycle andshut of...
Page 33 - Changing the Oven Light; • Before replacing your oven light bulb,
33 ENGLISH Changing the Oven Light The oven light is a standard 10-watt halogen bulbfor ovens. To replace lamps located on the side wall: • Make sure oven and bulb are cool. 1. Unplug oven or disconnect power.2. Remove oven racks.3. Slide a flat blade screwdriver between the housing and the glass li...
Page 34 - DO NOT
34 Broiler Pan and Grid Do not clean the broilerpan or grid in a self-cleaning mode. After broiling, remove thebroiler pan from the oven.Remove the grid from thepan. Carefully pour outthe grease from the pan into a proper container. Wash and rinse the broiler pan and grid in hotwater with a soap-fil...
Page 35 - REMOVING & REPLACING THE LIFT-OFF OVEN DOOR; Read the following recommendations:; • Be careful when removing and lifting the door.
35 ENGLISH To remove the door: Step. 1 Open the door fully. Step. 2 Pull the hinge locksdown toward the doorframe to the unlockedposition. Step. 3 Firmly grasp both sides of the door at the top. Step. 4 Close door to the door removalposition, which isapproximately 5 degrees. Step. 5 Lift door up and...
Page 36 - BEFORE CALLING FOR SERVICE; Problem Possible Causes / Solutions; Changing Oven Light
36 BEFORE CALLING FOR SERVICE Before you call for service, review this list. It may save you time and expense. The list includes commonoccurrences that are not the result of defective workmanship or materials in this appliance. Problem Possible Causes / Solutions • Electronic control has detected a ...
Page 39 - ELECTRIC OVEN LIMITED WARRANTY – USA
ENGLISH 39 ELECTRIC OVEN LIMITED WARRANTY – USA LG Electronics Inc. will repair or replace your product, at LG’s option, if it proves to be defective in material orworkmanship under normal use, during the warranty period set forth below, effective from the date of original consumerpurchase of the pr...
Page 40 - MEMO
Page 41 - ESPAÑOLESPAÑOL; MANUAL DEL PROPIETARIO
ESPAÑOLESPAÑOL MANUAL DEL PROPIETARIO HORNO ELÉCTRICO DECONVECCIÓN EMPOTRADO Lea esta guía con detenimiento antes de utilizar el aparato ymanténgala a mano para referencia en todo momento. LSWS305ST P/No.: MFL51224505 www.lg.com
Page 42 - GARANTÍA; Información sobre registro de producto; INFORMACIÓN IMPORTANTE DE SEGURIDAD
2 GARANTÍA Garantía para clientes de los EE.UU ...........................39 Información sobre registro de producto Modelo: Número de serie: Fecha de compra: ¡GRACIAS! Felicitaciones por su compra y bienvenido a la familia de LG. Su nuevo horno empotrado LG combina características de cocción de prec...
Page 43 - ESPAÑOL; LEA TODAS LAS INSTRUCCIONES ANTES DE USAR; PRECAUCIONES DE SEGURIDAD; • NO TOQUE ELEMENTOS CALENTADORES O; Este símbolo lo alerta sobre riesgos o prácticas poco; Este símbolo lo alerta sobre riesgos o prácticas poco; ADVERTENCIA
ESPAÑOL 3 LEA TODAS LAS INSTRUCCIONES ANTES DE USAR PRECAUCIONES DE SEGURIDAD • Asegúrese de que un técnico calificado realice unacorrecta instalación y puesta a tierra del aparato. • No repare o reemplace ninguna pieza del aparato amenos que se lo señale específicamente en estemanual. • Cualquier o...
Page 44 - SEGURIDAD ELÉCTRICA
4 PRECAUCIONES DE SEGURIDAD (cont.) • Asegúrese de quitar todos los materiales de empaquetado del aparato antes de ponerlo enfuncionamiento. Mantenga plásticos, ropa y papel alejados de laspiezas del aparato que puedan calentarse. • NO fuerce la puerta del horno. Esto puede dañar el sistema automáti...
Page 45 - SEGURIDAD DURANTE EL USO
5 ESPAÑOL SEGURIDAD DURANTE EL USO • Bandejas del horno. Siempre coloque las bandejas del horno en la posición deseadamientras el horno está frío. • Siempre use agarraderas o guantes de cocina cuando quite alimentos del horno. Usted puede quemarse ya que los recipientes y losplatos estarán calientes...
Page 46 - SEGURIDAD DURANTE LA LIMPIEZA
6 SEGURIDAD DURANTE LA LIMPIEZA • No limpie la junta de la puerta. La junta de la puerta es esencial para un buen sellado. Debetenerse cuidado de no refregar, dañar o mover lajunta. • No utilice limpiadores de horno. No debe utilizarse ningún limpiador comercial orevestimiento protector de ninguna c...
Page 47 - PIEZAS Y CARACTERÍSTICAS
7 ESPAÑOL PIEZAS Y CARACTERÍSTICAS Asadera Rejilla Bandejas estándar (2 cada uno) Bandeja plegable (1 cada uno) Puerta del horno Sonda para carne Placa de modelo y número de serie Panel de control Espaciador (2 cada uno) - Uno en cada lado Reborde inferior de metal Bandeja plegable Bandejas estándar...
Page 48 - CARACTERÍSTICAS DE PANEL DE CONTROL; LEA LAS INSTRUCCIONES CON CUIDADO ANTES DE UTILIZAR EL HORNO.; Menu; OVEN LIGHT
8 CARACTERÍSTICAS DE PANEL DE CONTROL LEA LAS INSTRUCCIONES CON CUIDADO ANTES DE UTILIZAR EL HORNO. Para un uso satisfactorio de su horno, familiarícese con las diferentes características y funciones del horno descriptas a continuación. NOTA: • Presione la tecla CLEAR/OFF (borrar/apagado). Deje que ...
Page 49 - CONFIGURACIÓN INICIAL; Característica
9 ESPAÑOL Cuando el horno se enciende (ON) por primera vez,debe programarse con el idioma y la horacorrespondientes. Para configurar el reloj (ejemplo de 3:30 pm): NOTA: Cuando se interrumpe el suministro de energía al horno, aparecerá en la pantalla la hora en que ocurrióel corte de energía. Presio...
Page 50 - SELECCIÓN DE IDIOMA; Para configurar la selección de idioma; UNIDAD DE TEMPERATURA; Para configurar la unidad de temperatura.; BRILLO DE LA PANTALLA; Para configurar el brillo de la pantalla; Brillante
10 SELECCIÓN DE IDIOMA (ENGLISH, ESPAÑOL O FRANÇAIS) El idioma de la pantalla puede configurarse en inglés, francés o español. Para configurar la selección de idioma Las siguientes opciones pueden encontrarse presionando SET UP (configuración) en el menú principal. UNIDAD DE TEMPERATURA (FAHRENHEIT ...
Page 51 - VOLUMEN DE SONIDO; Para configurar el volumen de sonido; AUTO CONVERSIÓN DE CONVECCIÓN
11 ESPAÑOL VOLUMEN DE SONIDO (MUDO, NORMAL O ALTO) La característica de volumen de sonido permite regular el volumen a un nivel más aceptable. Existen tres niveles devolumen diferentes. Para configurar el volumen de sonido Para configurar la característicaactivar/desactivar AUTO CONVERSIÓN DE CONVEC...
Page 52 - Para ajustar la temperatura del horno; RECONFIGURACIÓN
12 AJUSTE DE TEMPERATURA TIPO DE HORA (12HORAS, 24HORAS) La temperatura de la cavidad del horno puede ajustarsesi es demasiado caliente o demasiado fría. Si fuera necesario, la temperatura puede ajustarse en+/- 35 grados. NOTA: Los ajustes de temperatura efectuados con esta característica modificará...
Page 53 - TEMPORIZADOR ENCENDIDO/APAGADO
ESPAÑOL 13 TEMPORIZADOR ENCENDIDO/APAGADO TIMER ON/OFF (temporizador encendido/apagado) funciona como un temporizador extra en la cocina que emite un pitido cuando finaliza el tiempo configurado. No inicia o detiene la cocción. La característica TIMER ON/OFF (temporizador encendido/apagado) puede ut...
Page 54 - BANDEJA PLEGABLE; Posición abierta; Cómo instalar la bandeja plegable
14 Guías de labandeja BANDEJA PLEGABLE La bandeja plegable deslizable puede utilizarse encualquier posición de bandeja. Posición abierta Posición cerrada y colocada Cómo instalar la bandeja plegable Paso. 1 Comience con la bandeja en la posición “cerrada”.Coloque una mano en el frente cerca del cent...
Page 55 - HORNEAR
ESPAÑOL 15 HORNEAR Los resultados de horneado serán mejores si los moldespara hornear se centran en el horno. Si va a hornear conmás de una bandeja, colóquelas de modo que tenganun espacio alrededor de por lo menos 1" a 1 -1/2".Si va a cocinar con varias bandejas, coloque lasbandejas del hor...
Page 56 - HORNEADO CON TEMPORIZADOR
16 HORNEADO CON TEMPORIZADOR El horno se enciende inmediatamente y hornea losalimentos durante un período de tiempo seleccionado.Al finalizar el tiempo de cocción, el horno se apagaautomáticamente. Para que el horno comience a cocinarinmediatamente y se apagueautomáticamente: (ejemplo siguientehorne...
Page 57 - HORNEADO CON TEMPORIZADOR CON RETRASO
ESPAÑOL 17 HORNEADO CON TEMPORIZADOR CON RETRASO • Tenga cuidado al utilizar las característicasCOCCIÓN CON TEMPORIZADOR o HORNEADOCON TEMPORIZADOR CON RETRASO. Utilice eltemporizador automático cuando cocine carnescuradas o congeladas y la mayoría de las frutas yvegetales. Los alimentos que pueden ...
Page 58 - ASAR; Para configurar el horno para asar.; GUÍA DE ASADO RECOMENDADO
18 ASAR El asado utiliza un calor intenso y radiante para cocinarlos alimentos. Los elementos de asado tanto internoscomo externos se calientan durante el asado completo.Sólo el elemento de asado interno se calienta durante elasado de centro. Los elementos se encienden y apagana intervalos para mant...
Page 60 - ROSTIZAR
20 ROSTIZAR 3 7 5 El horno puede programarse para rostizar. La sonda de carne puede utilizarse con estacaracterística. Para configurar la característica derostizado (ejemplo carnes que se cocinan a375°F): Presione CLEAR/OFF (borrar/apagado). Presione Rostizar . Presione 3, 7 y 5. Presione START (ini...
Page 61 - Beneficios del horneado por convección:; HORNEADO POR CONVECCIÓN
21 ESPAÑOL Beneficios del horneado por convección: Algunos alimentos se cocinan hasta un 25-30% másrápido, lo que ahorra tiempo y energía. Horneado en bandejas múltiples. No se necesitan recipientes de horneado especiales. El horneado por convección utiliza un ventilador parahacer circular el calor ...
Page 62 - CONVECCIÓN CRUJIENTE; Beneficios de la convección crujiente:
22 CONVECCIÓN CRUJIENTE Beneficios de la convección crujiente: La característica de convección crujiente es mejor paraproductos horneados claros y delicados tales comopasteles, tarteletas, galletas, hojaldres, scones, muffins,bizcochos, panes sin levadura, etc. El aire caliente quecircula mediante u...
Page 63 - ROSTIZADO POR CONVECCIÓN
23 ESPAÑOL Esta característica de rostizado por convección seencuentra diseñada para brindar un desempeño decocción óptimo para rostizar carnes de res y de ave. Noes necesario utilizar el precalentamiento para carnes deres y de ave. El aire caliente circula alrededor de losalimentos por todos los la...
Page 64 - BANCO DE RECETAS
24 El banco de recetas contiene 100 recetas, con 10categorías, para el cocinero doméstico. Se encuentrandisponibles ciclos de cocción predeterminados enmuchas de estas recetas. Para configurar el banco de recetas parauna cocción automática(ejemplo Crostini de frijoles negros yaguacate): Para configu...
Page 65 - LEUDAR; Para configurar la característica de calentar; CALENTAR
25 ESPAÑOL La característica de leudado mantiene un medio tibioque resulta útil para leudar productos con levadura. La característica de leudado brinda automáticamente latemperatura óptima para el proceso de leudado, y por lotanto no existe un ajuste de temperatura. PresioneSTART (iniciar) sin tocar...
Page 66 - TABLA DE ASAR SALUDABLEMENTE; ASAR SALUDABLEMENTE
26 Esta característica de asar saludablemente seencuentra diseñada para brindar resultados de cocciónbajos en grasas y en calorías en carnes de res y de ave.El asar saludablemente puede reducir la grasa hasta un20% en comparación con el rostizado regular. El nivelde reducción de grasa puede variar d...
Page 67 - MI MENÚ
27 ESPAÑOL MI MENÚ La característica de mi menú se utiliza para registrar yrecordar sus configuraciones de recetas favoritas. Estacaracterística puede almacenar y recordar hasta 10configuraciones diferentes. La configuración mi menúpuede utilizarse con horneado con temporizador. Estacaracterística n...
Page 69 - SONDA PARA CARNE
29 ESPAÑOL Para desactivar la característica de bloqueode control: Para activar la característica de bloqueo decontrol: Para cambiar la temperatura de la sondapara carne durante la cocción: TABLA DE RECOMENDACIÓN PARA LATEMPERATURA DE LA SONDA NOTA IMPORTANTE: Presione CLEAR/OFF (borrar/ apagado) pa...
Page 70 - Antes de un ciclo de auto-limpieza
30 El ciclo de auto-limpieza utiliza temperaturas de cocciónsuperiores a lo normal para limpiar automáticamente laparte interior del horno. Si el horno está muy sucio, es normal que se produzcahumo durante la limpieza. Es mejor limpiar el hornoregularmente en lugar de esperar hasta que haya unagran ...
Page 71 - Durante el ciclo de auto-limpieza
31 ESPAÑOL AUTO-LIMPIEZA (cont.) La tecla SELF-CLEAN (auto-limpieza) se utiliza parainiciar el ciclo de auto-limpieza. Cuando se usa con latecla Start Time (tiempo de inicio), también puedeprogramarse un ciclo de auto-limpieza con retraso. Lafunción de auto-limpieza cuenta con tiempos de ciclo de2 (...
Page 73 - Cómo cambiar la luz del horno; CUIDADOS Y LIMPIEZA
33 ESPAÑOL Cómo cambiar la luz del horno La luz del horno es una bombilla halógena estándarde 10 vatios para hornos. Para reemplazar las lámparas ubicadas enla pared lateral: • Asegúrese de que el horno y la bombillano estén calientes. 1. Desenchufe el horno o desconecte la energía. 2. Quite las ban...
Page 75 - INSTRUCCIONES DE CUIDADO DE LA PUERTA; Lea las siguientes recomendaciones:
Para quitar la puerta: Paso. 1 Abra la puerta porcompleto. Paso. 2 Tire de las trabasde la bisagra haciaabajo en direccióndel marco de la puerta hastadestrabarlas. Paso. 3 Tome con firmeza ambos lados de la puerta de laparte superior. Paso. 4 Cierre la puerta hasta laposición de remoción de lapuerta...
Page 76 - ANTES DE LLAMAR AL SERVICIO TÉCNICO; Problema Causas / Soluciones posibles
36 ANTES DE LLAMAR AL SERVICIO TÉCNICO Antes de llamar al servicio técnico, examine esta lista. Puede ahorrarle tiempo y dinero. La lista incluye situacionescomunes que no son el resultado de mano de obra o materiales defectuosos del aparato. Problema Causas / Soluciones posibles • El control eléctr...
Page 80 - Register your product Online!
Printed in Korea www.lg.com Register your product Online! LG Customer Information Center 1-800-243-0000 1-888-865-3026 USA, Consumer User USA, Commercial User


 LG MA3281GW
User Manual
LG MA3281GW
User Manual
 LG WCES6428F
User Manual
LG WCES6428F
User Manual
 LG WDEP9427F
User Manual
LG WDEP9427F
User Manual
 LG WDES9428F
User Manual
LG WDES9428F
User Manual
 LG WSES4728F
User Manual
LG WSES4728F
User Manual
 LG LSE3090ST
User Manual
LG LSE3090ST
User Manual
 LG LSES302ST
User Manual
LG LSES302ST
User Manual
 LG LSWC307ST
User Manual
LG LSWC307ST
User Manual
 LG LSWD300BD
User Manual
LG LSWD300BD
User Manual
 LG LSWD305ST
User Manual
LG LSWD305ST
User Manual
 LG LSWD306ST
User Manual
LG LSWD306ST
User Manual
 LG LSWD307ST
User Manual
LG LSWD307ST
User Manual
 LG LSWD309BD
User Manual
LG LSWD309BD
User Manual
 LG LSWS300BD
User Manual
LG LSWS300BD
User Manual
 LG LSWS306ST
User Manual
LG LSWS306ST
User Manual
 LG LSWS307ST
User Manual
LG LSWS307ST
User Manual
 LG LSWS309BD
User Manual
LG LSWS309BD
User Manual