Page 2 - Your GIGA X7c Professional
2 Table of contents Your GIGA X7c Professional Control elements 4 Important information 6 Proper use ...................................................................................................................................................... 6For your safety ..................................
Page 3 - ‘Espresso’; Symbol description
3 Table of contents Warnings J WARNING J CAUTION Always take note of any information marked with the words CAUTION or WARNING and a warning sign. The signal word WARNING draws your attention to potential serious injury, and the signal word CAUTION to potential minor injury. CAUTION CAUTION draws you...
Page 4 - Control elements
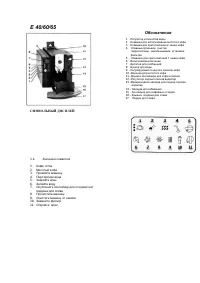
4 Control elements Control elements 5 6 2 3 8 7 10 15 14 13 9 11 12 4 1 1 Bean container with aroma preservation cover 2 Bean container status indicator 3 Water tank cover 4 Water tank 5 Power switch and plug-in mains cable (back of the machine) 6 Coffee grounds container 7 Drip tray 8 Cup grille 9...
Page 5 - Top of the machine
5 Control elements Top of the machine 1 Q On/Off button 2 g Rotary Switch 3 O P button (programming) Front 4 Display 5 Multi-function buttons (button function depends on what is shown in the display) Back of the machine 1 Service cover (open by pressing with your finger) 2 Locking device 3 Sliding ...
Page 6 - Important information; To avoid danger of potentially fatal electric shock:
6 Important information Important information This machine is intended for use by specialist or trained staff in businesses, light industry and agri-cultural facilities or for commercial use by non-pro-fessionals. It should only be used for coffee prepa-ration and to heat milk and water. Use for any...
Page 7 - There is a risk of scalds or burns on the spouts.
7 Important information U Make sure that the GIGA and the mains cable are not located close to hot surfaces. U Be careful to ensure that the mains cable is not trapped and does not rub against sharp edges. U Never open and repair the machine yourself. Do not modify the machine in any way that is not...
Page 8 - Only fill the water tank with fresh, cold water.
8 Important information U Switch your GIGA off at the power switch before any cleaning operation. Always wipe the GIGA with a damp cloth rather than a wet one, and protect it from prolonged exposure to water splash. U The GIGA is not suitable for installation on a surface where a jet of water can be...
Page 9 - Safety when handling the CLARIS filter cartridge:
9 Important information U Children aged 8 and over may only operate the machine without supervision if they have been instructed in how to use it safely. Chil-dren must be able to recognise and under-stand the potential dangers arising from incor-rect use. People, including children, who U do not ha...
Page 10 - Preparing and using for the first time; professionally qualified person:; JURA on the Internet; CAUTION
10 1 Preparing and using for the first time 1 Preparing and using for the first time Visit us on the Internet. On the JURA website (www.jura.com) you will find interesting and up-to-date information on your GIGA and on every aspect of coffee. A few preparations are necessary before the JURA service ...
Page 11 - with
11 1 Preparing and using for the first time T Remove any dirt or foreign objects from inside the bean container. T Fill the bean container with coffee beans and close the aroma preservation cover. E Before the machine is used for the first time, the permanent water connection must be installed b...
Page 12 - Quick installation
12 1 Preparing and using for the first time E To display more languages, press the ‘Next’ button (bottom right). T Press the button that corresponds to the language you want, e.g. ‘English’ . ‘Saved’ appears briefly on the display to confirm the setting. ‘First-time use’ E Now choose between ‘Quic...
Page 14 - Deactivating the filter
14 1 Preparing and using for the first time T Place a receptacle under the dual spout. k T Press the Rotary Switch. ‘Machine is rinsing.’ , the machine rinses. The operation stops automatically. ‘Please select product:’ appears on the display. Your GIGA is ready for use. T Press the ‘Inact...
Page 15 - Connecting milk
15 1 Preparing and using for the first time code corresponds to different authorisations. For instance, you can define that initiation of the maintenance programmes is disabled using a code. U Blocking the ‘Permanently setting the amount of water for the cup size’ function. U Blocking the option of ...
Page 16 - Preparation; amounts
16 2 Preparation 2 Preparation E While a product is being prepared, you can stop preparation at any time. To do this, press the Rotary Switch k or the ‘ ’ button. E During preparation, you can change the preset amounts (e.g. amount of milk foam or water) by turning the Rotary Switch g . E You can fo...
Page 18 - ‘Please select product:’; Ground coffee
18 2 Preparation As soon as you turn the Rotary Switch, more products are displayed in a product selector. E The product selector view disappears automatically after 5 seconds if no preparation is started. Example: Proceed as follows to prepare a milky coffee using the product selector. Preconditio...
Page 20 - Preparing barista recipes
20 2 Preparation All barista recipes are prepared following this model. E The product selector view disappears automatically after 5 seconds if no preparation is started. Example: Proceed as follows to prepare a White Cool. Precondition: ‘Please select product:’ is displayed. g T Turn the Ro...
Page 21 - hold
21 2 Preparation T Place a cup under the dual spout. T Press and hold the ‘Coffee’ button. ‘Coffee’ and the fill volume are displayed. T Hold the ‘Coffee’ button down until ‘Enough coffee? Press button.’ appears. T Release the ‘Coffee’ button. Preparation starts and the coffee flows into the...
Page 22 - Preparation of a speciality
22 2 Preparation T Press the ‘Café à la carte’ button. T Press the ‘Active’ button. T Press the ‘Save’ button. ‘Saved’ appears briefly on the display. ‘Machine settings (4/5)’ O T Press the P button to exit programming mode. ‘Please select product:’ Example: Proceed as follows to prepar...
Page 23 - Hot water
23 2 Preparation The following temperatures can be selected for preparing hot water: ‘Low’ , ‘Normal’ , ‘High’ . There is a danger of scalding from hot water splashes. T Avoid direct contact with the skin. Precondition: ‘Please select product:’ is displayed. T Place a cup under the hot-water sp...
Page 24 - Daily; ‘Welcome to JURA’; Switching on
24 3 Daily operation 3 Daily operation When the GIGA is switched on, it automatically prompts you to perform the rinse operation. Start the rinse operation by pressing the Rotary Switch k . In programming mode you can change this setting so that the machine starts the switch-on rinse automatically ...
Page 25 - Switching off
25 3 Daily operation When you switch off your GIGA, the dual spout is rinsed automati-cally. Precondition: ‘Please select product:’ is displayed. T Place a receptacle under the dual spout. Q T Press the On/Off button. ‘Machine is rinsing.’ , ‘Milk system is being rinsed.’ (if you have prepa...
Page 26 - Permanent settings in programming mode; Programme item
26 4 Permanent settings in programming mode 4 Permanent settings in programming mode Press the P button to enter programming mode. You can navigate through the programme items and permanently save the required settings simply by turning the Rotary Switch and using the multi-function buttons. The fol...
Page 27 - ‘Product counter’; Product settings
27 4 Permanent settings in programming mode Programme item Sub-item Explanation ‘Information (5/5)’ ‘Product counter’ , ‘Day counter’ , ‘Maintenance counter’ , ‘Version’ T Keep track of all products prepared and view the number of maintenance programmes performed. In the programme item ‘Product sett...
Page 28 - ‘Expert mode’
28 4 Permanent settings in programming mode Product Coffee strength Amount More settings Caffè latte* ; (extra-mild), ;; (mild), ;;; (normal), ;;;; (strong), ;;;;; (extra-strong) Water: 25 ml – 290 mlMilk: 0 sec. – 120 sec.Milk foam: 0 sec. – 120 sec. Temperature (low, normal, high), grinder on the ...
Page 30 - immediately; Maintenance settings
30 4 Permanent settings in programming mode T Press the ‘+’ or ‘–’ button to change the setting for the con- sistency of grind. T Press the ‘Save’ button. ‘Saved’ appears briefly on the display. ‘Set consistency of grind’ O T Press the P button to exit programming mode. ‘Please select prod...
Page 33 - every day of the week.; Time and date
33 4 Permanent settings in programming mode You already set the time and date during first-time use. You can change this setting. E For the time format, you can choose between ‘24 hrs’ and ‘AM / PM’ (see Chapter 4 ‘Permanent settings in programming mode – Units’). Example: Proceed as follows to ch...
Page 34 - Automatic switch-off
34 4 Permanent settings in programming mode O T Press the P button. ‘Maintenance status (1/5)’ g T Turn the Rotary Switch until the programme item ‘Machine settings (3/5)’ is displayed. T Press the ‘Timer’ button. ‘Timer’ T Press the ‘Monday’ button (example). ‘Monday’ T Press the ...
Page 35 - Units
35 4 Permanent settings in programming mode g T Turn the Rotary Switch until the programme item ‘Machine settings (3/5)’ is displayed. T Press the ‘Timer’ button. T Press the ‘Next’ button. T Press the ‘Switch off after’ button. ‘Switch off after’ T Press the ‘+’ or ‘–’ button to chang...
Page 36 - all products; Restore factory settings
36 4 Permanent settings in programming mode In the programme item ‘Machine settings (3/5)’ / ‘Factory setting’ you can reset various settings to their factory settings: U ‘All products’ U The settings (amount of water, coffee strength, temperature etc.) for all products are reset to the factory se...
Page 37 - Display settings
37 4 Permanent settings in programming mode g T Turn the Rotary Switch until the programme item ‘Machine settings (4/5)’ is displayed. T Press the ‘Choose language’ button. ‘Choose language’ E To display more languages, press the ‘Next’ button (bottom right). T Press the ‘Deutsch’ button. ...
Page 38 - Background
38 4 Permanent settings in programming mode In this programme item you can set the background for the display of your GIGA. E The set background is only displayed on the start screen. Precondition: ‘Please select product:’ is displayed. O T Press the P button. ‘Maintenance status (1/5)’ g ...
Page 39 - Querying information
39 4 Permanent settings in programming mode In the programme item ‘Information (5/5)’ you can view the follow- ing information: U ‘Product counter’ : Number of prepared coffee speciality cof- fees, speciality coffees with milk and hot water U ‘Day counter’ : Number of prepared coffee speciality coff...
Page 40 - Maintenance; daily; Rinsing the coffee system
40 5 Maintenance 5 Maintenance Your GIGA has the following integrated maintenance programmes: U Rinsing the coffee system ( ‘Rinse the coffee system’ ) U Rinsing the milk system in the dual spout ( ‘Rinse the milk system’ ) U Cleaning the milk system in the dual spout ( ‘Clean the milk system’ ) U C...
Page 41 - Rinsing the milk system
41 5 Maintenance Depending on the setting in programming mode, the GIGA prompts you to rinse the milk system or automatically performs rinsing fol-lowing milk preparation. Example: Proceed as follows to rinse the milk system when prompted to do so. Precondition: ‘Rinse the milk system.’ and the c ...
Page 45 - Changing the filter
45 5 Maintenance E After the set amount of water has flowed through the external filter cartridge, it will cease to work. Your GIGA will automati-cally prompt you to change the filter. Example: Proceed as follows to change the filter when prompted to do so. Precondition: ‘Change the filter’ and th...
Page 46 - Descaling the machine
46 5 Maintenance T Empty the drip tray and coffee grounds container and put them back into the machine. ‘Press the Rotary Switch.’ T Place a receptacle under the dual spout. k T Press the Rotary Switch. ‘Machine is being cleaned.’ , water flows out of the dual spout.The operation is interr...
Page 47 - ‘Descale’
47 5 Maintenance If the descaling operation is interrupted, there may be damage to the machine. T Allow the descaling programme to run to the end. If the descaling agent comes into contact with sensitive surfaces (e.g. marble), damage cannot be ruled out. T Clean up any splashes immediately. E T...
Page 48 - ‘Machine is being descaled.’
48 5 Maintenance T Place one receptacle under the dual spout and another under the hot-water spout. k T Press the Rotary Switch. ‘Machine is being descaled.’ , water flows repeatedly out of the dual spout and the hot-water spout.The operation stops automatically. ‘Empty drip tray.’ appears o...
Page 49 - ‘Fill bean container.’
49 5 Maintenance Coffee beans may be covered with a slight oil film which remains on the walls of the bean containers. These traces may negatively affect the coffee result. For this reason clean the bean containers from time to time. Precondition: ‘Fill bean container.’ is displayed. Q T Swit...
Page 50 - Display; Message
50 6 Display messages 6 Display messages Message Cause/Result Action ‘Empty coffee grounds container.’ The coffee grounds container is full. You cannot prepare any products. T Empty the coffee grounds container and the drip tray (see Chapter 3 ‘Daily operation – Daily maintenance’). ‘Coffee grounds ...
Page 52 - Troubleshooting; Problem
52 7 Troubleshooting 7 Troubleshooting Problem Cause/Result Action Insufficient foam is produced when the milk is frothed, or milk sprays from the dual spout. The dual spout is dirty. T Rinse and clean the dual spout (see Chapter 5 ‘Maintenance – Cleaning the milk system’). Coffee only comes out in ...
Page 53 - Transport and environmentally friendly disposal; Disposal
53 8 Transport and environmentally friendly disposal 8 Transport and environmentally friendly disposal In order to protect the GIGA from frost during transport, the system must be emptied. Precondition: ‘Please select product:’ is displayed. T Place one receptacle under the dual spout and another...
Page 54 - Technical; Technical data for permanent water connection:
54 9 Technical data 9 Technical data Voltage 220–240 V ~, 50 Hz Power 2300 W Airborne noise emitted L P < 70 dB (A) Ambient conditions Humidity max. 80%Ambient temperature 10–35 °C Conformity mark A S Energy consumption ‘Save energy’ / ‘Save No’ approx. 30 Wh Energy consumption ‘Save energy’ ...
Page 60 - JURA contact details / Legal information; The machine complies with the following directives:
60 11 JURA contact details / Legal information 11 JURA contact details / Legal information JURA Elektroapparate AGKaffeeweltstrasse 10CH-4626 NiederbuchsitenTel. +41 (0)62 38 98 233www.jura.com The machine complies with the following directives: U 2006/42/EC – Machinery Directive U 2004/108/EC – Ele...


 Jura 13629
User Manual
Jura 13629
User Manual
 Jura 15094
User Manual
Jura 15094
User Manual
 Jura 15115
User Manual
Jura 15115
User Manual
 Jura 15371
User Manual
Jura 15371
User Manual
 Jura 15465
User Manual
Jura 15465
User Manual
 Jura 72166
User Manual
Jura 72166
User Manual
 Jura F9
User Manual
Jura F9
User Manual
 Jura GIGA X9c Professional
Manual
Jura GIGA X9c Professional
Manual
 Jura IMPRESSA X9
Manual
Jura IMPRESSA X9
Manual
 Jura JURAFOURTHCAREPACK
User Manual
Jura JURAFOURTHCAREPACK
User Manual
 Jura WE8
User Manual
Jura WE8
User Manual
 Jura IMPRESSA X7-S
Manual
Jura IMPRESSA X7-S
Manual
 Jura IMPRESSA X7
Manual
Jura IMPRESSA X7
Manual
 Jura IMPRESSA S90
Manual
Jura IMPRESSA S90
Manual
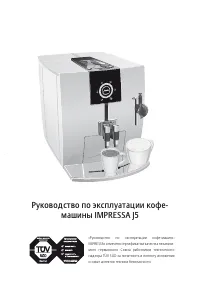 Jura IMPRESSA J5
Manual
Jura IMPRESSA J5
Manual
 Jura IMPRESSA F9
Manual
Jura IMPRESSA F9
Manual
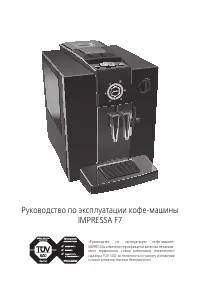 Jura IMPRESSA F7
Manual
Jura IMPRESSA F7
Manual
 Jura IMPRESSA E65
Manual
Jura IMPRESSA E65
Manual