Page 3 - SAVE THESE INSTRUCTIONS
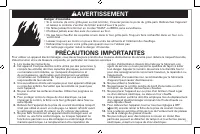
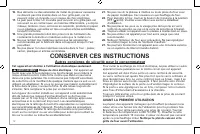
3 Other Consumer Safety Information This appliance is intended for household use only. w WARNING Electrical Shock Hazard: This appliance is provided with a polarized plug (one wide blade) to reduce the risk of electric shock. The plug fits only one way into a polarized outlet. Do not defeat the safe...
Page 4 - Parts and Features
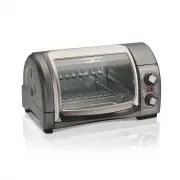
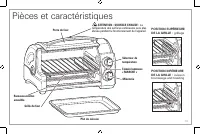
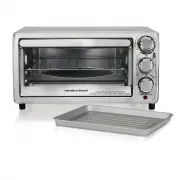
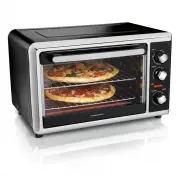
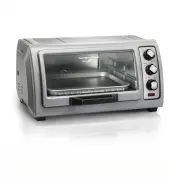
4 To order parts: US: 1.800.851.8900 www.hamiltonbeach.com Canada: 1.800.267.2826 Mexico: 01 800 71 16 100 Oven Door Parts and Features HIGH RACK POSITION: broiling LOW RACK POSITION:baking and toasting Baking Pan Temperature Dial ON Indicator Light Slide-Out Crumb Tray Oven Rack Timer CAUTION: HOT ...
Page 5 - How to Toast
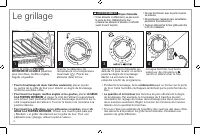
5 How to Toast 2 3 1 Place oven rack in LOW RACK POSITION (shown) for toast, English muffins, bagels, and waffles. Turn Temperature Dial to maximum temperature ( ). Place food in oven. • When toasting only two slices of bread, place bread in middle of oven rack to get even toasting on top and bottom...
Page 6 - How to Bake
6 How to Bake 2 3 1 5 4 Place oven rack on LOW RACK POSITION (shown). When finished, turn Timer dial to (OFF) and unplug. Turn Temperature Dial to desired temperature. • Do not totally enclose foods in aluminum foil. Foil can insulate foods and slow down heating. • To reheat rolls or biscuits, place...
Page 7 - How to Broil
7 How to Broil 2 3 1 4 Slide oven rack into HIGH RACK POSITION. Insert baking pan under oven rack and add food. DO NOT PREHEAT OVEN. Turn Temperature Dial to (broil). Rotate Timer past 10 and then to the desired broiling time or rotate Timer to (ON) while pressing in and holding the buttons on the s...
Page 8 - Care and Cleaning
8 Care and Cleaning To clean inside of oven, wipe oven walls, bottom of oven, and glass door with a damp, soapy cloth. Repeat with a damp, clean cloth.For stubborn stains, use a plastic scouring pad. To remove door: Open door; gently pull straight up and remove to clean with hot, soapy water. Rinse ...
Page 9 - Troubleshooting
9 PROBLEMOven will not heat. Moisture forms on inside of oven door when toasting.An odor and smoke come from oven.Oven will not toast. Some foods burn and some are not done.Concentrated steam comes out of top corners of oven door. PROBABLE CAUSE• Check to make sure electrical outlet is working and t...
Page 10 - Limited Warranty
10 Limited Warranty This warranty applies to products purchased and used in the U.S. and Canada. This is the only express warranty for this product and is in lieu of any other warranty or condition.This product is warranted to be free from defects in material and workmanship for a period of five (5)...
Page 12 - CONSERVER CES INSTRUCTIONS
12 Autres consignes de sécurité pour le consommateur Cet appareil est destiné à l’utilisation domestique seulement. w AVERTISSEMENT Risque de choc électrique : Cet appareil est fourni avec une fiche polarisée (une broche large) pour réduire le risque d’électrocution. Cette fiche n’entre que dans un ...
Page 13 - Pièces et caractéristiques
13 Pièces et caractéristiques Ramasse-miettes amovible Grille du four Porte du four POSITION SUPÉRIEURE DE LA GRILLE : grillage POSITION INFÉRIEURE DE LA GRILLE : cuisson brunissage and toasting Sélecteur de température Témoin lumineux « MARCHE » Minuterie Plat de cuisson ATTENTION : SURFACE CHAUDE ...
Page 14 - Le grillage
14 Le grillage 2 3 1 Placer la grille en POSITION INFÉRIEURE DE LA GRILLE (illustrée) pour les rôties, muffins anglais, bagels, et gaufres. Tourner le sélecteur de température à la température maximale ( ). Placer les aliments dans le four. • Pour le brunissage de deux tranches seulement, placer le ...
Page 15 - Pour la cuisson
15 Pour la cuisson 2 3 1 5 4 Placer la grille du four à la POSITION INFÉRIEURE DE LA GRILLE (illustré). Lorsque terminé, tourner le sélecteur de minuterie à (arrêt) et débrancher le four. Tourner le sélecteur de température à la température désirée. • Ne pas emballer hermétiquement les aliments dans...
Page 17 - Entretien et nettoyage
17 Entretien et nettoyage Pour le nettoyage intérieur du four, essuyer toutes les parois internes et la porte de verre avec un linge imbibé d’eau savonneuse. Répéter avant un linge propre et humide.Pour les taches tenaces, utiliser un tampon à récurer en plastique. Pour installer la porte : Aligner ...
Page 18 - Dépannage
18 PROBLÈMELe four ne chauffe pas. Formation de condensation sur l’interieur de la porte du four pendant le brunissage.Odeur et fumée émanant du four.Aucun brunissage. Quelques aliments brûlent alors que d’autres ne sont pas cuits.De la vapeur concentrée s’échappe par les coins supérieurs de la port...
Page 19 - Notes
Page 20 - Garantie limitée
20 Garantie limitée Cette garantie s’applique aux produits achetés et utilisées aux É.-U. et au Canada. C’est la seule garantie expresse pour ce produit et est en lieu et place de tout autre garantie ou condition.Ce produit est garanti contre tout défaut de matériaux et de main-d’oeuvre pour une pér...
Page 22 - GUARDE ESTAS INSTRUCCIONES
22 Otra Información de Seguridad para el Cliente GUARDE ESTAS INSTRUCCIONES Este aparato ha sido diseñado solamente para uso doméstico. w ADVERTENCIA Peligro de Descarga Eléctrica: Este aparato es provisto con un enchufe polarizado (una pata más ancha) para reducir el riesgo de una descarga eléctric...
Page 23 - Partes y Características
23 Partes y Características Sartén de Cocción Selector de Temperatura Luz Indicadora de ENCENDID Charola de Migajas Deslizante Rejilla de Horno Puerta del Horno Programador de Tiempo POSICIÓN ALTA DE LA REJILLA: asar POSICIÓN BAJA DE LA REJILLA: cocer y tostar PRECAUCIÓN: SUPERFICIE CALIENTE. La tem...
Page 24 - Como Tostar
24 Como Tostar 2 3 1 Coloque la rejilla en LA POSICIÓN BAJA DE LA REJILLA (como se muestra) para tostar panecillos ingleses, bagels, y waffles. Gire el Selector de Temperatura a la temperatura máxima ( ). Coloque el alimento en el horno. • Cuando tueste sólo dos piezas de pan, coloque el pan hacia e...
Page 25 - Como Cocinar
25 Como Cocinar 2 3 1 5 Coloque la rejilla del horno en la POSICIÓN BAJA DE LA REJILLA (indicado). Cuando haya finalizado, gire el Programador de Tiempo a (apagado) y desenchufe. Gire el Selector de Temperatura a la temperatura deseada. • No encierre completamente el alimento en papel aluminio. El p...
Page 27 - Cuidado y Limpieza
27 Cuidado y Limpieza Para limpiar el interior del horno, limpie las paredes, parte inferior del horno y puerta de vidrio con un trapo húmedo y jabonoso. Repita con un trapo húmedo y limpio.Para manchas persistentes, use un estropajo de plástico. Para quitar la puerta: Abra la puerta; suavemente jal...
Page 28 - Resolviendo Problemas
28 PROBLEMAEl horno no calienta. Se forma humedad en el interior de la puerta del horno cuando tuesta.Sale un olor o humo del horno.El horno no tuesta. Algunos alimentos se queman y algunas no se cocinan.Sale vapor concentrado de los extremos superiores de la puerta de horno. PROBABLE CAUSA• Revise ...
Page 29 - Notas