Page 4 - Ta ble of Con ten ts
- 4 - Ta ble of Con ten ts GA-8I865GVM-775/GA-8I865GVMF-775 Motherboard Layout ................................... 6Block Diagram ........................................................................................................... 7 Chapter 1 Hardware Installation ...............................
Page 7 - Block Diagram; MIC
- 7 - Block Diagram * Only for GA- 8I865GVM F-775. Line-Out MIC LGA775 Processor CPUCLK+/-(133/200M Hz) 33MHz Ho st Interfa ce In te l 865GV GMCH GM CHCLK (66M Hz) 66MHz 48MHz DDR 400/333/266M Hz DIM M 14.318M Hz 33MHz LPC47M 997 2 Serial ATA ATA33/66/100 IDE Chann els In te l ICH5 14.318M Hz BIOS C...
Page 9 - Hard ware In stalla tion; English; Considerations Prior to Installation; Preparing Your Computer; Chapter 1 Hardware Installation
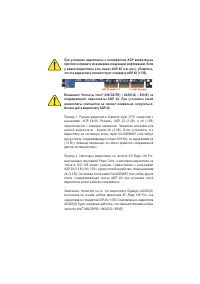
Hard ware In stalla tion - 9 - English 1-1 Considerations Prior to Installation Preparing Your Computer Th e moth erb oard c ontain s n ume rou s d elicate e le ctronic c irc uits a nd compon ents whic h c anbecome damage d as a result of electro static d ischarge (ESD). Thus, p rior to installa tio...
Page 10 - Feature Summary
GA-8I865GVM (F)-775 M otherboard - 10 - English M otherboard w GA-8I865GVM -775 or GA-8I865GVM F-775 CPU w Supp orts the latest In tel ® Pentium ® 4 LGA7 75 CPU w Supports 800/533M Hz FSB w L2 c ache var ies with CPU Chip set w Northbridg e: Intel ® 865GV Chipset w Southbridg e: Intel ® ICH5 Mem ory...
Page 11 - Installation of the CPU and Heatsink; overheating and perm anent dam age of the CPU m ay occur.; HT functionality requirement content :; Pentiu m 4 Processor with HT Tec hnology
Hard ware In stalla tion - 11 - English 1-3 Installation of the CPU and Heatsink Befor e installing the CPU, plea se com ply with the following conditions:1. Please m ake su re that the m otherboard sup ports the CPU.2. Please tak e note of the one indented corner of the CPU. If you install the CPU ...
Page 13 - is switched off to prevent hardware d am age.; Installation of Memory
Hard ware In stalla tion - 13 - English Before installing the m em ory m o dules, please com ply with the following conditions:1. Please m ake sure tha t the m em ory used is supported by the m otherboard. It is recom m ended that m em ory of sim ilar capacity, specifications and brand be used. 2. B...
Page 14 - Dual Cha nnel DDR
GA-8I865GVM (F)-775 M otherboard - 14 - English Dual Cha nnel DDR GA-8I865GVM (F)-775 supports the Dual Channel Technology. After operating the Dual Channel Technology,the bandwidth of M em ory Bus will add doub le up to 6.4GB/s (DDR400). GA-8I865GVM (F)-775 inclu des 4 DIM M sockets, and each Chann...
Page 15 - Installation of Expansion Cards; Installing a PCI expansion card:
Hard ware In stalla tion - 15 - English 1-5 Installation of Expansion Cards You can install you r expansion card by following the steps outlined below:1. Read the r elated expansion ca rd's instruction doc um ent before install the expansion car d into the com puter. 2. Rem ove your com puter's chas...
Page 16 - I/O Back Panel Introduction; Connects to serial-based m ouse or data processing devices.
GA-8I865GVM (F)-775 M otherboard - 16 - English 1-6 I/O Back Panel Introduction PS/2 Keyboard and PS/2 Mouse Connector To install a PS/2 port keyboard and m ouse, plug the m ouse to the upper port (green) and the keyboard to thelower port (purple). Para llel Port The paralle l port allows connection...
Page 17 - Connectors Introduction
Hard ware In stalla tion - 17 - English 1-7 Connectors Introduction 1 2 14 1) ATX_12V2) ATX (Power Connector)3) CPU_ FAN4) SYS_FAN5) FDD6) IDE1 / I DE27) SATA0 / SATA18) PWR_LED9) BAT 10) F_PANEL 11) F_AUDIO 12) CD_IN13) SPDIF14) F_USB1 / F_ USB215) F1_1394* / F2_1394*16) COM B17) IR18) CLR_CM OS 10...
Page 27 - CONT ROL KEYS; Chapter 2 BIOS Setup
BIOS Setup - 27 - English BIOS (Basic Input and Output Sy stem) includes a CMOS SETUP utility w hich allow s user to configurerequired settings or to activ ate certain sy stem features.The CMOS SETUP sav es the configuration in the CMOS SRAM of the motherboard.When the pow er is turned off, the batt...
Page 28 - This setup page includes all onboard peripherals.
GA-8I865GVM(F)- 775 Motherboard - 28 - English The Main Menu (For example: BIOS Ver. : E2) Once y ou enter Aw ard BIOS CMOS Setup Utility, the Main Menu (as figure below ) w ill appear on the screen.Use arrow key s to select among the items and press <Enter> to accept or enter the sub-menu. If...
Page 29 - BIOS Setup; Load Optimiz ed Defaults; Sav e CMOS v alue settings to CMOS and ex it setup.; Exit Without S aving; Abandon all CMOS v alue changes and ex it setup.
BIOS Setup - 29 - English n Load Optimiz ed Defaults Optimized Defaults indicates the v alue of the sy stem parameters w hich the sy stem w ould be in bestperformance c onfiguration. n Set Su pervisor Password Change, set, or disable passw ord. It allows y ou to limit access to the sy stem and Setup...
Page 30 - Standard CMOS Features; Date
GA-8I865GVM(F)- 775 Motherboard - 30 - English 2-1 Standard CMOS Features Date The date format is <w eek>, <month>, <day >, <y ear>. Week The w eek, from Sun to Sat, determined by the BIOS and is display only Month The month, Jan. Through Dec. Day The day , from 1 to 31 (or t...
Page 32 - Advanced BIOS Features; Hard D isk Boot Pr iority
GA-8I865GVM(F)- 775 Motherboard - 32 - English 2-2 Advanced BIOS Features Hard D isk Boot Pr iority Select boot sequence for onboard(or add-on cards) SCSI, RAID, etc.Use < > or < > to select a device, then press<+> to mov e it up, or <-> to mov e it down the list. Press<ES...
Page 33 - CPU H yper-T hreading
BIOS Setup - 33 - English CPU H yper-T hreading Enab led Enables CPU Hy per Threading Feature. Please note that this feature is only workingfor operating sy stem w ith multi processors mode supported. (Default v alue) Disabled Disables CPU Hy per Threading. Limit CPUID Max. to 3 Enab led Limit CPUID...
Page 34 - Integrated Peripherals; On-Chip Prim ary PCI IDE
GA-8I865GVM(F)- 775 Motherboard - 34 - English 2-3 Integrated Peripherals CMOS Se t up Utility -Cop y right (C) 198 4-2004 Awa rd S oftwa re Inte gra te d P e riphe ra ls On-Chip P rim a ry P CI IDE [Enable d] On-Chip Se c on da ry P CI IDE [Enable d] On-Chi p SATA [Auto] x SATA P ort0 c onfig ure a...
Page 37 - Power Management Setup
BIOS Setup - 37 - English 2-4 Power Management Setup ACPI Suspend Type S1(POS) Set ACPI suspend ty pe to S1/POS(Pow er On Suspend). (Default v alue) S3(STR) Set ACPI suspend ty pe to S3/STR(Suspend To RAM). Power LED in S1 state Blinking In standby mode(S1), poer LED w ill blink. (Default v alue) Du...
Page 38 - PnP/PCI Configurations; PCI 1 IRQ Assig nment; Resu me by A larm
GA-8I865GVM(F)- 775 Motherboard - 38 - English 2-5 PnP/PCI Configurations PCI 1 IRQ Assig nment Au to Auto assign IRQ to PCI 1. (Default v alue) 3,4,5,7,9,10,11,12,14,15 Set IRQ 3,4,5,7,9,10,11,12,14,15 to PCI 1/5. PCI 2 IRQ Assig nment Au to Auto assign IRQ to PCI 2. (Default v alue) 3,4,5,7,9,10,1...
Page 39 - PC Health Status; Current CPU/System Temper ature; Detect CPU/Sy stem temperature automatically .
BIOS Setup - 39 - English 2-6 PC Health Status Current CPU/System Temper ature Detect CPU/Sy stem temperature automatically . Current Voltage(V) V core / +3.3V / +5V / +12V / DDR25V Detect sy stem's v oltage status automatically . Curren t CPU/SYST EM FAN Speed (RPM) Detect CPU/SYSTEM Fan speed stat...
Page 40 - Frequency/Vol tage Control; CPU Clock Ratio; Au to
GA-8I865GVM(F)- 775 Motherboard - 40 - English 2-7 Frequency/Vol tage Control CMOS Se t up Utility -Cop y right (C) 198 4-2004 Awa rd S oftwa re Fre que n c y /Volta ge C ontrol CP U Cloc k R a tio [15X] Me m ory Fre que ncy For [Auto] Me m ory Fre que nc y (Mhz) 266 higf : M ove Ente r: Se le c t +...
Page 41 - Load F ail-Safe Defaults; Load Optimized Defaults
BIOS Setup - 41 - English 2-8 Load F ail-Safe Defaults Fail-Safe defaults contain the most appropriate v alues of the sy stem parameters that allow minimum sy stemperformance. CMOS Se t up Utility -Cop y right (C) 198 4-2004 Awa rd S oftwa re } Stan da rd CM OS Fe a t ure s } Advanc e d BIOS Fe a tu...
Page 43 - -12 Exit Witho ut Saving
BIOS Setup - 43 - English 2-11 Save & Exit Setup Ty pe "Y" w ill quit the Setup Utility and sav e the user setup v alue to RTC CMOS.Ty pe "N" will return to Setup Utility. 2-12 Exit Witho ut Saving Ty pe "Y" w ill quit the Setup Utility w ithout sav ing to RTC CMOS.Ty pe ...
Page 45 - Chapter 3 Drivers Installation; Install Chipset Drivers
Drivers Installation - 45 - English Pictures below are shown in Windows XP.Insert the driver CD-title that came with your motherboard into your CD-ROM drive, the driverCD-title will auto start and show the installation guide. If not, please double click the CD-ROMdevice icon in "My computer"...
Page 46 - Software Application
GA-8I865GVM(F)-775 Motherboard - 46 - English 3-2 Software Application This page displays all the tools that Gigabyte developed and some free software, you can choose anyoneyou want and press "install" to install them. 3-3 Software Information This page lists the contents of software and dri...
Page 47 - Hardware Information; Contact Us
Drivers Installation - 47 - English 3-4 Hardware Information This page lists all device you have for this motherboard. 3-5 Contact Us Please see the last page for details.
Page 49 - What is Xpress Recovery ?; How to use the Xpress Recovery; Chapter 4 Appendix; Unique Software Utilities
Appendix - 49 - English 4-1-1 Xpress Recovery Introduction What is Xpress Recovery ? Xpress Recovery is a utility used to back up and restore an OS partition.If the hard drive is not working properly, the user can restore the drive toits original state. 1. Supports FAT16, FAT32, and NTFS formats2. M...
Page 50 - F9 For Xpress Recovery
GA-8I865GVM(F)-775 Motherboard - 50 - English 2. Press F9 during powering on the computer. (Text Mode) Press F9 during powering on the computer . Xpress Recovery V1.0 (C) Copy Right 2003. GIGABYTE Technology CO. , Ltd. 1. Execute Backup Utility2. Execute Restore Utility3. Remove Backup Image4. Set P...
Page 51 - Press B to Backup your System or Esc to Exit
Appendix - 51 - English 1. Execute Backup Utility: ! Press B to Backup your System or Esc to Exit The backup utility will automatically scan your system and back up data as a backup image in your harddrive. Not all systems support access to Xpress Recovery by pressing the F9 key during computer powe...
Page 52 - Utility; Del; Utility on Dual BIOS Motherboards.
GA-8I865GVM(F)-775 Motherboard - 52 - English Method 1 : Q-Flash TM Utility Q-Flash TM is a BIOS flash utility embedded in Flash ROM. With this utility, users only have to stay in the BIOS menu when they want to updateBIOS. Q-Flash TM allows users to flash BIOS without any utility in DOS or Window s...
Page 53 - Exploring the Q-Flash; / Dual BIOS utility screen
Appendix - 53 - English Entering the Q-Flash TM utility: CMOS Setup Utility-C op yright (C ) 1984-2004 Award So ftware } Stand ard CMOS Features } Ad van ced BIOS Features } In tegrated Perip herals } Po wer Managemen t Setup } Pn P/PC I C onfiguratio ns } PC Health Status } MB Intelligen t Tweaker(...
Page 54 - Enter
GA-8I865GVM(F)-775 Motherboard - 54 - English Du al BIOS Utility Boo t Fro m ......................................... Main Bios Main R OM Ty pe/Size.............................SST 49LF003A 512K Backu p ROM Typ e/Size.........................SST 49LF003A 512K Wide Ran ge Protection Disab le Bo ot F...
Page 57 - utility screen
Appendix - 57 - English Exploring the Q-Flash TM utility screen The Q-FlashBIOS utility screen consists of the following key components. Task menu for Q-Flash utility: Contains the names of three tasks. Blocking a task and pressing Enter key on your keyboard to enableexecution of the task. Action ba...
Page 58 - Part One
GA-8I865GVM(F)-775 Motherboard - 58 - English 3. Press Y button on your keyboard after you are sure to update BIOS. Then it will begin to update BIOS. The progress of updating BIOS will be shown at the same time. Q-Flas h Utility V1.30 Flas h Ty pe/Size.................................SST 49LF003A 2...
Page 61 - Stereo Speakers Connection and Settings:
Appendix - 61 - English 4-1-3 2- / 4- / 5.1- Channel Audio Function Introduction Line Out Stereo Speakers Connection and Settings: We recommend that you use the speaker with amplifier to acquire the best sound effect if the stereo outputis applied.STEP 1:Connect the stereo speakers or earphone to ...
Page 62 - Channel Audio Setup
GA-8I865GVM(F)-775 Motherboard - 62 - English 4 Channel Audio Setup STEP 1 :Connect the Front Speakers to "Line Out", the RearSpeakers to "Line In". Line In (Rear Speaker Out)Line Out (Front Speaker Out)Mic In STEP 2 :After you install the audio driver, you will find the "SoundMA...
Page 63 - Channel Audio Setup
Appendix - 63 - English 5.1 Channel Audio Setup STEP 1 :Connect the Front Speakers to "Line Out", the Sur-r o u n d S p e a k e r s t o " L i n e I n " , a n d t h e C e n t e r /Subwoofer Speakers to "MIC In". Sound Effect Configuration:At t he "Acou stic En vironmen ts&...
Page 65 - Troubleshooting
Appendix - 65 - English 4-2 Troubleshooting Below is a collection of general asked questions. To check general asked questions based on a specificmotherboard model, please log on to http://tw.giga-byte.com/faq/faq.htm Question 1: I cannot see some options that were included in previous BIOS after up...