Elica Elibloc 9 LX Silver F/80 - Manuals
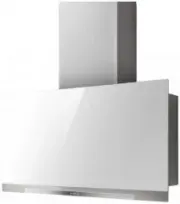
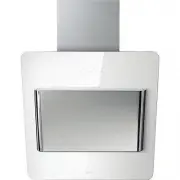
User Manual Elica Elibloc 9 LX Silver F/80


Summary
4 IT - Istruzioni di montaggio e d'uso Attenersi strettamente alle istruzioni riportate in questo manuale. Si declina ogni responsabilità per eventuali inconvenienti, danni o incendi provocati all'apparecchio derivati dall'inosservanza delle istruzioni riportate in questo manuale. La cappa è concepi...
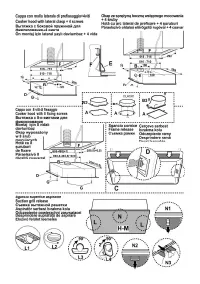
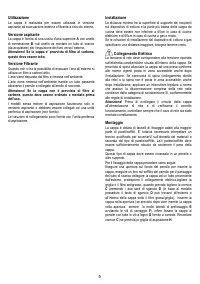
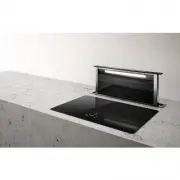
5 Utilizzazione La cappa è realizzata per essere utilizzata in versione aspirante ad evacuazione esterna o filtrante a ricircolo interno. Versione aspirante La cappa è fornita di una uscita d‘aria superiore A con anello di connessione B , sull anello va montato un tubo di scarico (da acquistare) per...
7 EN - Instruction on mounting and use Closely follow the instructions set out in this manual. All responsibility, for any eventual inconveniences, damages or fires caused by not complying with the instructions in this manual, is declined. The hood is conceived for the suction of cooking fumes and s...
Elica Range Hoods Manuals
-
 Elica 35CC DYNAMIQUE RED/F/35
User Manual
Elica 35CC DYNAMIQUE RED/F/35
User Manual
-
 Elica 35CC EVOQUE UMBER/F/35
User Manual
Elica 35CC EVOQUE UMBER/F/35
User Manual
-
 Elica 35CC EVOQUE/F/35
User Manual
Elica 35CC EVOQUE/F/35
User Manual
-
 Elica 35CC/F/35
User Manual
Elica 35CC/F/35
User Manual
-
 Elica ACUTA IX/F/100
User Manual
Elica ACUTA IX/F/100
User Manual
-
 Elica ADAGIO BL/F/120
User Manual
Elica ADAGIO BL/F/120
User Manual
-
 Elica ADAGIO BL/F/90
User Manual
Elica ADAGIO BL/F/90
User Manual
-
 Elica ADAGIO GME BL/A/90
User Manual
Elica ADAGIO GME BL/A/90
User Manual
-
 Elica Adele BL MAT/A/60
User Manual
Elica Adele BL MAT/A/60
User Manual
-
 Elica Adele BL MAT/A/90
User Manual
Elica Adele BL MAT/A/90
User Manual
-
 Elica Adele BLIX/A/60
User Manual
Elica Adele BLIX/A/60
User Manual
-
 Elica Adele BLIX/A/90
User Manual
Elica Adele BLIX/A/90
User Manual
-
 Elica APLOMB-RS BL/A/60
User Manual
Elica APLOMB-RS BL/A/60
User Manual
-
 Elica APLOMB-RS BL/A/90
User Manual
Elica APLOMB-RS BL/A/90
User Manual
-
 Elica APLOMB-RS WH/A/60
User Manual
Elica APLOMB-RS WH/A/60
User Manual
-
 Elica APLOMB-RS WH/A/90
User Manual
Elica APLOMB-RS WH/A/90
User Manual
-
 Elica AUDREYHEAVYMETALF50
User Manual
Elica AUDREYHEAVYMETALF50
User Manual
-
 Elica BELT LUX BL/A/55
User Manual
Elica BELT LUX BL/A/55
User Manual
-
 Elica BELT LUX BL/A/80
User Manual
Elica BELT LUX BL/A/80
User Manual
-
 Elica BELT LUX WH/A/55
User Manual
Elica BELT LUX WH/A/55
User Manual