Page 4 - A v v e r t e n z e
6 A v v e r t e n z e • Questo apparecchio è stato costruito per condizionare gli ambienti domestici e non deve essere adoperato per altri scopi. • É pericoloso modificare o alterare in qualsiasi modo le caratteristiche dell’apparecchio. • L’apparecchio deve essere installato secondo le regole impia...
Page 5 - ALIANO; Cosa sono Pinguino e SuperPinguino
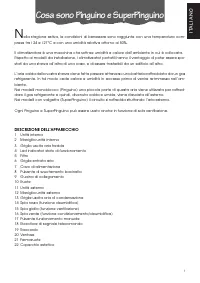
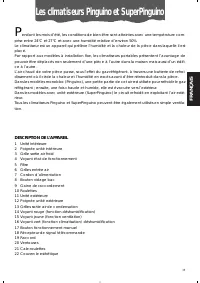
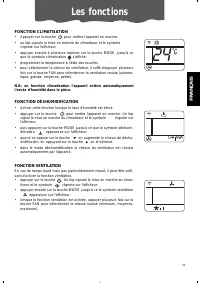
IT ALIANO 7 N ella stagione estiva, le condizioni di benessere sono raggiunte con una temperatura com- presa tra i 24 e i 27°C e con una umidità relativa attorno al 50%. Il climatizzatore è una macchina che sottrae umidità e calore dall’ambiente in cui è collocata. Rispetto ai modelli da installazio...
Page 6 - P r e d i s p o s i z i o n e a l l ’ u s o
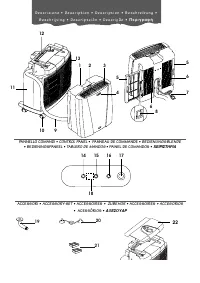
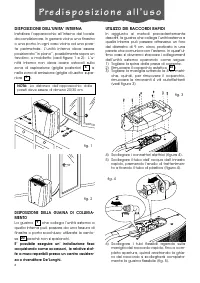
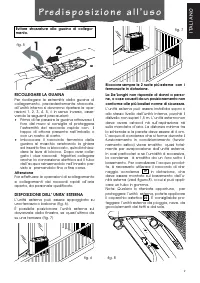
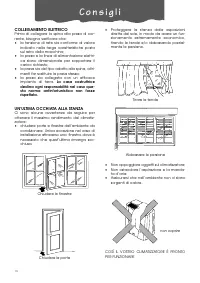
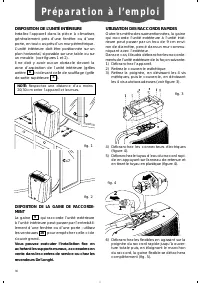
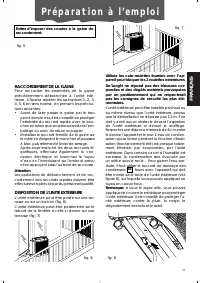
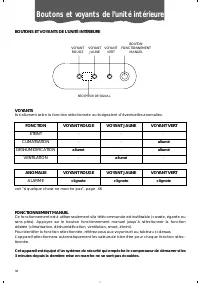
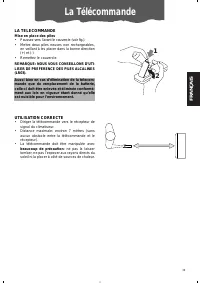
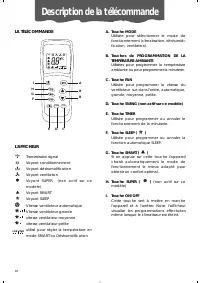
8 P r e d i s p o s i z i o n e a l l ’ u s o NOTA: La distanza dell’apparecchio dalle pareti deve essere di almeno 20/30 cm. DISPOSIZIONE DELL’UNITA’ INTERNA Installare l’apparecchio all’interno del localeda condizionare. In genere vicino una finestrao una porta. In ogni caso vicino ad una pare-te ...
Page 8 - Pulsanti ed indicatori
10 PULSANTI ED INDICATORI DELL’UNITÀ INTERNA PULSANTE FUNZIONAMENTO MANUALE SPIA ROSSA RICEVITORE DI SEGNALE SPIE LUMINOSE Si accendono a seconda della funzione selezionata o segnalano eventuali anomalie. ANOMALIA SPIA ROSSA SPIA GIALLA SPIA VERDE ALLARME lampeggia lampeggia lampeggia FUNZIONE SPIA ...
Page 9 - Il telecomando
IT ALIANO 11 Il telecomando IL TELECOMANDO Inserimento batterie • Rimuovere il coperchio di protezione (vedifigura). • Inserire due batterie nuove del tipo nonricaricabili, facendo attenzione a posizio-narle nel verso giusto (+) e (-). • Reinserire il coperchio. Nota: Vi consigliamo l’utilizzo di ba...
Page 10 - Descrizione del telecomando
12 Descrizione del telecomando IL TELECOMANDO A E D C B B I H G F SWING FAN IL DISPLAY Trasmissione segnale Indicatore Condizionamento Indicatore Deumidifica Indicatore Ventilazione Indicatore SUPER (non attivo in questo modello) Indicatore SMART Indicatore SLEEP Velocità ventilatore automatica Velo...
Page 11 - Le funzioni
13 Le funzioni IT ALIANO 24 FUNZIONE CONDIZIONAMENTO • Innanzitutto premere il tasto per l’accensione. • Un beep segnalerà l’avvio del condizionatore e sul display lam-peggerà il simbolo . • Poi premere più volte il tasto MODE, finché apparirà sul display ilsimbolo condizionamento . • A questo punto...
Page 14 - C o n s i g l i
16 C o n s i g l i COLLEGAMENTO ELETTRICO Prima di collegare la spina alla presa di cor-rente, bisogna verificare che:• la tensione di rete sia conforme al valoreindicato nella targa caratteristiche postasul retro della macchina; • la presa e la linea di alimentazione elettri-ca siano dimensionate p...
Page 15 - P u l i z i a
IT ALIANO 17 Prima di ogni operazione di pulizia o di manu-tenzione, spegnete l’apparecchio premendoil tasto “OFF” sul telecomando e staccatesempre la spina dalla presa di corrente. PULIZIA Vi suggeriamo di pulire l’apparecchio con unpanno che sia soltanto inumidito ed asciuga-re con un panno asciut...
Page 16 - Se qualcosa non funziona...
18 Se qualcosa non funziona… SE QUALCOSA NON FUNZIONA Se qualcosa non funziona, a volte si tratta di piccoli problemi che voi stessi potrete facilmente risolve-re. Verificare quindi con attenzione queste brevi indicazioni prima di rivolgervi al Centro di AssistenzaTecnica Autorizzato che opera nella...
Page 17 - Garanzia/caratteristiche tecniche
IT ALIANO 19 Garanzia/caratteristiche tecniche GARANZIA E ASSISTENZA TECNICA Condizioni di garanzia e assistenza tecnica sono riportate sul certificato medesimo corre- dato al vostro apparecchio. CONDIZIONI LIMITE DI FUNZIONAMENTO Temperatura nella stanza 21 ÷ 32°C Temperatura esterna 21 ÷ 43°C CARA...
Page 18 - W a r n i n g s
20 W a r n i n g s • This appliance is designed for home air conditioning and must not be used for other purposes. • It is dangerous to modify or alter the characteristics of the appliance in any way. • The appliance must be installed in conformity with legislation in force in the country concer- ne...
Page 19 - ENGLISH; What are the Pinguino and SuperPinguino?
21 ENGLISH D uring the summer, you feel comfortable at a temperature of between 24 and 27°C with a relative humidity of about 50%. An air conditioning unit removes excess moisture and heat from the room where it is located. Compared with installed models, portable air conditioning units have the adv...
Page 20 - P r e p a r i n g f o r u s e
22 P r e p a r i n g f o r u s e NOTE: The appliance must be positioned at least 20/30cm from any walls. POSITIONING THE INDOOR UNIT Install the appliance inside the room being air-conditioned. In general, near a window or door. In any case, near a perimeter wall. The indoor unit must be positioned ...
Page 22 - Buttons and indicators on the indoor unit
24 BUTTONS AND INDICATORS ON THE INDOOR UNIT MANUAL OPERATION BUTTON RED LIGHT SIGNAL RECEIVER INDICATOR LIGHTS These turn on according to the function selected or indicate any operating anomalies. ANOMALY RED LIGHT YELLOW LIGHT GREEN LIGHT ALARM flashing flashing flashing FUNCTION RED LIGHT YELLOW ...
Page 23 - The remote control
25 ENGLISH The remote control REMOTE CONTROL Inserting the batteries • Slide the cover as shown in figure. • Insert two new batteries (not rechargeable)making sure the (+) and (-) are in the correctpositions. • Put the cover back on. Note: WE SUGGEST USING ALKALINE BAT- TERIES (LR03). If the remote ...
Page 24 - Description of the remote control
26 Description of the remote control THE REMOTE CONTROL A. MODE button Selects the operating mode (air conditio-ning, dehumidifying, fan). B. ROOM TEMPERATURE buttons Set room temperature or programme thetimer. C. FAN button Sets fan speed to automatic, high,medium or low in sequence. D. SWING butto...
Page 25 - Functions
27 ENGLISH Functions AIR-CONDITIONING MODE • Press the button to turn the appliance on. • A beep indicates that the air-conditioning unit is on and the symbol flashes on the display • Press the MODE button a number of times until the air-conditioningsymbol appears on the display. • Now set the tempe...
Page 28 - T i p s
30 T i p s ELECTRICAL CONNECTIONS Before plugging the appliance into the mainssocket, check that:• the mains power supply corresponds tothe value indicated on the rating plate onthe rear of the appliance; • the mains socket and electrical circuit areadequate for the load; • the mains socket matches ...
Page 29 - C l e a n i n g
31 ENGLISH Before cleaning or maintenance, turn theappliance off by pressing the “OFF” button onthe remote control ON/OFF and alwaysunplug the appliance from the mains socket. CLEANING You should clean the appliance with a slightlydamp cloth then dry with a dry cloth. Forsafety reasons, never wash t...
Page 30 - Troubleshooting
32 Troubleshooting TROUBLESHOOTING If something is not working, the problem may at times be simple to resolve.Carefully check these brief instructions before contact your local Authorised Service Centre. PROBLEM CAUSE REMEDY The air-conditionerdoesn’t work • no electricity • it is not plugged into t...
Page 31 - Warranty/technical specifications
33 ENGLISH Warranty/technical specifications WARRANTY AND TECHNICAL SERVICE The conditions of the warranty and technical service are provided on the certificate sup- plied with your appliance. LIMIT CONDITIONS Temperature in the room 21 ÷ 32°C Outside temperature 21 ÷ 43°C TECHNICAL SPECIFICATIONS P...
Page 32 - A v e r t i s s e m e n t s
34 A v e r t i s s e m e n t s • Cet appareil a été conçu pour la climatisation des locaux domestiques et ne doit pas être destiné à d'autres usages. Il est dangereux de modifier ou d’altérer d’une quelconque façon les caractéristiques de l'ap- pareil. • L'appareil doit être installé selon les norme...
Page 33 - FRANÇAIS; Les climatiseurs Pinguino et SuperPinguino
35 FRANÇAIS P endant les mois d’été, les conditions de bien-être sont atteintes avec une température com- prise entre 24°C et 27°C et avec une humidité relative d’environ 50%. Le climatiseur est un appareil qui prélève l’humidité et la chaleur de la pièce dans laquelle il est placé. Par rapport aux ...
Page 34 - P r é p a r a t i o n à l ’ e m p l o i
36 P r é p a r a t i o n à l ’ e m p l o i NOTE: Respectez une distance d’au moins 20/30 cm entre l’appareil et les murs. DISPOSITION DE L’UNITÉ INTÉRIEURE Installez l’appareil dans la pièce à climatiser,généralement près d’une fenêtre ou d’uneporte, en tout cas près d’un mur périmétrique. L’unité i...
Page 36 - Boutons et voyants de l’unité intérieure
38 BOUTONS ET VOYANTS DE L’UNITÉ INTÉRIEURE BOUTON FONCTIONNEMENT MANUEL VOYANT ROUGE RÉCEPTEUR DE SIGNAL VOYANTS Ils s’allument selon la fonction sélectionnée ou ils signalent d’éventuelles anomalies. ANOMALIE VOYANT ROUGE VOYANT JAUNE VOYANT VERT ALARME clignote clignote clignote FONCTION VOYANT R...
Page 37 - La Télécommande
39 FRANÇAIS La Télécommande 1 2 LA TELECOMMANDE Mise en place des piles• Poussez vers l’avant le couvercle (voir fig.). • Mettre deux piles neuves non rechargeables,en veillant à les placer dans la bonne direction(+) et (-) • Remettez le couvercle. REMARQUE: NOUS VOUS CONSEILLONS D’UTI-LISER DE PREF...
Page 38 - Description de la télécommande
40 Description de la télécommande LA TÉLÉCOMMANDE A. Touche MODE Utilisée pour sélectionner le mode defonctionnement (climatisation, déshumidi-fication, ventilation). B. Touches de PROGRAMMATION DE LA TEMPÉRATURE AMBIANTE Utilisées pour programmer la températureambiante ou pour programmer la minuter...
Page 39 - Les fonctions
Les fonctions 41 FRANÇAIS FONCTION CLIMATISATION • Appuyer sur la touche pour mettre l'appareil en marche. • un bip signale la mise en marche du climatiseur et le symbole clignote sur l'afficheur. • appuyer ensuite à plusieurs reprises sur la touche MODE, jusqu'à ceque le symbole climatisation s'aff...
Page 42 - C o n s e i l s
44 C o n s e i l s RACCORDEMENT ÉLECTRIQUE Avant de brancher la fiche sur la prise de cou-rant, vérifiez si:• la tension du secteur correspond à celleindiquée sur la plaque signalétique au dosde l’appareil ; • la prise et la ligne d'alimentation électri-que peuvent supporter la charge requise ; • la...
Page 43 - N e t t o y a g e
45 FRANÇAIS Avant toute opération de nettoyage ou d'en-tretien, arrêtez toujours l’appareil enappuyant sur la touche « OFF » de la télé-commande et débranchez-le. NETTOYAGE Nous vous conseillons de nettoyer l'appareilavec un simple chiffon humide et de l’essuyeravec un chiffon sec. Pour des raisons ...
Page 45 - Garantie/Caractéristiques techniques
47 FRANÇAIS Garantie/Caractéristiques techniques GARANTIE ET ASSISTANCE TECHNIQUE Les conditions de garantie et d’assistance technique sont indiquées sur le certificat qui accompagne votre appareil. CONDITIONS DE FONCTIONNEMENTCONSEILLÉES Température dans la pièce 21 ÷ 32°C Température extérieure 21...
Page 46 - H i n w e i s e
48 H i n w e i s e • Dieses Gerät wurde ausschließlich als Haushaltsgerät zum Kühlen von Wohnräumen entwickelt und dar f nicht zweckentfremdet eingesetzt werden. • Eingriffe oder Änderungen, die die Betriebseigenschaften des Gerätes verändern, stellen eine Gefahrenquelle dar. • Das Gerät ist gemäß d...
Page 47 - Eigenschaften der Klimageräte
DEUT SCH 49 Eigenschaften der Klimageräte Pinguino und SuperPinguino I m Sommer wird das Wohlbefinden bei einer Temperatur zwischen 24 und 27°C und einer relati- ven Feuchte von etwa 50 % erreicht. Das Klimagerät ist eine Maschine, die dem Raum, in dem sie aufgestellt ist, Feuchtigkeit und Wärme ent...
Page 48 - Vorbereitung für den Gebrauch
50 Vorbereitung für den Gebrauch NOTA: Das Gerät muss in einem Abstand von mindestens 20/30 cm zu den Wänden aufge-stellt werden. AUFSTELLUNG DER INNENEINHEIT Installieren Sie das Gerät in dem zu kühlenden Raum, und zwar möglichst in der Nähe eines Fenster oder einer Tür, und auf jeden Fall an einer...
Page 50 - Tasten und anzeigen
52 TASTEN UND ANZEIGEN DER INNENEINHEIT ROTE KONTROLLANZEIGE SIGNALEMPFÄNGER KONTROLLANZEIGEN Sie leuchten je nach der gewählten Funktion auf oder signalisieren eventuelle Störungen. STÖRUNG ROTE KONTROLLANZEIGE GELBE KONTROLLANZEIGE GRÜNE KONTROLLANZEIGE ALARM Blinkt auf Blinkt auf Blinkt auf FUNKT...
Page 51 - Die Fernbedienung
DEUT SCH Die Fernbedienung 1 2 DIE FERNBEDIENUNG Einlegen der Batterien• Schieben Sie den Deckel nach vorne (sieheAbb.) • Legen Sie zwei neue Einwegbatterien ein,und achten Sie dabei auf die korrekte Einlege-richtung (+) und (-). • Bringen Sie den Deckel wieder an. HINWEIS: WIR EMPFEHLEN IHNEN DENGE...
Page 52 - Beschreibung der Fernbedienung
54 Beschreibung der Fernbedienung DIE FERNBEDIENUNG DAS DISPLAY Signalübertragung Anzeige Kühlung Anzeige Entfeuchten Anzeige Belüftung Anzeige SUPER (in diesem Modell nicht verfügbar) Anzeige SMART Anzeige SLEEP Automatische Gebläsegeschwin- digkeit Hohe Gebläsegeschwindigkeit Mittlere Gebläsegesch...
Page 53 - Die Betriebsarten
DEUT SCH 55 Die Betriebsarten 24 KÜHLBETRIEB • Drücken Sie zunächst die Taste , um das Gerät einzuschalten. • Ein Piepston wird den Start des Klimagerätes anzeigen und auf demDisplay blinkt das Symbol auf. • Dann mehrmals die Taste MODE betätigen, bis auf dem Display dasSymbol Kühlung erscheint. • N...
Page 54 - Die Funktionen
56 Die Funktionen 26 FUNKTION SMART Mit der Funktion SMART stellt das Gerät sich automatisch auf die Betrieb-sart, welche Ihnen Komfortbedingungen garantiert. • Drücken Sie die Taste , um das Gerät einzuschalten. Ein Piepstonzeigt den Start des Klimagerätes an, und auf dem Display blinkt dasSymbol a...
Page 56 - R a t s c h l ä g e
58 R a t s c h l ä g e ELEKTRISCHER ANSCHLUSS Bevor Sie den Netzstecker an der Steckdoseanschließen, Folgendes überprüfen:• ob die Netzspannung mit der auf demTypenschild angegebenen Spannungübereinstimmt; das Typenschild ist auf derRückseite des Gerätes angebracht; • ob die Strombelastung der Steck...
Page 57 - R e i n i g u n g
DEUT SCH 59 Bevor Sie mit Reinigungs- bzw. Wartungsar-beiten beginnen, schalten Sie das Gerätdurch Drücken der Taste „OFF“ auf der Fern-bedienung aus und ziehen stets den Netz-stecker aus der Steckdose. REINIGUNG Wir empfehlen Ihnen das Gerät mit einemangefeuchteten Tuch zu reinigen und dana-ch mit ...
Page 59 - Garantie/Technische Eigenschaften
DEUT SCH 61 Garantie/Technische Eigenschaften GARANTIE UND TECHNISCHERKUNDENDIENST Die Garantiebedingungen und der technische Kundendienst sind auf dem Ihrem Gerät beigelegten Zertifikat aufgeführt. EINSATZGRENZEN Raumtemperatur 21 ÷ 32°C Außentemperatur 21 ÷ 43°C TECHNISCHE EIGENSCHAFTEN Anschlusss...