DeLonghi ECAM61075MB - Manuals

User Manual DeLonghi ECAM61075MB


Summary
5 1. INTRODUCTION Thank you for choosing this bean to cup espresso and cappuc-cino machine. Take a few minutes to read this Instruction for Use. This will avoid all risks and damage to the appliance. 1.1 Letters in brackets The letters in brackets refer to the legend in the description of the applia...
6 C4. Water softener filter (*certain models only) C5. Cleaning brushC6. Power cordC7. Descaling spout (keep the spout safely after each use) Accessories with certain models only: C8. Coffee pot (*certain models only)C9. Travel mug (*certain models only) 2.4 Description of the milk container" (p...
8 In the settings menu (B6), the symbol indicating the connection status alternates with the other symbols (e.g. descaling, etc.) Symbol on homepage MeaningThe appliance is connected The appliance is connected to the home Wi-Fi, but there is no network, or the cloud cannot be reached -- Connection d...
DeLonghi Coffee Machines Manuals
-
 DeLonghi CAM51025MB
User Manual
DeLonghi CAM51025MB
User Manual
-
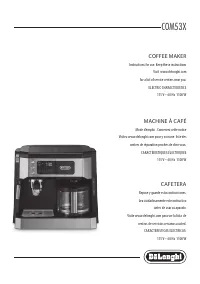 DeLonghi COM530M
User Manual
DeLonghi COM530M
User Manual
-
 DeLonghi EABI6600
User Manual
DeLonghi EABI6600
User Manual
-
DeLonghi EABI6600
Manual
-
 DeLonghi EC230
User Manual
DeLonghi EC230
User Manual
-
 DeLonghi EC260BK
User Manual
DeLonghi EC260BK
User Manual
-
 DeLonghi EC680BK
User Manual
DeLonghi EC680BK
User Manual
-
 DeLonghi EC680R
User Manual
DeLonghi EC680R
User Manual
-
 DeLonghi EC685BK
User Manual
DeLonghi EC685BK
User Manual
-
 DeLonghi EC685M
User Manual
DeLonghi EC685M
User Manual
-
 DeLonghi EC685R
User Manual
DeLonghi EC685R
User Manual
-
 DeLonghi EC685W
User Manual
DeLonghi EC685W
User Manual
-
 DeLonghi EC785AZ
User Manual
DeLonghi EC785AZ
User Manual
-
 DeLonghi EC860M
User Manual
DeLonghi EC860M
User Manual
-
 DeLonghi EC885M
User Manual
DeLonghi EC885M
User Manual
-
 DeLonghi EC885MPK
User Manual
DeLonghi EC885MPK
User Manual
-
 DeLonghi EC9155GR
User Manual
DeLonghi EC9155GR
User Manual
-
 DeLonghi EC9155GRPKK
User Manual
DeLonghi EC9155GRPKK
User Manual
-
 DeLonghi EC9155MB
User Manual
DeLonghi EC9155MB
User Manual
-
 DeLonghi EC9155MBPK
User Manual
DeLonghi EC9155MBPK
User Manual