DeLonghi DEIND64P - Manuals
User Manual DeLonghi DEIND64P


Summary
3 IMPORTANT SAFETY PRECAUTIONS AND RECOMMENDATIONS IMPORTANT: This appliance is designed and manufactured solely for the cooking of domestic (household) food and is not suitable for any non domestic application and therefore should not be used in a commercial environment. The appliance guarantee wil...
4 • IMPORTANT: The use of suitable protective clothing/gloves is recommended when handling or cleaning this appliance. • Do not attempt to modify the technical characteristics of the appliance as this may become dangerous to use. The manufacturer declines all responsibility for any inconvenience res...
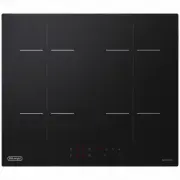
8 USE OF THE APPLIANCE, ENERGY SAVING TIPS HOB, INDUCTION COOKING ZONES AND/OR AREAS • To save electricity, use lids whenever possible. • When the pan comes to the boil, turn the heat down to the level desired. • Please use suitable pans marked for induction cooking. Some cookware available on the m...
Manual DeLonghi DEIND64P


Summary
3 IMPORTANT SAFETY PRECAUTIONS AND RECOMMENDATIONS IMPORTANT: This appliance is designed and manufactured solely for the cooking of domestic (household) food and is not suitable for any non domestic application and therefore should not be used in a commercial environment. The appliance guarantee wil...
4 • IMPORTANT: The use of suitable protective clothing/gloves is recommended when handling or cleaning this appliance. • Do not attempt to modify the technical characteristics of the appliance as this may become dangerous to use. The manufacturer declines all responsibility for any inconvenience res...
8 USE OF THE APPLIANCE, ENERGY SAVING TIPS HOB, INDUCTION COOKING ZONES AND/OR AREAS • To save electricity, use lids whenever possible. • When the pan comes to the boil, turn the heat down to the level desired. • Please use suitable pans marked for induction cooking. Some cookware available on the m...
DeLonghi Hobs Manuals
-
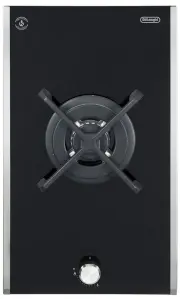
 DeLonghi DE302GB
User Manual
DeLonghi DE302GB
User Manual
-
DeLonghi DE302GB
Manual
-
 DeLonghi DE302GBX1
User Manual
DeLonghi DE302GBX1
User Manual
-
 DeLonghi DE302IB
User Manual
DeLonghi DE302IB
User Manual
-
DeLonghi DE302IB
Manual
-
 DeLonghi DE30WGB
User Manual
DeLonghi DE30WGB
User Manual
-
DeLonghi DE30WGB
Manual
-
 DeLonghi DE30WGBX1
User Manual
DeLonghi DE30WGBX1
User Manual
-
 DeLonghi DEGH60
User Manual
DeLonghi DEGH60
User Manual
-
DeLonghi DEGH60
Manual
-
 DeLonghi DEGH60BGX1
User Manual
DeLonghi DEGH60BGX1
User Manual
-
 DeLonghi DEGH60ST
User Manual
DeLonghi DEGH60ST
User Manual
-
DeLonghi DEGH60ST
Manual
-
 DeLonghi DEGH60STF
User Manual
DeLonghi DEGH60STF
User Manual
-
 DeLonghi DEGH70BGX1
User Manual
DeLonghi DEGH70BGX1
User Manual
-
 DeLonghi DEGH70W
User Manual
DeLonghi DEGH70W
User Manual
-
 DeLonghi DEGH90BGX1
User Manual
DeLonghi DEGH90BGX1
User Manual
-
 DeLonghi DEGH90STF
User Manual
DeLonghi DEGH90STF
User Manual
-
 DeLonghi DEGH90WF
User Manual
DeLonghi DEGH90WF
User Manual
-
DeLonghi DEGH90WF
Manual