Page 2 - Flowchart and Reference Guides; Viewing the PDF Manuals; Safety Precautions; Be sure to also read the safety precautions listed in the; Advanced Camera User Guide; Warnings; touch the flash portion of the camera if it has been damaged.; Caution; • Do not sit with the camera in a back pocket as it may cause the
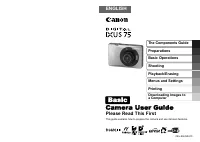
The following guides are available. Refer to them as necessary according to the flowchart below. Flowchart and Reference Guides System Map Basic Camera User Guide (This Guide) • Read this first. Advanced Camera User Guide Direct Print User Guide Basic Camera User Guide (This Guide) Software Starter ...
Page 3 - Front View; Wrist Strap Mount; The Components Guide; cde
1 Front View a Wrist Strap Mount b Microphone ( Advanced Guide pp. 41, 90, 91) c AF-assist Beam ( Advanced Guide p. 24) d Red-Eye Reduction Lamp ( Advanced Guide p. 35) e Self-Timer Lamp (p. 17) f Flash (p. 15) g Speaker h Lens The Components Guide In order to avoid dropping the camera, wear the w...
Page 4 - Back View; Advanced Guide
2 Back View a LCD Monitor ( Advanced Guide pp. 12, 15) b DIGITAL Terminal (p. 28) c A/V OUT (Audio/Video output) Terminal ( Advanced Guide p. 101) d Terminal Cover e Tripod Socket f DC Coupler Terminal Cover ( Advanced Guide p. 131) g Memory Card Slot/Battery Cover (p. 7) The interface cable and A...
Page 5 - Controls; Mode Switch; MENU; Button
3 Controls a Mode Switch (pp. 11 , 12) b ON/OFF Button (p. 11) c Zoom Lever ( p. 15 , Advanced Guide p. 76) Shooting: (Wide Angle)/ (Telephoto) Playback: (Index)/ (Magnify) d Shutter Button (p. 11) e (Print/Share) Button ( pp. 23 , 30 , Advanced Guide pp. 66, 67) f Playback Button ( pp. 10 , 19 , ...
Page 6 - Using the Touch Control Dial; Touching the Dial; the
4 Using the Touch Control Dial Touching the Dial A magnified image of the touch control dial displays on the LCD monitor when you place your finger on the dial. Circling your finger on the dial allows you to configure the functions assigned to each button. Circling Your Finger on the Dial You ca...
Page 7 - Indicator; Operable Functions; Advanced
5 The following functions can be operated using the touch control dial. Please note that some of the options for some functions cannot be operated with it. Indicator The camera indicator lights or blinks under the following circumstances. Operable Functions Reference Page Basic Advanced Shooting Sel...
Page 8 - Charging the Battery.; Preparations
6 1. Charging the Battery. Charge the battery before use under the following circumstances.• When using the battery for the first time.• When the "Change the battery pack." message displays. 1. Insert the battery into the battery charger.2. Plug the battery charger (CB-2LV) into a power outl...
Page 9 - Installing the Battery.; Push the battery lock in the direction of the arrow (; ) and hold it while pulling the battery out.; Inserting the Memory Card.
7 2. Installing the Battery. 1. Slide the memory card slot/battery cover and open it ( a , b ). 2. Push the battery lock in the direction of the arrow ( c ) and insert the battery until it locks. To remove the battery, push the battery lock in the direction of the arrow ( c ) and hold it while pulli...
Page 10 - To Remove the Memory Card; First Time Settings; Setting the Date/Time; Use the or button to select an item and the
8 To Remove the Memory Card Push the memory card with your finger or the toggle on the wrist strap until the memory card clicks and then release it. First Time Settings Setting the Date/Time 1. Press the ON/OFF button ( a ). 2. Use the or button to select an item and the or button to change its ...
Page 11 - Setting the Display Language; or button to select a language and; The display language can also be set in the Set up menu
9 Setting the Display Language 1. Press the (playback) button. 2. Hold down the FUNC./SET button and press the MENU button. 3. Use the , , or button to select a language and press the FUNC./SET button. The display language can also be set in the Set up menu (p. 22) . • A rechargeable lithium batte...
Page 12 - Turning the Camera On/Off; Press the ON/OFF button or the; button set it to the; button while turning; Using the Button; The; Basic Operations; Shooting Mode
10 Turning the Camera On/Off 1. Press the ON/OFF button or the button. The start-up sound will play and the start-up image will display in the LCD monitor. • Pressing the ON/OFF button sets the camera to the shooting mode and pressing the button set it to the playback mode. • Pressing the ON/OFF but...
Page 13 - Set the shooting mode to; Slide the mode switch to; Aim the camera at the subject.; Press the shutter button halfway to; Shooting; b d
11 1. Press the ON/OFF button. 2. Set the shooting mode to (Auto). 1. Slide the mode switch to (Rec.) ( a ). 2. Press the FUNC./SET button ( b ) and use the or button ( c ) to select (Auto). 3. Press the FUNC./SET button ( d ). 3. Aim the camera at the subject. 4. Focus and shoot. 1. Press the shutt...
Page 14 - Reviewing an Image Right After Shooting; or; Selecting a Shooting Mode; Slide the mode switch to; You can also use the touch control dial to make a selection.
12 Reviewing an Image Right After Shooting After a shot is taken, the image appears in the LCD monitor for approximately 2 seconds.You can continue to display images regardless of the review duration setting with the following procedures. • Keeping the shutter button pressed after a shot.• Pressin...
Page 15 - Shooting Modes
13 Shooting Modes AUTO Auto The camera automatically selects settings. Manual Allows you to select settings yourself, such as the exposure compensation, white balance, my colors or ISO speed. Digital Macro Allows you to shoot when the distance from the lens (at maximum wide angle) to the subject i...
Page 17 - Using the Zoom; Press the zoom lever toward; Using the Flash; ) and use the or button to
15 Using the Zoom 1. Press the zoom lever toward or . The zoom can be adjusted from 35 – 105 mm (focal length) in 35mm film equivalent terms. Using the Flash 1. Press the button ( a ) and use the or button to switch between modes ( b ). You can also use the touch control dial to make a selection. Î ...
Page 18 - button and use the or button to; Macro; Use this mode to shoot close-ups of flowers or small items.; Infinity
16 Shooting Close-Ups/Infinity Shots 1. Press the / button ( a ) and use the or button to switch between modes ( b ). • You can also use the touch control dial to make a selection.• To Cancel: press the / button and use the or button to display (Normal). Macro Use this mode to shoot close-ups of flo...
Page 20 - Changing the Delay Time and Number of Shots ( ); In the
18 Changing the Delay Time and Number of Shots ( ) 1. In the (Rec) menu, select [Self-timer] and press the FUNC./SET button. 2. Use the or button to select [Delay] or [Shots] and the or button to change the setting and press the FUNC./SET button. 3. Press the MENU button. Î See Menus and Settings ...
Page 21 - Press the; • Use the; Playback
19 1. Press the (playback) button ( a ). The last recorded image will display. If you have replayed images, the last image viewed will display (Resume Playback).If the memory card has been switched, or the images on the memory card have been edited with a computer, the newest image on the memory car...
Page 22 - Erasing
20 1. In the playback mode, use the or button to select an image to erase ( a ) and press the button ( b ). You can also use the touch control dial to make a selection. 2. Confirm that [Erase] is selected and press the FUNC./SET button ( c ). To exit instead of erasing, select [Cancel]. Erasing Plea...
Page 23 - Menus and Settings; This example shows the FUNC. menu in
21 Settings for the shooting or playback modes or such camera settings as the print settings, date/time and sounds are set using the FUNC. menu or the Rec., Play, Print, Set up or My Camera menu. FUNC. Menu This menu sets many of the common shooting functions. a Slide the mode switch to , or . b Pre...
Page 25 - Printing
23 You can easily print by connecting the camera to a direct print compatible printer *1 with a cable and simply pressing the button on the camera. 1. Connect the camera to a direct print compatible printer and turn on the printer's power. *1 Since this camera uses a standard protocol (PictBridge), ...
Page 27 - Downloading Images to a Computer; Supplied Software
25 The following methods can be used to download images recorded by the camera to a computer. Some methods, depending on the OS used, may not be available. Please read System Requirements (p. 26) in advance. Camera to Computer Connection Using a Memory Card Reader A memory card reader can be use...
Page 28 - System Requirements; Windows
26 System Requirements Please install the software on a computer meeting the following minimum requirements. Windows Macintosh OS Windows 2000 Service Pack 4 Windows XP (including Service Pack 1 and Service Pack 2) Windows Vista Computer Model The above OS should be pre-installed on computers wi...
Page 29 - Preparing to Download Images; Items to Prepare; Install the software.; Place the Canon Digital Camera Solution Disk in the
27 Preparing to Download Images Items to Prepare • Camera and computer• Canon Digital Camera Solution Disk supplied with the camera• Interface cable supplied with the camera 1. Install the software. 1. Place the Canon Digital Camera Solution Disk in the computer's CD-ROM drive. 2. Click [Easy Inst...
Page 30 - Connecting the camera to a computer.; Connect the supplied interface cable to the computer's USB; If the Digital Signature Not Found window appears,
28 2. Connecting the camera to a computer. 1. Connect the supplied interface cable to the computer's USB port and to the camera's DIGITAL terminal. Use the toggle on the wrist strap or slip a fingernail under the edge of the camera's DIGITAL terminal cover, lift up and plug the interface cable in al...
Page 32 - All Images; Transfers and saves all images to the computer.; New Images; Transfers and saves to the computer only the
30 Downloading Images to a Computer The following window will appear when you establish a connection between the camera and computer. If it fails to appear, click the [Canon CameraWindow] icon on the Dock (the bar which appears at the bottom of the desktop). 1. Download the images. • Download the im...
Page 33 - Wallpaper
31 1. Confirm that the Direct Transfer menu is displayed on the camera's LCD monitor. • The button will light blue. • Press the MENU button if the Direct Transfer menu fails to appear. All Images/New Images/DPOF Trans. Images 2. Select , or and press the button. • The images will download. The but...