Canon 130U- Manuals
Canon 130U– User Manual, Manual in PDF format online.
Manuals:
User Manual Canon 130U


Summary
Handling Precautions 1. This camera is not resistant to water, and should not be used outdoors if it is raining or snowing. If it is accidentally dropped in water, contact an authorized Canon service facility Keep the camera out of salt spray and excessive humidity. If used at the beach, clean it th...
Thank you for purchasing this Canon product. Before taking pictures, please read these instructions carefully for a thorough understanding of how the camera operates. Contents Handling Precautions.. ............. ........... ..,.,....2 Contents................ ...»......................................
Nomenclature ® Shutter button (^14) Ci)| Self-timer/Remote control GBZEm button (^20, 20, 29) AF' sensor/Metering window LCD panel (-^8. 9) Viewfinder window [MODE! Mode button (—>32, 34) cfiiUbi» Flash mode button (->22, 28, 32-34) Flash Back cover release leverPress this lever down to open t...
Manual Canon 130U


Canon Manuals
-
 Canon 6130280
User Manual
Canon 6130280
User Manual
-
 Canon imageCLASS MF284dw
User Manual
Canon imageCLASS MF284dw
User Manual
-
Canon imageCLASS MF289dw
User Manual
-
 Canon imageCLASS LBP172dw
User Manual
Canon imageCLASS LBP172dw
User Manual
-
 Canon 250
User Manual
Canon 250
User Manual
-
 Canon 251
User Manual
Canon 251
User Manual
-
Canon 251
Manual
-
Canon 251
Troubleshooting Guide
-
 Canon K10608
User Manual
Canon K10608
User Manual
-
 Canon imageRUNNER C3326i
User Manual
Canon imageRUNNER C3326i
User Manual
-
 Canon imageCLASS MF465dw
User Manual
Canon imageCLASS MF465dw
User Manual
-
 Canon K10617
User Manual
Canon K10617
User Manual
-
 Canon imageCLASS LBP247dw
User Manual
Canon imageCLASS LBP247dw
User Manual
-
 Canon K10595
User Manual
Canon K10595
User Manual
-
 Canon imageRUNNER ADVANCE DX 6980I
User Manual
Canon imageRUNNER ADVANCE DX 6980I
User Manual
-
 Canon imageRUNNER ADVANCE DX 4945i
User Manual
Canon imageRUNNER ADVANCE DX 4945i
User Manual
-
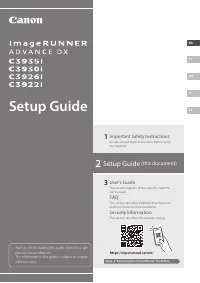
 Canon imageRUNNER ADVANCE DX C3926i
User Manual
Canon imageRUNNER ADVANCE DX C3926i
User Manual
-
Canon imageRUNNER ADVANCE DX C3930i
User Manual
-
 Canon imageRUNNER ADVANCE DX C3935i
User Manual
Canon imageRUNNER ADVANCE DX C3935i
User Manual
-
 Canon imageCLASS MF275dw
User Manual
Canon imageCLASS MF275dw
User Manual