Canon 10 - Manuals
Canon 10 – Manual in PDF format online.
Manuals:
Manual Canon 10


Summary
2 Contents Safety Precautions .................................................................................... 4 Read This First .......................................................................................... 5 About the Manuals ...........................................................
4 Safety Precautions The precautions noted within this guide are intended to instruct you in the safe and correct use of the products and to prevent injuries or damage to yourself, other persons and property. Please read and ensure that you understand them before proceeding to other sections of the ...
5 Read This First About the Manuals This user guide describes how to connect the printer to a computer and print images. CP-100 or CP-10 User Guide Provides printer handling notes, safety precautions, printer preparation, names of parts and other information necessary for operating the printer. Plea...
Canon Manuals
-
 Canon 6130280
User Manual
Canon 6130280
User Manual
-
 Canon imageCLASS MF284dw
User Manual
Canon imageCLASS MF284dw
User Manual
-
Canon imageCLASS MF289dw
User Manual
-
 Canon imageCLASS LBP172dw
User Manual
Canon imageCLASS LBP172dw
User Manual
-
 Canon 250
User Manual
Canon 250
User Manual
-
 Canon 251
User Manual
Canon 251
User Manual
-
Canon 251
Manual
-
Canon 251
Troubleshooting Guide
-
 Canon K10608
User Manual
Canon K10608
User Manual
-
 Canon imageRUNNER C3326i
User Manual
Canon imageRUNNER C3326i
User Manual
-
 Canon imageCLASS MF465dw
User Manual
Canon imageCLASS MF465dw
User Manual
-
 Canon K10617
User Manual
Canon K10617
User Manual
-
 Canon imageCLASS LBP247dw
User Manual
Canon imageCLASS LBP247dw
User Manual
-
 Canon K10595
User Manual
Canon K10595
User Manual
-
 Canon imageRUNNER ADVANCE DX 6980I
User Manual
Canon imageRUNNER ADVANCE DX 6980I
User Manual
-
 Canon imageRUNNER ADVANCE DX 4945i
User Manual
Canon imageRUNNER ADVANCE DX 4945i
User Manual
-
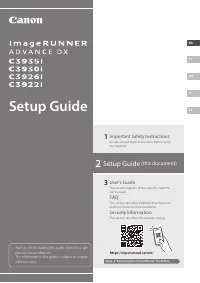
 Canon imageRUNNER ADVANCE DX C3926i
User Manual
Canon imageRUNNER ADVANCE DX C3926i
User Manual
-
Canon imageRUNNER ADVANCE DX C3930i
User Manual
-
 Canon imageRUNNER ADVANCE DX C3935i
User Manual
Canon imageRUNNER ADVANCE DX C3935i
User Manual
-
 Canon imageCLASS MF275dw
User Manual
Canon imageCLASS MF275dw
User Manual