Breville BTA830CB - Manuals
User Manual Breville BTA830CB


Summary
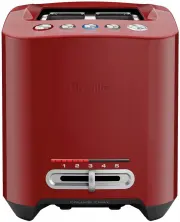
3 CONGRATULATIONS on the purchase of your new Breville Smart Toast ™ CONTENTS 4 Breville recommends safety first 8 Know your Breville Smart Toast™ 10 Operating your Breville Smart Toast™ 18 Care, cleaning & storage of your Breville Smart Toast™
4 5 • The bread may burn, therefore do not use the toaster near or below combustible material, such as curtains or other combustible material and this toaster must be supervised at all times when in use. IMPORTANT SAFEGUARDS FOR ALL ELECTRICAL APPLIANCES • The temperature of accessible surfaces may ...
6 7 BREvILLE RECOMMENDS SAFETy FIRST • Keep the appliance and its cord out of reach of children less than 8 years. • The temperature of accessible surfaces may be high when the appliance is operating. • Appliances are not intended to be operated by means of an external timer or separate remote- cont...
Breville Toasters Manuals
-
 Breville BOV450XL
User Manual
Breville BOV450XL
User Manual
-
Breville BOV450XL
Manual
-
 Breville BOV650XL
User Manual
Breville BOV650XL
User Manual
-
Breville BOV650XL
Manual
-
 Breville BOV800XL
User Manual
Breville BOV800XL
User Manual
-
Breville BOV800XL
Manual
-
 Breville BOV860BSS1BUS1
User Manual
Breville BOV860BSS1BUS1
User Manual
-
 Breville BOV950BSS1BUS1
User Manual
Breville BOV950BSS1BUS1
User Manual
-
Breville BOV950BST1BUS1
User Manual
-
 Breville BTA320
User Manual
Breville BTA320
User Manual
-
 Breville BTA360CRN
User Manual
Breville BTA360CRN
User Manual
-
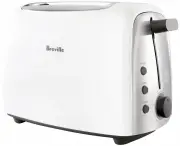
 Breville BTA380WHT
User Manual
Breville BTA380WHT
User Manual
-
 Breville BTA425BKS
User Manual
Breville BTA425BKS
User Manual
-
 Breville BTA430
User Manual
Breville BTA430
User Manual
-
Breville BTA430
Manual
-
 Breville BTA430BKS
User Manual
Breville BTA430BKS
User Manual
-
 Breville BTA430CB
User Manual
Breville BTA430CB
User Manual
-
 Breville BTA430PSS
User Manual
Breville BTA430PSS
User Manual
-
 Breville BTA440BSS
User Manual
Breville BTA440BSS
User Manual
-
 Breville BTA630XL
User Manual
Breville BTA630XL
User Manual