Page 2 - the Mini Smart Oven; Instruction Book - Livret d’instructions
BOV450XL the Mini Smart Oven ™ Instruction Book - Livret d’instructions
Page 3 - CONGRATULATIONS; On the purchase of your new; Register online for product support
CONGRATULATIONS On the purchase of your new Breville Mini Smart Oven ™ * Registering is not a substitute for proof of purchase when submitting a Warranty Claim. USA Consumers: www.brevilleusa.com Canadian Consumers: www.breville.ca Register online for product support and exclusive offers. *
Page 4 - CONTENTS
3 CONTENTS 4 Breville recommends safety fi rst 7 Know your Breville Mini Smart Oven ™ 10 Quick Start Guide 14 Before fi rst use - Preparing the oven for use- A note on cooking times- A note on rack height positions- A note on STANDBY mode- A note on optional settings 22 Operating your Breville Mini Sm...
Page 5 - BREVILLE RECOMMENDS SAFETY FIRST; READ ALL INSTRUCTIONS; IMPORTANT SAFEGUARDS
4 BREVILLE RECOMMENDS SAFETY FIRST READ ALL INSTRUCTIONS • Remove and safely discard any packing materials and promotional labels before using the oven for the fi rst time. • To eliminate a choking hazard for young children, remove and safely discard the protective cover fi tted to the power plug of t...
Page 8 - KNOW; your Breville Mini Smart Oven
Page 9 - KNOW YOUR BREVILLE MINI SMART OVENTM; IMPORTANT; NOTE
8 KNOW YOUR BREVILLE MINI SMART OVEN™ A. 10” x 10” enamel baking pan B. Door handle C. Ribbed plate warming tray IMPORTANT The outer surface of the oven, including the oven door, is hot during and after operation. Always use protective hot pads or insulated oven mitts when inserting, removing or han...
Page 10 - Temperature conversion button; OPTIONAL EXTRA
9 START CANCEL A BIT MORE TIME SLICES TEMP DARKNESS Pizza Reheat Bagel Cookies Toast Bake Broil Roast KNOW YOUR BREVILLE MINI SMART OVEN™ P. Temperature conversion button Q. Frozen foods button R. A Bit More™ button IMPORTANT Do not touch hot surfaces. The outer surface of the oven, including the ov...
Page 11 - FUNCTION DIAL; ROTATE; Quick Start Guide
10 PREPARING THE OVEN (A ONE-TIME PROCESS) In order to remove any protective substances on the heating elements, it is necessary to run the oven empty for 15 minutes. Ensure the area is well ventilated as the oven may emit vapors. These are normal and not detrimental to the performance of the oven. ...
Page 12 - QUICK START GUIDE
11 QUICK START GUIDE OPERATING YOUR BREVILLE MINI SMART OVEN™ The Breville Mini Smart Oven™ features Element IQ™ - a cooking technology that regulates the heating elements to cook food more evenly and quickly. Each of the oven’s functions are preset with our recommended settings, however we suggest ...
Page 13 - OVEN FUNCTIONS
12 QUICK START GUIDE NOTE The cooking cycle can be stopped at any time by pressing the START/CANCEL button. This will cancel the cycle, the button surround illumination will go out and the LCD will illuminate blue. OVEN FUNCTIONS TOAST FUNCTION: Evenly toasts bread so it’s crisp and crunchy on the o...
Page 15 - BEFORE FIRST USE; of your Breville Mini Smart Oven
BEFORE FIRST USE of your Breville Mini Smart Oven ™
Page 17 - A NOTE ON COOKING TIMES; Broil; Bake
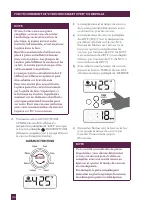
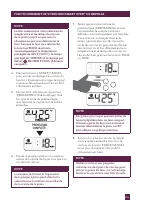
16 BEFORE FIRST USE 8. Press the START/CANCEL button to activate this setting. The oven alert will sound, the button surround will illuminate red and the LCD will illuminate orange. 9. The LCD screen will indicate a blinking ‘PREHEATING’. Once the preheating cycle has completed, the temperature aler...
Page 18 - A NOTE ON RACK HEIGHT POSITIONS
17 BEFORE FIRST USE It is normal to notice the following occur during the cooking cycle: • It is normal that during the broil function, the bottom set of elements turn off while the top set is heating at full power. • It is normal that the ends of each heating element will glow more brightly than th...
Page 19 - A NOTE ON STANDBY MODE; Temperature Conversion Button
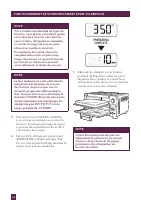
18 BEFORE FIRST USE START CANCEL A BIT MORE TIME SLICES TEMP DARKNESS Pizza Reheat Bagel Cookies Toast Bake Broil Roast Bagel Cookies Toast Pizza Bake Reheat Roast Broil Top rack height position: BROIL function. Middle rack height position: TOAST, BAGEL, PIZZA, and COOKIE functions. Bottom rack heig...
Page 23 - OPERATING
Page 24 - Elements; Optional Settings
23 OPERATING YOUR BREVILLE MINI SMART OVEN™ TOAST FUNCTION Elements Top and bottom heating elements cycle on and off to regulate the correct temperature. Rack Position Middle rack height position. Optional Settings FROZEN FOODS button. The TOAST function browns and crisps the outside of your bread w...
Page 25 - OPERATING YOUR BREVILLE MINI SMART OVENTM; DESIRED TOAST COLOR
24 OPERATING YOUR BREVILLE MINI SMART OVEN™ As a general guide: DESIRED TOAST COLOR SETTING Light color toastMedium color toastDark color toast 1 or 23, 4 or 56 or 7 When using the TOAST function for the fi rst time, we recommend toasting on the preset browning setting ‘4’ so you can adjust the brown...
Page 26 - BAGEL FUNCTION
25 OPERATING YOUR BREVILLE MINI SMART OVEN™ 7. At the end of the toasting cycle, the oven alert will sound three times, the START/CANCEL button surround will no longer illuminate red and the LCD will be illuminated blue. 8. If the toast cycle has fi nished and you would prefer your toast to be toaste...
Page 29 - BAKE FUNCTION
28 NOTE For safety reasons the oven is limited to a maximum of 10 minutes continuous toasting. Time that has already elapsed during the cycle is included. If the oven does not allow you to input extra time it is because the maximum continuous time has been reached. Allow the oven to cool before rest...
Page 32 - ROAST FUNCTION
31 ROAST FUNCTION Elements Top and bottom heating elements cycle on and off to regulate the correct temperature. Rack Position Bottom rack height position. Optional Settings TEMPERATURE CONVERSION button. The ROAST function is ideal for cooking a variety of meats and poultry that are tender and juic...
Page 35 - BROIL FUNCTION
34 BROIL FUNCTION Elements Top heating elements cycle on and off to provide intense top heat. Bottom heating elements remain on low. Rack Position Top rack height position. Optional Settings TEMPERATURE CONVERSION button. The BROIL function is ideal for open sandwiches, small cuts of meat, poultr y,...
Page 38 - PIZZA FUNCTION
37 PIZZA FUNCTION Elements Top and bottom heating elements cycle on and off to regulate the correct temperature. Rack Position Middle rack height position. Optional Settings FROZEN FOODS button. TEMPERATURE CONVERSION button. The PIZZA function melts and browns cheese and toppings, while crisping th...
Page 42 - COOKIE FUNCTION
41 COOKIE FUNCTION Elements Top and bottom heating elements cycle on and off to regulate the correct temperature. Rack Position Middle rack height position. Optional Settings FROZEN FOODS button. TEMPERATURE CONVERSION button. The COOKIE function is ideal for baking homemade or commercially prepared...
Page 44 - REHEAT FUNCTION
43 10. If the cookie cycle has fi nished and you would prefer your food to be cooked slightly more, press the A BIT MORE™ button for an additional 2 minutes. If the oven has not fi nished the cycle, 2 minutes will be added to the existing time remaining. If the oven has fi nished the cycle, pressing th...
Page 48 - USING THE PLATE WARMING TRAY
47 USING THE PLATE WARMING TRAY The top of the oven is very hot during and after operation. Do not store any item on top of the oven when in operation. The only exceptions is one layer of ceramic plates for warming. IMPORTANT The use of any accessory attachments not recommended by Breville may cause...
Page 50 - CARE & CLEANING YOUR BREVILLE MINI SMART OVENTM; Cleaning the interior; Cleaning the crumb tray
49 CARE & CLEANING YOUR BREVILLE MINI SMART OVEN™ Ensure the oven is turned OFF by pressing the START/CANCEL button on the control panel. The oven is OFF when the button surround illumination is no longer red and the LCD is illuminated blue. Remove the power plug from the power outlet. Allow the...
Page 51 - Cleaning the wire rack and baking pan
50 CARE & CLEANING YOUR BREVILLE MINI SMART OVEN™ Cleaning the wire rack and baking pan 1. Wash all accessories in warm soapy water with a soft sponge or soft plastic scouring pad. Rinse and dry thoroughly. 2. To extend the life of your accessories, we do not recommend that these be placed in th...
Page 53 - HELPFUL TIPS; for your Breville Mini Smart Oven
52 HELPFUL TIPS for your Breville Mini Smart Oven ™
Page 54 - HELPFUL TIPS FOR YOUR BREVILLE MINI SMART OVENTM
53 HELPFUL TIPS FOR YOUR BREVILLE MINI SMART OVEN™ • For questions regarding the use of oven safe and specialty bakeware in compact ovens, please contact the bakeware manufacturer directly. • Caution should be exercised when using pans and dishes constructed of materials other than metal. If using c...
Page 55 - TROUBLESHOOTING
Page 56 - PROBLEM
55 TROUBLESHOOTING PROBLEM EASY SOLUTION Oven will not switch “ON” • Check that the power plug is securely inserted into the power outlet • Insert the power plug into an independent power outlet • Insert the power plug into a different outlet • Reset the household circuit breaker if necessary I woul...
Page 59 - RECIPES
Page 60 - INGREDIENTS
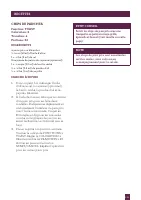
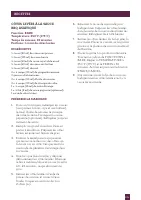
59 RECIPES PITA CHIPS Function: TOASTDarkness: 6Slices: 4Yield: 32 Chips INGREDIENTS 4 whole wheat pita pockets¼ cup olive oil1 teaspoon saltpinch cayenne pepper (optional)1 tablespoon dried basil½ teaspoon garlic powder¼ teaspoon paprika METHOD 1. In a small bowl, combine olive oil, salt, cayenne (...
Page 61 - The Dip
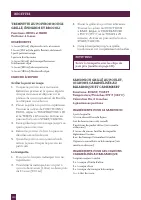
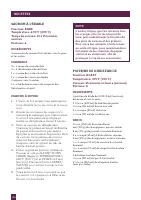
60 RECIPES ROASTED RED BELL PEPPER, SPINACH AND BROCCOLI DIP Function: BROIL AND BAKEYield: 4 cups INGREDIENTS ¼ cup cooked spinach, excess water removed 1 cup cooked bite-sized broccoli fl orets1 red bell pepper 1 garlic clove, crushed¼ cup freshly grated Parmesan cheese¾ cup mayonnaise¾ cup shredde...
Page 62 - ROASTING THE CHICKEN BREASTS
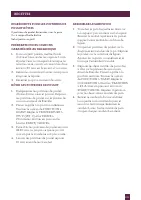
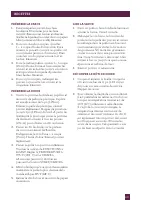
61 RECIPES MAKING BALSAMIC CARAMELIZED ONIONS 1. In a small saute pan, heat the olive oil and saute the onions for 1 minute. Add water, balsamic vinegar, salt and sugar, cover and continue to cook on low heat about 20 minutes, stirring occasionally. 2. Uncover and cook to evaporate any remaining liq...
Page 65 - STUFFED TURKEY BREAST; FILLING
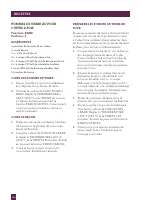
64 RECIPES MAPLE SALMON Function: BAKETemperature: 400˚ F (205˚C)Cooking Time: Approximately 13 to 15 minutes Yield: 4 servings INGREDIENTS Four 5 oz pieces of fresh salmon, skinned and boned MARINADE 3 tablespoons pure maple syrup2 teaspoons Dijon mustard1 tablespoon lemon juice1 tablespoon light s...
Page 66 - PREPARE THE STUFFING
65 RECIPES PREPARE THE STUFFING 1. Soak porcini mushrooms in hot water for 30 minutes to soften. Squeeze the porcini mushrooms, chop and set aside. Strain the liquid through a paper fi lter (a coffee fi lter). Set aside. 2. Heat 1 tablespoon olive oil in a medium sized skillet. Fry the pancetta until ...
Page 68 - Al Salmone
67 RECIPES Tre-Funghi Prepare dough as described on page 66. Cut the dough in half and stretch to fi t the enamel baking pan or optional 11” non-stick pizza pan. Spread ¼ cup tomato sauce, sautéed button, oyster and Portobello mushrooms in butter and garlic, freshly chopped rosemary and thyme. Season...
Page 70 - METHOD
69 RECIPES 6. Bake the chocolate cake until a skewer inserted into the cake comes out clean. Cool in tin for 5 minutes before removing from tin. Cool completely on a wire cake rack. 7. Meanwhile, melt the chocolate and butter in a heatproof bowl over a pan of gently simmering water until melted. 8. ...
Page 72 - NOTES
Page 73 - FÉLICITATIONS; pour l’achat de votre nouveau; de Breville; Consommateurs américains:; Inscrivez-vous en ligne pour le soutien
FÉLICITATIONS pour l’achat de votre nouveau Mini Smart Oven MC de Breville * L’e n re g is t re me n t n ’e s t pas u n sub s t i t u t à la p reu ve d ’ac hat l o r sq u e vou s sou me t t ez u ne ré c la ma t i o n d e ga r a n t i e. Consommateurs américains: www.brevilleusa.com Consommateurs can...
Page 74 - TABLE DES MATIÈRES
73 TABLE DES MATIÈRES 74 Breville vous recommande la sécurité avant tout 77 Faites la connaissance de votre Mini Smart Oven MC de Breville 80 Guide de démarrage rapide 84 Avant la première utilisation - Préparation initiale du four- Une note sur le temps de cuisson - Une note sur la position de la g...
Page 75 - BREVILLE VOUS RECOMMANDE LA SÉCURITÉ AVANT TOUT; IMPORTANTES MESURES DE SÉCURITÉ
74 BREVILLE VOUS RECOMMANDE LA SÉCURITÉ AVANT TOUT LISEZ TOUTES LES INSTRUCTIONS • Retirez et disposez de tout matériel d’emballage ou étiquettes promotionnelles avant d’utiliser le four pour la première fois. • Afi n de protéger les jeunes enfants contre les risques de suffocation, retirez et jetez ...
Page 78 - de votre Mini Smart Oven
FAITES LA CONNAISSANCE de votre Mini Smart Oven MC de Breville
Page 79 - FAITES LA CONNAISSANCE DE VOTRE MINI SMART OVEN; DE BREVILLE
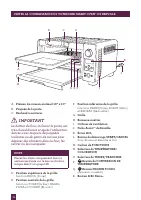
78 FAITES LA CONNAISSANCE DE VOTRE MINI SMART OVEN MC DE BREVILLE A. Plateau de cuisson en émail 10” x 10” B. Poignée de la porte C. Réchaud à nervures IMPORTANT Le boîtier du four, incluant la porte, est très chaud durant et après l’utilisation. Servez-vous toujours de poignées isolantes ou de gant...
Page 80 - ACCESSOIRES OPTIONNELS
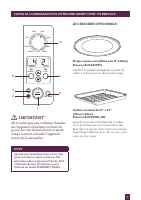
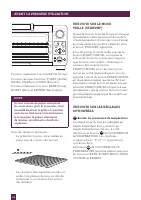
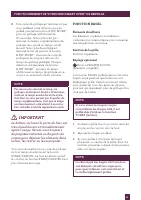
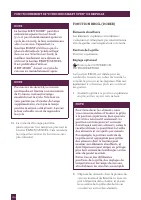
79 FAITES LA CONNAISSANCE DE VOTRE MINI SMART OVEN MC DE BREVILLE IMPORTANT Ne touchez pas aux surfaces chaudes de l’appareil. Le boîtier, incluant la porte, est très chaud durant et après usage. Laissez refroidir l’appareil avant de le manipuler. NOTE Quand vous branchez le four dans une prise mura...
Page 81 - Guide de démarrage rapide; CADRAN DE FONCTIONS
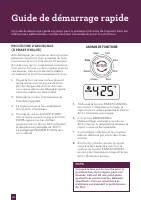
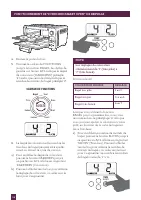
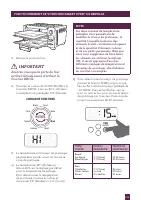
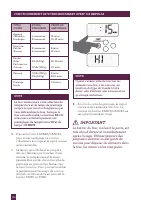
80 PROCÉDURE D’AMORÇAGE (À PHASE UNIQUE) Afi n d’éliminer les substances recouvrant les éléments chauffants, il est essentiel de faire fonctionner le four à vide durant 15 minutes. Assurez-vous qu’il y a une bonne circulation d’air autour du four, car de la vapeur pourrait s’en émaner. Cela est norma...
Page 82 - GUIDE DE DÉMARRAGE RAPIDE
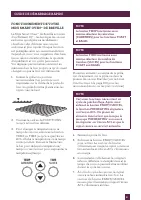
81 GUIDE DE DÉMARRAGE RAPIDE FONCTIONNEMENT DE VOTRE MINI SMART OVEN MC DE BREVILLE Le Mini Smart Oven MC de Breville est muni d’un Élément IQ MC - technologie de cuisson exclusive qui régularise les éléments chauffants afi n d’obtenir une cuisson uniforme et plus rapide. Chaque fonction est préréglé...
Page 83 - FONCTIONS DU FOUR; Position de la grille:
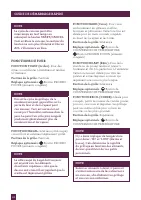
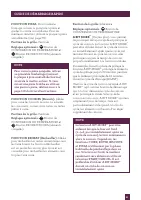
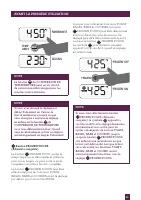
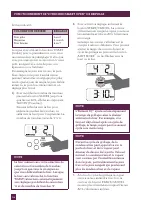
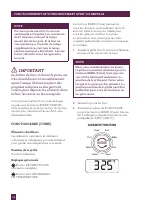
82 GUIDE DE DÉMARRAGE RAPIDE NOTE Le cycle de cuisson peut être interrompu en tout temps en enfonçant le bouton START/CANCEL. Ceci arrêtera la cuisson, le contour du bouton ne sera plus illuminé et l’écran ACL s’illuminera en bleu. FONCTIONS DU FOUR FONCTION TOAST (Griller): Pour des rôties croustil...
Page 84 - peut être
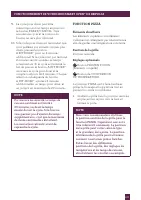
83 GUIDE DE DÉMARRAGE RAPIDE FONCTION PIZZA: Pour fondre le fromage, colorer la garniture à pizza et garder la croûte croustillante. Pour de meilleurs résultats, utilisez la plaque à pizza antiadhésive (voir page 79). Position de la grille: Centrale Réglages optionnels: Bouton de CONVERSION DE TEMPÉ...
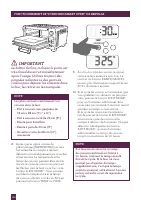
Page 87 - AVANT LA PREMIÈRE UTILISATION; Dorer
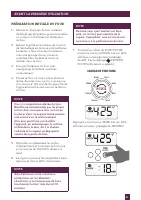
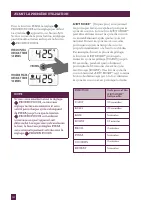
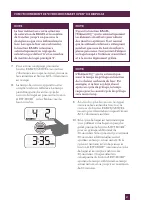
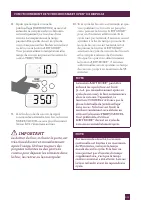
86 AVANT LA PREMIÈRE UTILISATION 8. Pressez le bouton START/CANCEL pour activer le réglage. Le signal sonore se fera entendre, le contour du bouton s’illuminera en rouge et l’écran ACL s’illuminera en orange. 9. Le message PREHEATING (préchauffage) clignotera sur l’écran ACL. Une fois le cycle de pr...
Page 89 - Bouton de conversion de température
88 AVANT LA PREMIÈRE UTILISATION START CANCEL A BIT MORE TIME SLICES TEMP DARKNESS Pizza Reheat Bagel Cookies Toast Bake Broil Roast Bagel Cookies Toast Pizza Bake Reheat Roast Broil Position supérieure: fonction BROIL (Dorer). Position centrale: fonctions TOAST (Griller), BAGEL, PIZZA et COOKIE (Bi...
Page 92 - lorsque le four est; durant le cycle de
91 AVANT LA PREMIÈRE UTILISATION NOTE Vous pouvez presser le bouton A BIT MORE MC lorsque le four est refroidi (c.-à-d. pas immédiatement après le cycle de cuisson) et le four commencera à chauffer; cependant, dans un tel cas, la phase de préchauffage ne sera pas activée pour les fonctions BAKE, ROA...
Page 93 - FONCTIONNEMENT
FONCTIONNEMENT de votre Mini Smart Oven MC de Breville
Page 94 - FONCTIONNEMENT DE VOTRE MINI SMART OVEN
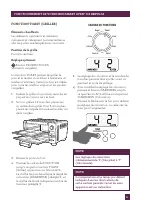
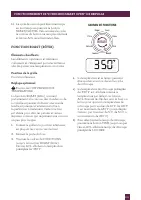
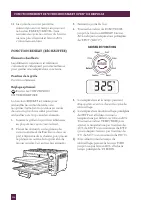
93 FONCTIONNEMENT DE VOTRE MINI SMART OVEN MC DE BREVILLE FONCTION TOAST (GRILLER) Éléments chauffants Les éléments supérieurs et inférieurs s’allument et s’éteignent par intermittence afi n de garder une température constante. Position de la grille Position centrale. Réglage optionnel Bouton FROZEN ...
Page 95 - ajuste automatiquement
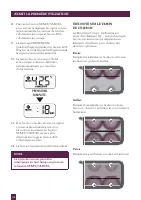
94 À titre indicatif: COLORATION DÉSIRÉE RÉGLAGE Très pâleMoyenneTrès foncée 1 ou 2 3, 4 ou 5 6 ou 7 Lorsque vous utilisez la fonction TOAST (Griller) pour la première fois, nous vous recommandons le préréglage ‘4’ afi n que vous puissiez ajuster la coloration à votre goût, eu égard à la sorte de pai...
Page 96 - FONCTION BAGEL; Éléments chauffants; Réglage optionnel
95 8. Si le cycle de grillage est termine, et que vous préférez votre rôtie un peu plus grillée, pressez le bouton A BIT MORE MC pour un grillage additionnel de 30 secondes. Si le cycle n’est pas terminé, du temps supplémentaire de grillage sera ajouté au temps actuel restant. Si le cycle de grillag...
Page 105 - durant un cycle de
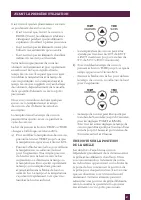
104 NOTE Le bouton A BIT MORE MC peut être enfoncé lorsque le four est froid (c.-à-d. pas immédiatement après un cycle de cuisson); le four commencera alors la cuisson. Cependant, la fonction ROAST n’utilisera pas la phase habituelle de ‘préchauffage’ dans ce cas. Si le four est froid, le meilleur r...
Page 108 - FONCTION PIZZA
107 9. Le cycle pour dorer peut être interrompu en tout temps en pressant le bouton START/CANCEL . Cela annulera le cycle et le contour du bouton ne sera plus illuminé. 10. Si le cycle pour dorer est terminé et que vous préférez vos aliments un peu plus dorés, pressez le bouton A BIT MORE MC pour un...
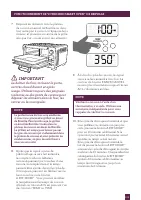
Page 110 - FROZEN FOODS (Aliments
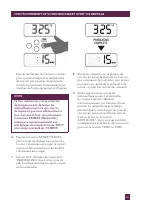
109 NOTE Le four mémorisera votre sélection de température et de temps de cuisson de la pizza jusqu’à ce que vous la changiez ou que vous débranciez le four. Lorsque le four sera rebranché, la fonction PIZZA réactivera automatiquement la température préréglée de 425°F (220°C), le temps préréglé de ‘...
Page 111 - durant un cycle de cuisson ou
110 9. Si le cycle de pizza est terminé et que vous préférez votre pizza un peu plus cuite, pressez le bouton A BIT MORE MC pour un 5 minutes additionnel. Si le cycle n’est pas terminé, 5 minutes seront ajoutées à la fi n du temps qui reste. Si le cycle de pizza est terminé, le fait de presser le bou...
Page 120 - UTILISATION DU RÉCHAUD
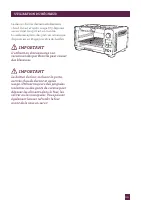
119 UTILISATION DU RÉCHAUD Le dessus du four devient extrêmement chaud durant et après usage. N’y déposez aucun objet lorsqu’il est en marche. La seule exception: des plats en céramique disposés en un étage pour être réchauffés. IMPORTANT L’utilisation d’accessoires non recommandés par Breville peut...
Page 121 - ENTRETIEN
ENTRETIEN & NETTOYAGE de votre Mini Smart Oven MC de Breville
Page 122 - ENTRETIEN ET NETTOYAGE; Nettoyage de l’intérieur du four
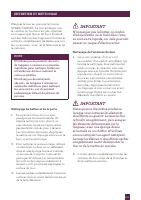
121 ENTRETIEN ET NETTOYAGE Éteignez le four en pressant le bouton START/CANCEL. Le four est éteint que le contour du bouton n’est plus illuminé en rouge et que l’écran ACL est illuminé en bleu. Débranchez l’appareil et laissez-le refroidir complètement, de même que tous les accessoires, avant de le ...
Page 123 - ENTRETIEN ET NETTOYAGE DE VOTRE MINI SMART OVEN; Nettoyage du ramasse-miettes
122 ENTRETIEN ET NETTOYAGE DE VOTRE MINI SMART OVEN MC DE BREVILLE Nettoyage du ramasse-miettes 1. Après chaque utilisation, laissez le four refroidir, retirez le ramasse-miettes et jetez les miettes. Essuyez le plateau avec une éponge douce et humide. Un nettoyant liquide sans-abrasif peut être uti...
Page 125 - TRUCS UTILES; pour votre Mini Smart Oven
124 TRUCS UTILES pour votre Mini Smart Oven MC de Breville
Page 126 - TRUCS UTILES POUR VOTRE MINI SMART OVEN
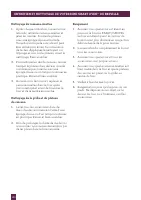
125 TRUCS UTILES POUR VOTRE MINI SMART OVEN MC DE BREVILLE • Pour toute question concernant l’utilisation d’ustensiles de cuisson spécialisés pour four compact, contactez directement le fabricant. • Soyez extrêmement prudent lorsque vous utilisez des casseroles ou plats non métallisés, comme la céra...
Page 127 - GUIDE DE DÉPANNAGE
Page 128 - PROBLÈME POSSIBLE
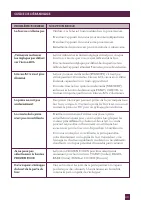
127 GUIDE DE DÉPANNAGE PROBLÈME POSSIBLE SOLUTION FACILE Le four ne s’allume pas • Vérifi ez si la fi che est bien insérée dans la prise murale. • Branchez l’appareil dans une prise murale indépendante. • Branchez l’appareil dans une autre prise murale. • Remettez le disjoncteur en position initiale, ...
Page 131 - RECETTES
Page 132 - INGRÉDIENTS
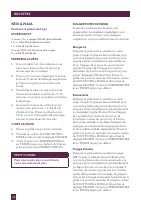
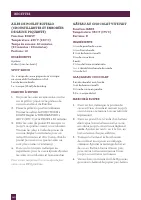
131 RECETTES CHIPS DE PAIN PITA Fonction: TOASTColoration: 6Tranches: 4Portions: 32 INGRÉDIENTS 4 pains pita au blé entier ¼ tasse (60ml) d’huile d’olive1 c. à thé (5 ml) de sel Une pincée de poivre de cayenne (optionnel)1 c. à soupe (30 ml) de basilic séché½ c. à thé (2.5 ml) de poudre d’ail¼ c. à ...
Page 134 - RÔTIR LES POITRINES DE POULET
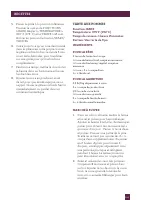
133 RECETTES INGRÉDIENTS POUR LES POITRINES DE POULET RÔTIES 2 poitrines de poulet désossées, sans la peau2 c. à soupe d’huile d’oliveSel et poivre au goût PRÉPARATION DES OIGNONS CARAMÉLISÉS AU BALSAMIQUE 1. Dans un petit poêlon, mettre l’huile d’olive et faire sauter les oignons 1 min. Ajouter l’e...
Page 137 - POITRINE DE DINDE FARCIE
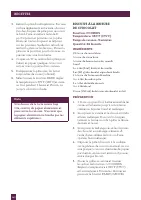
136 RECETTES SAUMON À L’ÉRABLE Fonction: BAKETempérature: 400˚ F (205˚C)Temps de cuisson: 13 à 15 minutes environ Portions: 4 INGRÉDIENTS 4 morceaux de saumon frais de 5oz, sans la peau et les arêtes MARINADE 3 c. à soupe de sirop d’érable2 c. à thé de moutarde de Dijon1 c. à soupe de jus de citron ...
Page 138 - PRÉPARER LA FARCE
137 RECETTES PRÉPARER LA FARCE 1. Faire tremper les porcini dans l’eau bouillante 30 minutes pour les faire ramollir. Bien essorer, hacher et réserver. Garder le liquide et le couler dans un papier fi ltre (comme un fi ltre à café). Réserver. 2. Dans un chaudron moyen, chauffer 1 c. à soupe d’huile d’...
Page 139 - Portions: 2 pizzas de 11 po; PETIT CONSEIL; Troppo Picante
138 RECETTES PÂTE À PIZZA Portions: 2 pizzas de 11 po INGRÉDIENTS ¾ tasse + 2 c. à soupe (210 ml) d’eau chaude1 ¾ c. à thé (9 ml) de levure sèche1 c. à thé (5 ml) de sucre2 tasses (500 ml) de farine tout usage1 c. à thé (5 ml) de sel PRÉPARER LA PÂTE 1. Dans un petit bol, dissoudre le sucre dans l’e...
Page 143 - Note; PRÉPARATION
142 RECETTES 3. Retirer la pâte du réfrigérateur. Sur une surface légèrement enfarinée, abaisser l’un des disques de pâte pour recouvrir le fond d’une assiette à tarte de 9 po. Disposer les pommes sur la pâte. Abaisser l’autre disque et le déposer sur les pommes. Sceller les rebords et rentrer la pâ...