Page 2 - EN; Manual; Pictograms used; Important information
EN Manual EN 3 - EN 51 Pictograms used Important information Tip
Page 3 - YOUR OVEN
EN 3 YOUR OVEN Your oven Introduction 4 Control panel 5 Description 6 Guide rails/Telescopic guide rails 6 Accessories 7 Door 8 Cooling fan 8 Main functions 8 Keys 10 Navigation 11 Initial use What to do first 13 Operation Selecting your function 16 Functions settings mode 16 Progress mode 18 Finish...
Page 4 - Introduction; Installation instructions are supplied separately.
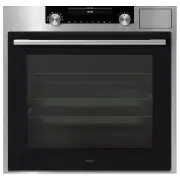
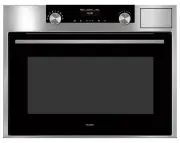
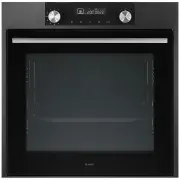
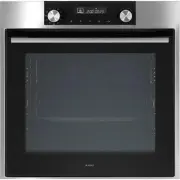
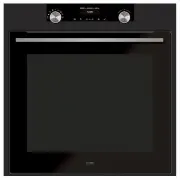
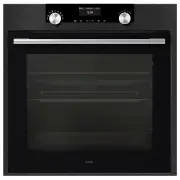
EN 4 Introduction Congratulations on choosing this ASKO steam oven. This product is designed to offer simple operation and optimum user-friendliness. The oven has a wide range of settings, enabling you to select the correct cooking method every time. This manual shows how you can best use this oven....
Page 5 - Control panel
EN 5 Control panel 12 13 14 15 16 17 18 19 1 10 11 6 7 8 9 5 4 3 2 1. Function knob (in ‘Off’ position)2. Defrost3. Programs & Favourites4. Fast preheat5. Oven6. Steam7. Combi steam8. Warming 9. Steam clean 10. Display11. Selection knob12. On/off key and stop key (cancel)13. Light key14. Timer k...
Page 6 - Description; • Place the oven rack, baking tray or steam dish in the gap between; Level 1
EN 6 YOUR OVEN Description 1. Control panel2. Water reservoir cover2. Oven levels3. Oven door4. Door handle Guide rails/Telescopic guide rails • The oven has four or five guide rails (Level 1 to 4/5), depending on the model. Level 1 is mainly used in combination with bottom heat. The two upper level...
Page 7 - Accessories; Enamelled baking tray
EN 7 Accessories Your appliance is accompanied by a range of accessories, depending on the model. Only use original accessories; they are specially suited to your appliance. Note: not all accessories are suitable/available for every appliance (it may also differ by country). When purchasing, always ...
Page 8 - • The steam dishes can be used simultaneously on two levels; Door; • The door switches interrupt the operation of the steam oven when; Cooling fan; Setting
EN 8 YOUR OVEN Accessories that can be supplied with your appliance (depending on the model) • The steam dishes can be used simultaneously on two levels (i.e., the non-perforated steam dish on Level 1 and the perforated steam dish on Level 2). • For steaming you can place the perforated steam dish i...
Page 9 - Manual defrost
EN 9 Oven Hot airHot air + bottom heatBottom + top heatLarge grillGrillLarge grill + fanUpper heatBottom heatBottom heat + fanPro roastingEco hot air Fast preheat Programs and favourites FavouritesPrograms Defrost Manual defrost Steam SteamLow temperature Sous vide Combi steam Hot air + steam densit...
Page 10 - Keys
EN 10 YOUR OVEN Keys In the table below you can find the discription of the different keys. Keys Description of the keysStop key: - Press short: cancel operation or go one step back in the menu. - Press long: turn the appliance off or on. Light key: - To turn the cavity light on or off. Egg timer - ...
Page 11 - Navigation; Within every menu the navigation is as follows:
EN 11 Navigation active area stop key confirm key function knob selection knob navigation keys By turning the function knob away from the 0-position, the icon of the chosen main function is lit. The display will show the icon and name of the activated function for about 1,5 seconds. Next you will se...
Page 13 - INITIAL USE; What to do first; • Clean the oven interior and accessories with hot water and; Setting the language; English; Deutsch; Confirm the setting by pressing the confirm key.; Setting the date; pressing the selection knob.
EN 13 INITIAL USE What to do first • Clean the oven interior and accessories with hot water and washing-up liquid. Do not use aggressive cleaning agents, abrasive sponges and similar. • The oven will emit a particular odor when it is used for the first time; this is normal. Make sure that there is g...
Page 14 - Setting the time; Setting the water hardness; red; Checking the water hardness; with those on the test strip.
EN 14 Setting the time : 00 11 12 13 TIME l HOUR 1. Turn the selection knob and change the hours.2. Confirm this setting by pressing the right navigation key or by pressing the selection knob. 3. Turn the selection knob and change the minutes.4. Confirm this setting by pressing the confirm key. Sett...
Page 15 - • Press and hold the stop key to shut down the appliance manually.; Switching on the appliance
EN 15 Display Test strip number/colour of the bars Type PPM French hardness (°df) German hardness (°dH) 1 4 green bars Very soft water 0 - 90 0 - 9 0 - 5 2 1 red bar Soft water 90 -178 9 - 18 5 - 10 3 2 red bars Rather hard water 178 - 267 18 - 26 10 - 15 4 3 red bars Hard water 267 - 356 26 - 35 15...
Page 16 - Selecting your function; key is blinking if it is possible to start the program).; Function settings mode; Example; Choose a main function by turning the function knob.; Confirm the setting by pressing the right navigation key or by; Turn the selection knob and change the setting.; OPERATION
EN 16 Selecting your function Select a function appropriate for the meal you are cooking. Consult the table in chapter ‘Functions table’ to see which functions are available.• Go directly to the progress mode by pressing the confirm key (this key is blinking if it is possible to start the program). ...
Page 17 - Turn the selection knob and change the setting.; with clean water before starting the program.
EN 17 5. Confirm the setting by pressing the right navigation key or by pressing the selection knob. The next sub-function setting becomes active. 210 °C OVEN l COOKING TIME 14:30 ▷ The timer icon shows that there is no timer necessary for this function. Press the confirm key to start the program di...
Page 18 - Progress mode; • Left side on the screen, the temperature is displayed (if the set; Finish display; Stop the progress
EN 18 Progress mode • Left side on the screen, the temperature is displayed (if the set temperature is not reached, the temperature will switch between cavity temp (grey) and set temp (white)). If the set temperature is reached a pop-up will appear ‘set temperature is reached’. • Right side on the s...
Page 19 - Add extra time; The previous process is activated again.; Gratin; Grill settings will be shown.; Save as favourite; Changing settings during the progress
EN 19 OPERATION Add extra time 1. Press the right navigation key to select ‘Add extra time’. 2. The time setting becomes active and can be changed directly by rotating the selection knob. 3. Confirm by means of the confirm key. The previous process is activated again. Gratin 1. Press the right navig...
Page 20 - USE; Functions table; • Only use glass dishes that can withstand temperatures
EN 20 USE Functions table Consult the table to choose the desired function. Also consult the instructions for preparation on the dish packaging. • Only use glass dishes that can withstand temperatures of 230 °C. Function DescriptionOven functions Hot Air • Heating by means of hot air from the back o...
Page 21 - Function Description
EN 21 USE Function Description Large Grill • Heating by means of the upper element and grill element. • This mode can be used with dishes and baked goods that require a distinctive bottom crust or browning. Use just before the end of the baking or roasting time. • Place the the oven rack on level 4 ...
Page 22 - he upper h
EN 22 USE Function Description Top Heat • Heating only by means of the upper heating element. • This mode can be used when you wish to bake/ roast the top part of your dish. • Place the baking tray or oven rack on level 2.• Suggested temperature: 150 °C 2 Bottom Heat • Heating only by means of the l...
Page 24 - Extra functions
EN 24 USE Function DescriptionCombi steam functions High 3 Medium 2 Low 1 Hot air + Steam density 1 / 2 / 3 • Heating by means of hot air in combination with steam. • The steam is sprayed into the oven cavity at regular intervals. • This mode can be used for baking types of pastry such as puff pastr...
Page 25 - Steam function; The water system empties each time the steam function is
EN 25 USE Function Description Defrost • With this function, the air circulates by means of the fan. The air will be heated to a temperature of 30 °C. • Use this function to defrost frozen dishes. Programs and Favourites • Programs: for baking and roasting. Select a dish from a list of pre-programme...
Page 26 - Sous vide; • Vacuum cooking; Filling the water reservoir; Fill the reservoir with water up to the ‘MAX’ mark on the reservoir
EN 26 USE Sous vide Using the sous vide steam function:• Vacuuming ▷ First vacuum the food in plastic using a vacuuming machine. This process removes most of the air from the plastic bag. The bag preserves nutrients and taste during cooking, resulting in food that is juicier, softer and tastier. • V...
Page 28 - Steam tables; Steam and Low temperature steam
EN 28 USE Steam tables Steam and Low temperature steam Use the settings and times in this table as guide lines for steaming. Always fill the water tank with fresh water to the maximum level. Dish Temperature Time (min.) Accessory (shelf level) Broccoli Florets 100 °C 12 - 16 Perforated steam dish (2...
Page 29 - Dish
EN 29 USE COMBI: Hot air + Steam level 1, 2, 3 Use the settings and times in this table as guide lines for baking and roasting. Always fill the water tank with fresh water to the maximum level. Dish Temperature Steam level Time (min.) Accessory (shelf level) Puff Pastry Stripes (add grated cheese) 2...
Page 30 - Sous Vide table; Mussels with shell
EN 30 USE Sous Vide table Sous Vide cooking is cooking vacuum-packed food at low constant temperature over a long period of time. Dish Temperature Time (min.) Accessory (shelf level) Beef fillet medium (4 cm thickness) 60 °C 110 - 120 Oven rack (2) Beef fillet well done (4 cm thickness) 65 °C 90 - 1...
Page 31 - Culisensor; completely into the dish.
EN 31 USE Culisensor If the culisensor is plugged in, the culisensor screen will be shown and a small culisensor icon will appear next to the time. The oven operates until the food core reaches the set temperature. The core temperature is measured by means of the temperature probe.1. Remove the rubb...
Page 32 - Recommended core temperature values
EN 32 Recommended core temperature values Beef Fillet/sirloin medium 55 - 58 ºC Roast beef medium 55 - 60 ºC Round steak well-done 85 - 90 ºC Roast beef well-done 80 - 85 ºC Stewed beef well-done 90 ºC Pork Hoof/leg well-done 75 ºC Hoof/leg slightly pink 65 - 68 ºC Pork loin slightly pink 65 - 70 ºC...
Page 33 - Fish; Settings menu
EN 33 Fish Salmon soft 60 ºC Fish fillet 62 - 65 ºC Entire fish 65 ºC Terrine 62 - 65 ºC Settings menu The settings menu is only available by pressing the ‘plus key’ when the appliance is in standby mode. Setting DescriptionGeneral LanguageTimeDateSound Display BrightnessClock sizeNight modeApplianc...
Page 34 - Display; display set start timer, second display set end time); Cooking settings; Plus menu; • To exit the plus menu, press the ‘stop key’ or ‘plus key’ the display
EN 34 Display You can set the following from this menu:• Brightness (low, mid, high)• Night mode (start and end time for lower display brightness: first display set start timer, second display set end time) • Clock size (small / large)• Stand-by (auto switch off / manually switch off) Changing to ma...
Page 35 - Add a steam cycle to the cooking process.
EN 35 + Menu Description Icon Cooking info Request more information about the selected function. Fast preheat Preheat the oven to the desired temperature quickly (not available in combination with delayed start). Delayed start The cooking process will start automatically and will be finished at the ...
Page 36 - Activate the fast preheat in the plus menu.; The small preheat icon will be shown next to the current time.; Starting with fast preheat
EN 36 Cooking information The cooking info screen will give more information about the chosen function, like the needed equipment and for what kind of purposes the function is used. Fast preheat There are two different ways to use fast preheat: Activate the fast preheat in the settings menu (to be d...
Page 37 - Delayed start; with the confirm key.; A small grill icon will appear next to the current time.; Stage cooking; A small icon will appear next to the current time.
EN 37 Delayed start Use the ‘delayed start’ function to start cooking at a later time, by setting the desired finishing time.1. Press the plus key (in the ‘Function settings mode’).2. Select ‘Delayed start’ with the right navigation key. 3. Press the confirm key. The display will show the delay star...
Page 38 - The display will switch to the settings screen.; Go to manual cooking; Automatic programs
EN 38 4. To add a stage, choose the second function by pressing the navigation keys or pressing the selection knob. 5. Press the confirm key. The display will switch to the settings screen. 6. Select the desired function, set the temperature and time. 7. Save the stage and return to the stage cookin...
Page 39 - Favourites; Egg timer; The egg timer is started.; Child lock
EN 39 Favourites (see chapter ‘Finish display’) • You can select your own stored recipes in ‘favourites’. • If there are no saved recipes, a pop-up will appear: ‘No saved dishes’. • The name of the recipe appears in the text bar and the saved oven settings are shown. Egg timer The egg timer can be u...
Page 41 - CLEANING; Cleaning the appliance; cloth and soapy water.; Steam clean; Using steam clean; Do not open the door during the cleaning process.
EN 41 CLEANING Cleaning the appliance Clean the appliance regularly to prevent fat and food particles from accumulating, especially on the surfaces of the interior and the exterior, the door and the seal. • Activate the child lock (to prevent that the appliance is switched on accidentally). • Clean ...
Page 42 - Cleaning the Water Tank Filter; Ensure that the filter touches the base of the water tank.; Descaling; Pour water mixed with descaling agent into the water reservoir.; Note
EN 42 Cleaning the Water Tank Filter If the water tank filter is dirty, you can clean it under the tap.1. Remove the suction tube with the filter.2. Clean it out under the tap and put it back into position. Ensure that the filter touches the base of the water tank. Descaling During the steam process...
Page 43 - Removing and cleaning the guide rails
EN 43 descaling action, it also has a cleansing and anti-bacterial effect, ensuring that the appliance’s internal components are preserved in an optimum hygienic state. Therefore food’s good taste is preserved and the appliance’s service life is extended.• Water is used for the steaming process. Wat...
Page 44 - Replacing the oven light bulb; • Disconnect the appliance from the power supply by removing the; Remove the four screws from the cover panel. Remove the cover
EN 44 Replacing the oven light bulb The lamp in this household appliance is only suitable for illumination of this appliance. The lamp is not suitable for household room illumination. The light bulbs (2x) (halogen G9, 230 V, 25 W) are a consumer items and therefore not covered by warranty. To replac...
Page 45 - Removing the oven door; • Keep your fingers away from the hinges of the oven door.; The hinges will be locked in the; Install the oven door.; positioned correctly.
EN 45 Removing the oven door • Keep your fingers away from the hinges of the oven door. The hinges are spring loaded and can cause injury if they spring back. • Make sure that the hinge latches are applied correctly to lock the hinges. Remove the oven door. 1. Open the door to the fully open positio...
Page 46 - Removing the oven door glass; remove it from the upper support.
EN 46 Removing the oven door glass The inside of the glass in the oven door can be cleaned. For this it must be removed from the oven door. 1. Slightly lift (1) and shift (2) the clamps at the lower left and right of the door to release the glass (A). 2. Grab the glass (A) at the bottom and gently l...
Page 47 - General; SOLVING PROBLEMS
EN 47 General If you have problems with your oven, then consult the error overview below. Should the problems persist, then please contact the Customer Services Department. The food stays raw • Check whether the timer has been set and you have pressed the ‘confirm key’. • Is the door closed properly...
Page 48 - The circuit breaker switches off regularly.; • Consult a service technician.; Storing and repairing the oven; • The model number and serial number (stated on the inside of the
EN 48 Clicking sounds can be heard when the oven is working, particularly in the defrost setting. • This is normal. The circuit breaker switches off regularly. • Consult a service technician. The display gives an error code, ERROR XX ... (XX indicates the number of the error). • There is a fault in ...
Page 49 - Disposal of the appliance and packaging; Declaration of conformity; YOUR OVEN AND THE ENVIRONMENT
EN 49 Disposal of the appliance and packaging This product is made from sustainable materials. However, the appliance must be disposed of responsibly at the end of its useful life. The government can provide you with information about this. The packaging of the appliance can be recycled. The followi...
Page 50 - Food tested in compliance with the EN 60350-1 standard; Baking; COOKING TEST
EN 50 Food tested in compliance with the EN 60350-1 standard OCS8687S / OCS8687A Baking Dish Equipment Guide (from the bottom) Temperature (°C) Cooking time (min) System Shortbread - single level Shallow enamel-coated baking tray 3 140-150 * 20-35 Shortbread - single level Shallow enamel-coated baki...