AEG 49669GO-MN- Manuals
AEG 49669GO-MN– User Manual in PDF format online.
Manuals:
User Manual AEG 49669GO-MN


Summary
22 1. IMpOrtaNt safEty INstructIONs . . . . . . . . . . . . . . . . . . . . . . . . . . . . . . . . . . . 3 2. fOr yOur safEty . . . . . . . . . . . . . . . . . . . . . . . . . . . . . . . . . . . . . . . . . . . . . . . . . . . 5 3. DEscrIptION Of yOur applIaNcE . . . . . . . . . . . . . . . . . . ...
33 Installation, cleaning and servicing an authorised person must install this appliance (certificate of compliance to be retained) .Before using the appliance, ensure that all packing materials are removed from the appliance .In order to avoid any potential hazard, the enclosed installation instruc...
5 for yoUr sAfEty If you smell gas • Turn off gas supply at source.• Extinguish all naked flames.• Do not operate any electrical appliances.• Ventilate the area.• Check for leaks as detailed in this manual.If odour persists, contact your dealer or gas supplier immediately . Do not tamper with the ap...
AEG Manuals
-
 AEG FFB72746PM
User Manual
AEG FFB72746PM
User Manual
-
 AEG PS254DB
User Manual
AEG PS254DB
User Manual
-
 AEG NIK85M00AZ
User Manual
AEG NIK85M00AZ
User Manual
-
 AEG HVB95450IB
User Manual
AEG HVB95450IB
User Manual
-
 AEG PL700
User Manual
AEG PL700
User Manual
-
 AEG IKE95771FB
User Manual
AEG IKE95771FB
User Manual
-
 AEG LF8594O8O
User Manual
AEG LF8594O8O
User Manual
-
 AEG LF9516O8Q
User Manual
AEG LF9516O8Q
User Manual
-
 AEG FFB53600PM
User Manual
AEG FFB53600PM
User Manual
-
 AEG LF8C1612A
User Manual
AEG LF8C1612A
User Manual
-
 AEG HK654070XB
User Manual
AEG HK654070XB
User Manual
-
AEG HK654070XB
Manual
-
 AEG BEE455010M
User Manual
AEG BEE455010M
User Manual
-
 AEG KMK76208PT
User Manual
AEG KMK76208PT
User Manual
-
 AEG KMK761000M
User Manual
AEG KMK761000M
User Manual
-
 AEG BPK535060B
User Manual
AEG BPK535060B
User Manual
-
 AEG CCE84751FB
Manual
AEG CCE84751FB
Manual
-
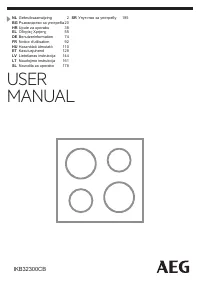 AEG IKB32300CB
User Manual
AEG IKB32300CB
User Manual
-
 AEG DGE7670HB
User Manual
AEG DGE7670HB
User Manual
-
AEG DGE7970HB
User Manual