AEG PE 8036-M - User Manual

AEG PE 8036-M – User Manual, read for free online in PDF format. We hope this helps you resolve any issues you may have. If you have further questions, please contact us through the contact form.


Table of Contents:
- Page 2 – C D; Downloaded from CoffeeMachineManual.com Manuals
- Page 9 – INDEX; DESCRIPTION OF THE
- Page 11 – CE; INSTRUCTIONS FOR; FILL UP THE WATER RESERVOIR; The hardness of the water:
- Page 13 – an ideal coffee grinding level.; PROGRAMMING OF THE GROUND
- Page 14 – ACCESSORIES
- Page 15 – COFFEE; USE OF COFFEE
- Page 16 – Useful ad vice; hygroscopical element that means; HOT WATER; LIQUIDS ‘ HEATING
- Page 17 – HOW TO PREPARE CAPPUCCINO’S; never make coffee
- Page 18 – RECIPES; This variation is the result of age -old
- Page 19 – OUTER PARTS; For cleaning the; WATER RESERVOIR
- Page 22 – WATER CONNECTION; MALFUNCTION
- Page 23 – ASSISTANCE AND
"Loading the manual" means you need to wait until the file loads and becomes available for online reading. Some manuals are very large, and the time they take to appear depends on your internet speed.
Was this manual helpful?
About this manual
- Brand
- AEG
- Model
- PE 8036-M
- Document type
- User Manual
- Language(s)
- English
- Pages
- 23
- File size
- 769.6 KB
- Format
Summary
3/88 C D E/1 E/2 F/1 F/2 Downloaded from CoffeeMachineManual.com Manuals
1/23 INDEX 12. Description of the Coffee machine 13. Description of the control panel 14. Recommendations 15. Instructions for the first use 16. Accessories (already included) 17. Coffee drawer (optional) 18. Coffee 19. Hot water 20. Steam 21. Recipes 22. Cleaning and servicing 23. Installation 24. ...
3/23 DISUSED APPLIANCES • Disused or useless appliances have not to be considered as discarded goods. Thanks to the ecological removal, a lot of materials used for producing your appliance can be used again. • App ly to your retailer for having information about the present possibilities of rubbish ...
Ask a question
Related manuals
Popular AEG Other
More AEG Other models
 AEG OKO_FAVORIT 545 i User Manual
 AEG OKO_FAVORIT 546 User Manual
 AEG OMNI 18C User Manual
 AEG PE 150 User Manual
 AEG PE4511-M User Manual
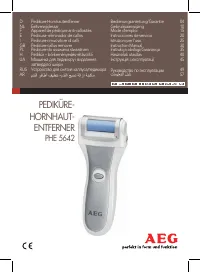 AEG PHE 5642 User Manual
 AEG PIZZASTEIN User Manual
 AEG PL700 User Manual
 AEG PL 750 User Manual
 AEG PM 10 E User Manual
- AEG PN 11 E User Manual
 AEG Protect 2.33 2.0 User Manual