AEG AHB71821LW - User Manual

AEG AHB71821LW – User Manual, read for free online in PDF format. We hope this helps you resolve any issues you may have. If you have further questions, please contact us through the contact form.


Table of Contents:
- Page 2 – CUSTOMER CARE AND SERVICE
- Page 4 – SAFETY INSTRUCTIONS; Installation
- Page 6 – OPERATION; Control panel
- Page 7 – DAILY USE
- Page 8 – HINTS AND TIPS; Hints for freezing
- Page 9 – CARE AND CLEANING; Cleaning the interior
- Page 10 – TROUBLESHOOTING
- Page 12 – Customer Service
- Page 13 – INSTALLATION; Positioning; Electrical connection
- Page 14 – TECHNICAL DATA; Technical data; ENVIRONMENTAL CONCERNS
- Page 15 – ATENCIÓN Y SERVICIO AL CLIENTE
- Page 17 – INSTRUCCIONES DE SEGURIDAD; Instalación
- Page 19 – FUNCIONAMIENTO
- Page 20 – Función FROSTMATIC; USO DIARIO; Congelación de alimentos
- Page 22 – CONSEJOS; Consejos sobre la
- Page 23 – MANTENIMIENTO Y LIMPIEZA; Limpieza del interior
- Page 24 – Periodos de inactividad; SOLUCIÓN DE PROBLEMAS
- Page 26 – Servicio técnico
- Page 27 – INSTALACIÓN; Colocación; Conexión eléctrica
- Page 28 – DATOS TÉCNICOS; Datos técnicos; ASPECTOS MEDIOAMBIENTALES
USER
MANUAL
EN
Chest Freezer
ES
Arcón congelador
AHB71821LW
"Loading the manual" means you need to wait until the file loads and becomes available for online reading. Some manuals are very large, and the time they take to appear depends on your internet speed.
Was this manual helpful?
About this manual
- Brand
- AEG
- Model
- AHB71821LW
- Document type
- User Manual
- Language(s)
- English, Spanish
- Pages
- 32
- File size
- 437.4 KB
- Format
Summary
CONTENTS 1. SAFETY INFORMATION............................................................................................. 3 2. SAFETY INSTRUCTIONS.............................................................................................4 3. OPERATION................................................
• Do not use water spray and steam to clean the appliance. • Clean the appliance with a moist soft cloth. Only use neutral detergents. Do not use abrasive products, abrasive cleaning pads, solvents or metal objects. • Do not store explosive substances such as aerosol cans with a flammable propellant...
3. OPERATION 3.1 Control panel 1 2 3 4 1 High temperature alarm light 2 Power indicator light 3 FROSTMATIC light 4 FROSTMATIC switch and Alarm reset 3.2 Switching on 1. Insert the plug into the wall socket. 2. Turn the Temperature regulator clockwise to a medium setting. The power indicator light wi...
Ask a question
Related manuals
Popular AEG Other
More AEG Other models
 AEG AFC959X,590D User Manual
 AEG AG941 User Manual
 AEG AG 1208 User Manual
 AEG AGB62226NX User Manual
 AEG AGB72526NX User Manual
 AEG AGS58200F0 User Manual
 AEG AIK2801R User Manual
 AEG AL1218 User Manual
 AEG AMS7000U User Manual
 AEG AMS8000I User Manual
 AEG AP 250 ECP User Manual
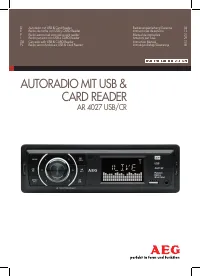 AEG AR 4027 USB-CR User Manual