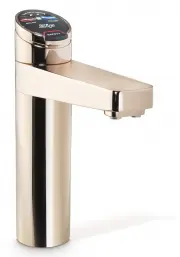
Page 2 - Tap options
Page 2 of 36 802257 - HydroTap B, BA, BHA, BAHA, Installation Instructions - July 2015 - v2.00 Tap options The G4 applaince series offers a range of interchangeable taps to suit the customer’s needs These three taps are directly compatible with the G4 under bench unit. The Mixer tap range is an addi...
Page 3 - Index
802257 - HydroTap B, BA, BHA, BAHA, Installation Instructions - July 2015 - v2.00 Page 3 of 36 HydroTap Specifications Installation check list .................................................................................................................... 4General Product Features .................
Page 4 - Before Commissioning:; Installation checklist
Page 4 of 36 802257 - HydroTap B, BA, BHA, BAHA, Installation Instructions - July 2015 - v2.00 Before Installation: A. Read the instructions and check if there is adequate space to mount all of the components. B. Note: Not all fittings are supplied with the appliance kit. Isolation valves are not su...
Page 5 - What is the Zip HydroTap ?; General Product Features; Boiling Ambient model
802257 - HydroTap B, BA, BHA, BAHA, Installation Instructions - July 2015 - v2.00 Page 5 of 36 Thank you for purchasing a Zip HydroTap. Please read and follow these instructions carefully to ensure safe operation and trouble free service. If service is required, please call 1800 460 222 What is the ...
Page 6 - Important Safety Instructions
Page 6 of 36 802257 - HydroTap B, BA, BHA, BAHA, Installation Instructions - July 2015 - v2.00 Important Safety Instructions This manual contains important safety, installation instructions for the Zip HydroTap G4.This appliance is not intended for use by persons (including children) with reduced ph...
Page 7 - WARNINGS; All Plumbing must comply with AS/NZS3500.
802257 - HydroTap B, BA, BHA, BAHA, Installation Instructions - July 2015 - v2.00 Page 7 of 36 Important Safety Instructions WARNINGS 1. The Zip HydroTap unit must be earthed. The resistance of the earth connection from each exposed metal part must be less than 1 ohm. 2. All Installation and service...
Page 8 - Major components and accessories; Parts supplied
Page 8 of 36 802257 - HydroTap B, BA, BHA, BAHA, Installation Instructions - July 2015 - v2.00 Major components and accessories Parts supplied Description 1 x Tap option with hoses (Classic tap shown) 1 x HydroTap Undersink Unit with water filter 1 x Mains water connection hose 1 x HydroTap Booster ...
Page 9 - Technical Specifications; Product covered by these instruction:; * Water from the H/T Mixer tap is unfiltered; Residential Models
802257 - HydroTap B, BA, BHA, BAHA, Installation Instructions - July 2015 - v2.00 Page 9 of 36 Technical Specifications Note: the Cup measurement =167ml Product covered by these instruction: * Water from the H/T Mixer tap is unfiltered ** Add an extra 3-4 kg when full of water H/T Tap *Filtered Boos...
Page 10 - Before Installation; Review all the technical specifications.; Special Tools Required:; In addition to normal tools, the following will be required:
Page 10 of 36 802257 - HydroTap B, BA, BHA, BAHA, Installation Instructions - July 2015 - v2.00 Before Installation Before installing ensure that the following have been provided at the Installation site: • Review all the technical specifications. • Ensure the underbench can support the product weig...
Page 11 - ** Check bowl depth and adjust accordingly; TAP; Elite; Double Bowl
802257 - HydroTap B, BA, BHA, BAHA, Installation Instructions - July 2015 - v2.00 Page 11 of 36 Hole positioning: Position the tap such that it dispenses into the sink bowl with ample clearance for a cup or tea pot. Alternative-ly, the tap could be mounted away from the sink using a Zip Font, availa...
Page 12 - Cut a 35mm hole in the bench / sink; HydroTap & Elite Installation; HydroTap Classic
Page 12 of 36 802257 - HydroTap B, BA, BHA, BAHA, Installation Instructions - July 2015 - v2.00 Apply a light smearing of silicon sealant on the underside of the spacer to ensure a watertight fit. 1.2 Cut a 35mm hole in the bench / sink top. BENCH TOP 1.1 Ø35mm ALL THREAD ROD STAINLESS STEEL SPACER ...
Page 13 - Installation Instructions; Note
802257 - HydroTap B, BA, BHA, BAHA, Installation Instructions - July 2015 - v2.00 Page 13 of 36 BLACK PLASTIC SPACER 1.3 Installation Instructions Pass all the hoses, tubes and USB lead through the 35mm hole. 1.4 35mm hole Note : feed each of the three tubes and electrical cable evenly in between th...
Page 14 - To change the spout position
Page 14 of 36 802257 - HydroTap B, BA, BHA, BAHA, Installation Instructions - July 2015 - v2.00 HydroTap Arc/Cube The HydroTap Arc/Cube has a spout that may be fixed in one of 6 angular positions (depending on the position of the rotary control) and fixed in one of two height positions. The spout is...
Page 15 - Left Hand Control; Height adjustment
802257 - HydroTap B, BA, BHA, BAHA, Installation Instructions - July 2015 - v2.00 Page 15 of 36 Installation Instructions A A Left Hand Control Right Hand Control B C C B 50mm Height adjustment (Fixed position options) Angular adjustment (Fixed position options) 1.7 O-RING LOWER RUBBER WASHER WASHER...
Page 16 - Mixer Tap Installation
Page 16 of 36 802257 - HydroTap B, BA, BHA, BAHA, Installation Instructions - July 2015 - v2.00 Cut a 35mm hole in the bench / sink top. SINK TOP 1.10 35mm Note : make sure the tap location will allow the nozzle to drain into the sink. Tap assembly exploded view and kitchen layout side view. BRAIDED...
Page 17 - Arc Mixer Tap; Installing the Mixer Tap; Fit the lower rubber seal to the threaded extension.
802257 - HydroTap B, BA, BHA, BAHA, Installation Instructions - July 2015 - v2.00 Page 17 of 36 Installation Instructions Sink top O-ring Lower seal Washer Securing nut Mixer tap Arc Mixer Tap 1.12 Installing the Mixer Tap (Classic, Arc and Cube) • Fit the O-ring into the recess on the underside of ...
Page 18 - The mixer tap requires a Restrictafl ow valve to be; Restrictafl ow valve; All
Page 18 of 36 802257 - HydroTap B, BA, BHA, BAHA, Installation Instructions - July 2015 - v2.00 Installation Instructions COLD isolation valve (Not supplied) 280mm 335mm Note: The mixer tap requires a Restrictafl ow valve to be fi tted in the cold water supply line, from the isolation valve tee piece,...
Page 19 - : make sure the tap location will allow the; Installation; sealant to ensure a watertight seal; Installation Procedure
802257 - HydroTap B, BA, BHA, BAHA, Installation Instructions - July 2015 - v2.00 Page 19 of 36 Cut a 50mm hole in the bench / sink top. SINK TOP 1.14 50mm Note : make sure the tap location will allow the nozzle to drain into the sink. (See Page 11) All-In-One Tap Installation Min 300mm 335mm 470mm ...
Page 20 - AIO Vented assy; BLUE; AIO Mains assy; Clamp Block markings and silicon tube positions,; RED
Page 20 of 36 802257 - HydroTap B, BA, BHA, BAHA, Installation Instructions - July 2015 - v2.00 FIXING NUT 1.16 Installation Instructions 1.17 CLAMP BLOCK O-RING AIO Vented assy BLUE to Chiller connection CLEAR to vent RED to Boiling connection From Mixer OUT AIO Mains assy BLUE mark WHITE mark BLUE...
Page 21 - Vented
802257 - HydroTap B, BA, BHA, BAHA, Installation Instructions - July 2015 - v2.00 Page 21 of 36 1.18 Installation Instructions External HOT & COLD isolation valves (Not supplied) Tee piece (Supplied) Typical All-in-1 Mains Installation (see section 5) CLAMP BLOCK • Screw the braided hoses into t...
Page 22 - Booster; Restrictaflow valve
Page 22 of 36 802257 - HydroTap B, BA, BHA, BAHA, Installation Instructions - July 2015 - v2.00 Installation Instructions 1.20 Typical All-In-One Vented assembly with Booster heater (See section 5) Booster A-I-O Tap 280mm 335mm Restrictaflow valve & Tee piece (Supplied) Note: The All-In-One vent...
Page 23 - All Models; Section 2
802257 - HydroTap B, BA, BHA, BAHA, Installation Instructions - July 2015 - v2.00 Page 23 of 36 2.1 All Models Proper air circulation must be provided for all models. The system will operate correctly only if the recommend-ed air gaps are achieved during installation. IMPORTANT: See section 4.3 for ...
Page 24 - Product Description; water connection
Page 24 of 36 802257 - HydroTap B, BA, BHA, BAHA, Installation Instructions - July 2015 - v2.00 Specifications: Rating Unit Nominal Power Rating 2.2 kW Nominal Current 10 A Electric Supply 50Hz AC 230 V Elect fl ex and plug (black) - 1 meter length (with 90º Australian plug) 10 A Fixed Flow Rate 1.2 ...
Page 25 - Booster Installation; The appliance complies with protection class IP 25.; Tilt Forward; Remove the backing plate for wall mounting; To Remove / Install the appliance; Insert a flat head screwdriver all the way into the lock.
802257 - HydroTap B, BA, BHA, BAHA, Installation Instructions - July 2015 - v2.00 Page 25 of 36 Booster Installation 3.2 Installation Procedure Site requirements • Appliance must only be installed in a frost-free area. Never expose appliance to frost. • The Appliance is designed for wall mounted Ins...
Page 26 - Booster System; NOTE2: Water connections must be pointing vertically upwards.; Braided hose connections; ° with a spanner; Braided Hoses
Page 26 of 36 802257 - HydroTap B, BA, BHA, BAHA, Installation Instructions - July 2015 - v2.00 Booster System NOTE1: This appliance is intended for use with the Zip HydroTap under sink unit. NOTE2: Water connections must be pointing vertically upwards. NOTE3: The booster unit should be installed as...
Page 27 - If an external filter is installed, select position B; xternal Bypass Valve; Remove all caps from the top of the undersink unit
802257 - HydroTap B, BA, BHA, BAHA, Installation Instructions - July 2015 - v2.00 Page 27 of 36 Section 4 Undersink Unit installation If an external filter is installed, select position B B Rotate 90° only 1 2 3 4 Check the table below to determine which filter bypass position you need for your prod...
Page 28 - Boiling model
Page 28 of 36 802257 - HydroTap B, BA, BHA, BAHA, Installation Instructions - July 2015 - v2.00 4.3 Boiling model Installation Instructions : Not required for BO HydroTap. POWER CORD USB MAINS IN MIXER OUT MIXER IN BOILING OUT BYPASS IN VENT BYPASS OUT RED CLE A R BR A IDED Max. 1400mm Max. 450 mm 2...
Page 32 - Filter Flush; Section 5; Select the Language
Page 32 of 36 802257 - HydroTap B, BA, BHA, BAHA, Installation Instructions - July 2015 - v2.00 1. Turn the stop cock ON 2. Press [Start] [Stop] buttons to start and stop the filter flush. 3. Allow at least 10 litres of water to flush through the filter. 4. Once the filter flush is finished, Turn th...
Page 33 - Boiling Calibration; Commissioning
802257 - HydroTap B, BA, BHA, BAHA, Installation Instructions - July 2015 - v2.00 Page 33 of 36 1. Press the [MENU] button for main menu.2. Press the [Install] button. 3. Press the [Booster] button. 4. In the next screen, press YES to enable the Booster. 5. Turn the Booster ON 6. Water must be run t...
Page 34 - Safety Sensor Calibration; Safety
Page 34 of 36 802257 - HydroTap B, BA, BHA, BAHA, Installation Instructions - July 2015 - v2.00 1. With the unit in Normal operating mode and with the safety enabled 2. Turn the power OFF 3. Pull both tap levers to the forward position 4. Turn ON the power 5. The unit will calibrate the safety switc...
Page 35 - Trouble Shooting; System Fault
802257 - HydroTap B, BA, BHA, BAHA, Installation Instructions - July 2015 - v2.00 Page 35 of 36 Trouble Shooting System Fault Message Possible Cause Solutions Power board fault Electrical disruption Check power supply and all fuses Interface fault Internal fault Call Zip Service Level board fault In...
Page 36 - Contact Details; Head Office
Page 36 of 36 802257 - HydroTap B, BA, BHA, BAHA, Installation Instructions - July 2015 - v2.00 Contact Details The standard cup referred to in this publication is 167 ml (6 fl oz). The standard glass is 200 ml (7 fl oz). The terms “Zip” and “HydroTap” are registered trade marks of Zip Heaters (Aust...