VITEK VT-1802 - User Manual
VITEK VT-1802 Robot Vacuum – User Manual, read for free online in PDF format. We hope this helps you resolve any issues you may have. If you have further questions, please contact us through the contact form.
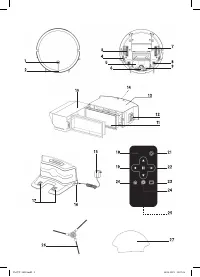
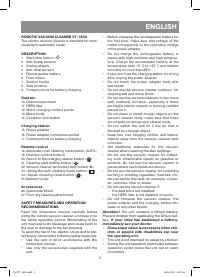

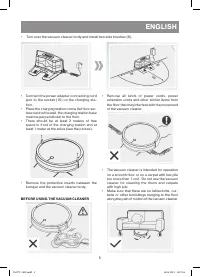
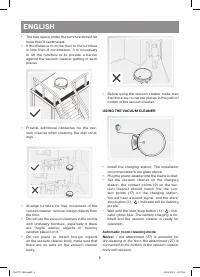

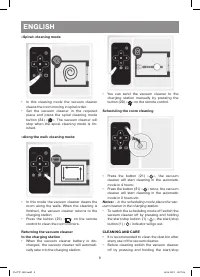

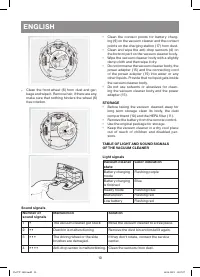
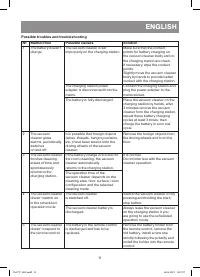
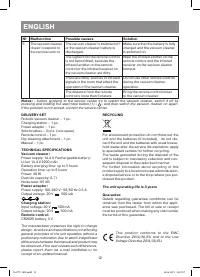

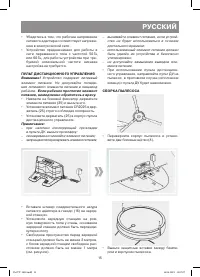

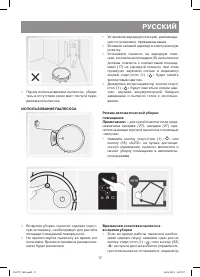
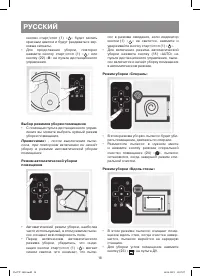
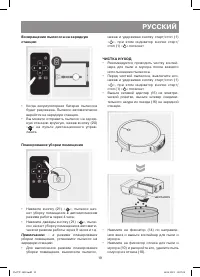
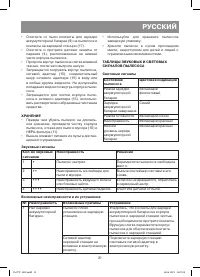
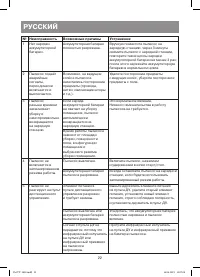
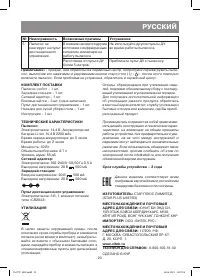
Table of Contents:
- Page 3 – ENGLISH; The unit contains a lithium battery.
- Page 4 – Danger of; BEFORE THE FIRST USE; Keep the original package.; REMOTE CONTROL; If your child has swallowed a battery,; ASSEMBLING THE VACUUM CLEANER
- Page 5 – Turn over the vacuum cleaner body and install two side brushes (8).; BEFORE USING THE VACUUM CLEANER
- Page 6 – USING THE VACUUM CLEANER; Plug the power adapter into the mains socket.; Automatic room cleaning mode; the attachment (27) is intended for
- Page 7 – » or the; » on the; » on the; Cleaning mode selection; - after you switch the vacuum cleaner; » indication flashes blue, it means
- Page 8 – «Spiral» cleaning mode; ». The vacuum cleaner will; «Along the wall» cleaning mode; » on the remote; Scheduling the room cleaning; uum cleaner in the charging station.; CLEANING AND CARE
- Page 9 – indicator will go out.
- Page 11 – Possible troubles and troubleshooting; The battery is fully discharged.
- Page 12 – » and then switch the vacuum cleaner on again.
- Page 13 – русский
- Page 14 – Устройство содержит литиевый; ПЕРЕД ПЕРВЫМ ИСПОЛЬЗОВАНИЕМ; Сохраните заводскую упаковку.
- Page 15 – ПУЛЬТ ДИСТАНЦИОННОГО УПРАВЛЕНИЯ; СБОРК А ПЫЛЕСОСА
- Page 16 – ПЕРЕД ИСПОЛЬЗОВАНИЕМ ПЫЛЕСОСА
- Page 17 – ИСПОЛЬЗОВАНИЕ ПЫЛЕСОСА; » будет мигать; » на пульте дистанционного управления,
- Page 19 – » на пульте дистанционного управ-; Планирование уборки помещения; - в режиме планирования; ЧИСТК А И УХОД
- Page 22 – No Неисправность
- Page 23 – Приблизьте пульт ДУ к пылесосу.
- Page 24 – RUS
1
VT-1802
3
13
Robotic vacuum
cleaner
Робот-пылесос
IM VT-1802.indd 1
14.06.2019 15:07:06
"Loading the manual" means you need to wait until the file loads and becomes available for online reading. Some manuals are very large, and the time they take to appear depends on your internet speed.
Summary
3 ENGLISH ROBOTIC VACUUM CLEANER VT-1802 The robotic vacuum cleaner is intended for room cleaning in automatic mode. DESCRIPTION 1. Start/stop button « » 2. Anti-bump sensors 3. Driving wheels 4. Anti-drop sensors 5. Rechargeable battery 6. Front wheel 7. Suction nozzle 8. Side brushes 9. Contact po...
4 ENGLISH • The unit is not intended for usage by physi-cally or mentally disabled persons (including children) or by persons lacking experience or knowledge if they are not under supervision of a person who is responsible for their safety or if they are not instructed by this person on the usage of...
5 ENGLISH • Turn over the vacuum cleaner body and install two side brushes (8). • Connect the power adapter connecting cord jack to the socket (16) on the charging sta-tion. • Place the charging station on the flat floor sur-face next to the wall, the charging station base must be perpendicular to t...