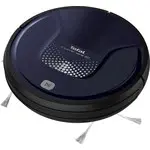
Tefal RG6871WH - User Manual
Tefal RG6871WH Vacuum – User Manual, read for free online in PDF format. We hope this helps you resolve any issues you may have. If you have further questions, please contact us through the contact form.
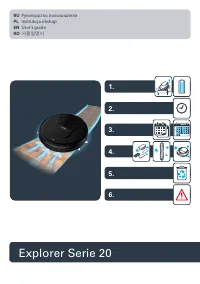

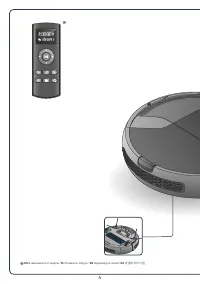
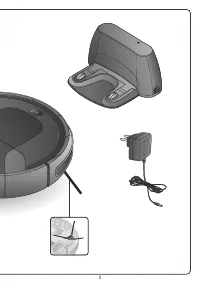
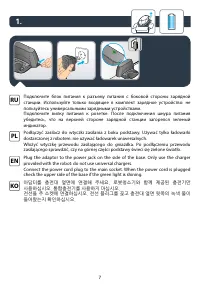
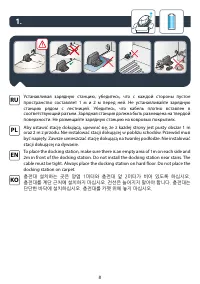
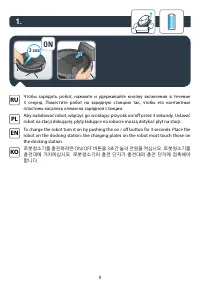
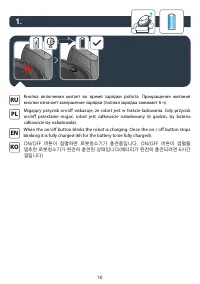


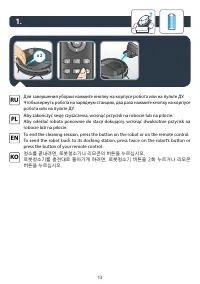

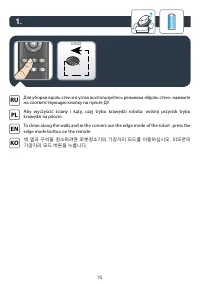
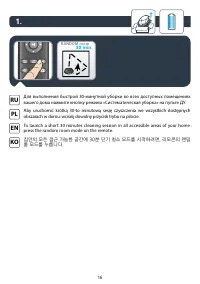
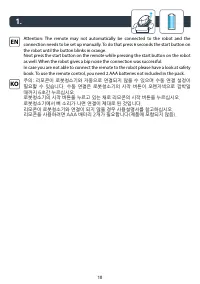
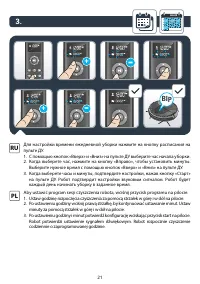
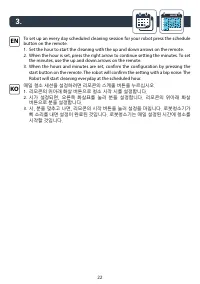

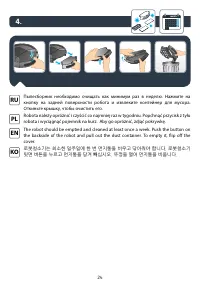
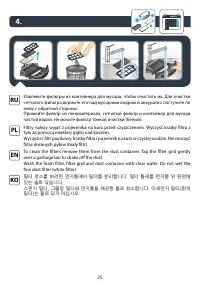
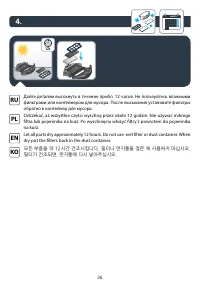


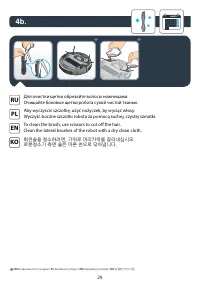
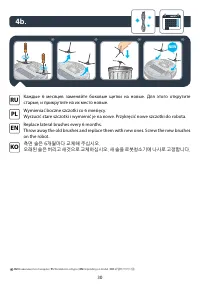
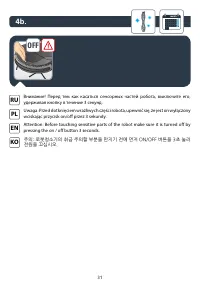
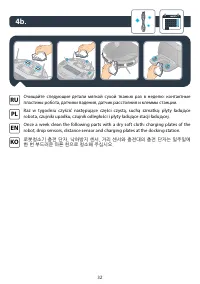
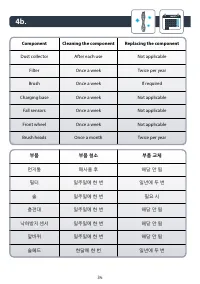
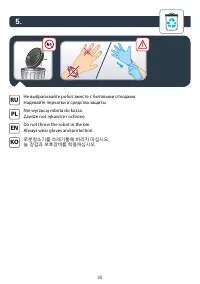
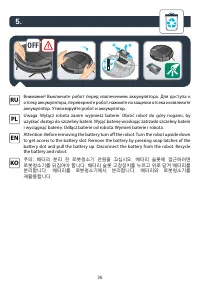
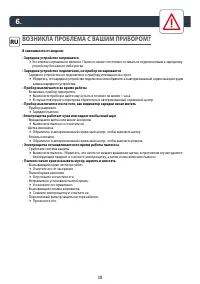
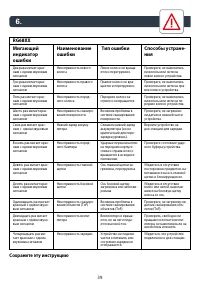
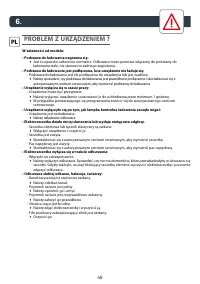
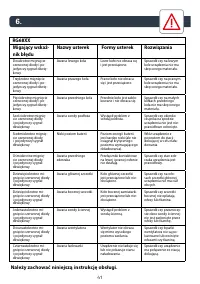
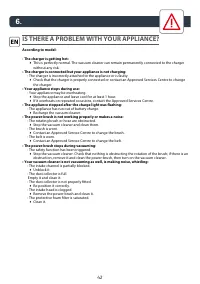
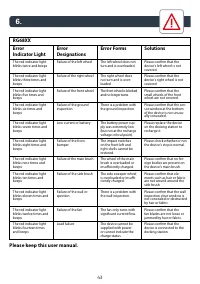

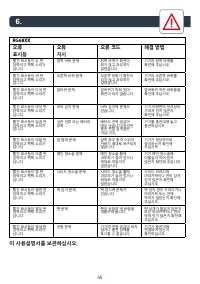


Table of Contents:
- Page 3 – RU
- Page 9 – ON; пластины касались клемм на зарядной станции.
- Page 14 – the random mode button on the remote.; RANDOM; wciśnij dowolny przycisk trybu na pilocie.
- Page 15 – edge mode button on the remote.; EDGE; на соответствующую кнопку на пульте ДУ.
- Page 16 – press the random room mode on the remote.; RANDOM room; obszarach w domu: wciśnij dowolny przycisk trybu na pilocie.
- Page 18 – the robot until the button blinks in orange.
- Page 19 – BIP
- Page 21 – minuty za pomocą strzałek w górę i w dół na pilocie.
- Page 22 – 매일 청소 세션을 설정하려면 리모콘의 스케줄 버튼을 누르십시오.
- Page 23 – сигналом, а время начала уборки исчезнет с пульта.
- Page 25 – over a garbage bin to shake off the dust.
- Page 27 – year; очистки и поролоновый фильтр каждые 6 месяцев.
- Page 29 – Для очистки щетки обрезайте волосы ножницами.
- Page 30 – Replace lateral brushes every 6 months.
- Page 31 – удерживая кнопку в течение 3 секунд.; OFF
- Page 34 – 부품
- Page 36 – the battery and robot.; аккумулятор. Утилизируйте робот и аккумулятор.
- Page 38 – ВОЗНИКЛА ПРОБЛЕМА С ВАШИМ ПРИБОРОМ?
- Page 40 – PROBLEM Z URZĄDZENIEM ?; W zależności od modelu:
- Page 42 – IS THERE A PROBLEM WITH YOUR APPLIANCE?
Explorer Serie 20
1.
2.
3.
month
4.
5.
6.
RU
Руководство пользователя
PL
Instrukcja obsługi
EN
User’s guide
KO
사용설명서
"Loading the manual" means you need to wait until the file loads and becomes available for online reading. Some manuals are very large, and the time they take to appear depends on your internet speed.
Summary
3 www.tefal.com RU Перед первым использованием внимательно прочитайте инструкцию «Меры безопасности и правила использования». / PL Przed pierwszym użyciem proszę uważnie przeczytać broszurę „Zalecenia dotyczące bezpieczeństwa i użytkowania” / EN Please read carefully the “Safety and use instructions...
9 To charge the robot turn it on by pushing the on / off button for 3 seconds. Place the robot on the docking station: the charging plates on the robot must touch those on the docking station. EN 1. 3 sec ON Чтобы зарядить робот, нажмите и удерживайте кнопку включения в течение 3 секунд. Поместите р...
14 1. To clean all accessible areas of your home, use the random mode of the robot : press the random mode button on the remote. EN RANDOM Чтобы очистить все доступные участки дома, воспользуйтесь режимом «Систематическая уборка»: нажмите на соответствующую кнопку на пульте ДУ. RU Aby wyczyścić wszy...