Page 2 - Table of contents
2 Dear customer! Thank you for purchasing our product. For safety, it is strongly recommended to read this manual carefullybefore connecting, operating and/or adjusting the product and keep the manual for reference in the future. Table of contents Table of contents .....................................
Page 3 - Important safeguards; qualified technician check the system.
3 Important safeguards - Read carefully through this manual to familiarize yourself with this high-quality sound system. - Disconnect the vehicle's negative battery terminal while mounting and connecting the unit. - When replacing the fuse, be sure to use one with an identical amperage rating. Using...
Page 4 - Installation/ Connections; Installation way
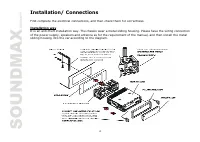
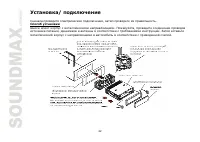
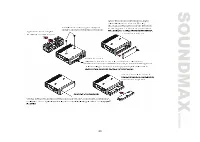
4 Installation/ Connections First complete the electrical connections, and then check them for correctness. Installation way It is an anti-theft installation way. The chassis wear a metal sliding housing. Please have the wiring connection of the power supply, speakers and antenna as for the requirem...
Page 6 - Speaker connection
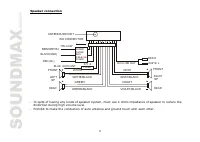
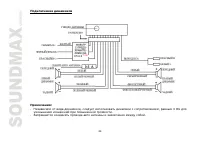
6 Speaker connection Notes: - In spite of having any kinds of speaker system, must use 4 ohms impedance of speaker to reduce thedistortion during high volume level. - Prohibit to make the conductors of auto antenna and ground touch with each other. + + + + + + + + YELLOW ANTENNA SOCKET MEMORY B+ BLA...
Page 7 - Panel controls; Press it to select RADIO or CD mode.
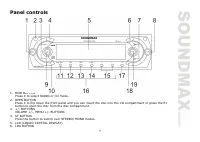
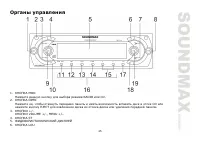
7 Panel controls 1. MOD BUTTON Press it to select RADIO or CD mode. 2. OPEN BUTTON Press it to flip down the front panel and you can insert the disc into the CD compartment or press the EJ button to eject the disc from the disc compartment. 3. +/- BUTTONS VOLUME +/-, MENU +/- BUTTONS. 4. ST BUTTON P...
Page 8 - Press the button to display the clock.
8 7. UP/DOWN (<</ >>) BUTTONS Tune up/ down, Seek up/ down, Track up/ down, Fast forward/ Reverse buttons. 8. PWR BUTTON Press any button except the EJECT and OPEN button to turn on the unit, press PWR button hold for more than 0.5 seconds to turn off the unit. (After switching on the AC...
Page 9 - Function of controls; General operations; Reset the unit; Press the PWR to switch the unit off.; Volume mode; mode of radio or disc playback mode.; Menu mode
9 Function of controls General operations Reset the unit Operating the unit for the first time or after replacing the car battery, you must reset the unit.Press OPEN button and remove the panel, then press the RESET button to restore the unit to the original factory settings. Power button Press any ...
Page 11 - Radio operations; BAND button; Press a Preset button (1-6) briefly to recall the stored station
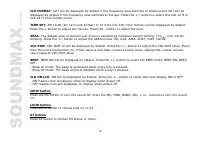
11 Clock display and adjustment To view the current time, press CLK button shortly, it will display for 5 seconds and then revert to theprevious display mode unless the button is pressed again.During the period when the time is displayed, you can change the time, press the CLK button long, the time ...
Page 12 - Discs operations; Loading a disc; Press EJECT button on the inner side to eject the disc.; track playback will start.; Playing previous/ next folder; Press again to start the previous track playback.; Scanning forward and backward
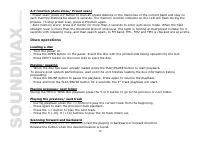
12 A.P function (Auto store/ Preset scan) - Preset scan: press A.P button to scan all preset stations in the memories of the current band and stay oneach memory stations for about 5 seconds. The memory location indicator on the LCD will flash during theprocess. To stop preset scan, press A.P button ...
Page 13 - tracks in current folder. Press again to cancel.; Intro playback; icon will appear on
13 Repeat playback Press the RPT button shortly to repeat the current track playback. Press again to cancel.During the MP3 or WMA disc playback press and hold the RPT button for 2 seconds to play repeatedly thetracks in current folder. Press again to cancel. Random playback During disc playback, pre...
Page 14 - Display ID3 information of MP3 File
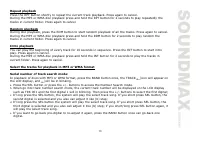
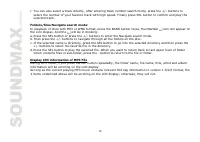
14 f. You can also select a track directly, after entering track number search mode, press the +/- buttons toselect the number of your favorite track with high speed. Finally press SEL button to confirm and play theselected track. Folders/files Navigate search mode: In playback of discs with MP3 or ...
Page 15 - MP3 overview; Notes on MP3; MP3 data written by the method of packet write.; Notes on creating your own CD-Rs or CD-RWs containing MP3 files; and a fixed bit rate o f 128 kbps.
15 MP3 overview Notes on MP3 - MP3 is short for MPEG Audio Layer 3 and refers to an audio compression technology standard. - This product allows playback of MP3 files on CD-ROM, CD-R or CD-RW discs. - The unit can read MP3 files written in the format compliant with ISO 9660. However it does not supp...
Page 16 - Handling compact discs
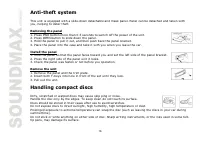
16 Anti-theft system This unit is equipped with a slide-down detachable and mask panel. Panel can be detached and taken withyou, helping to deter theft. Removing the panel 1. Press PWR button more than 0.5 seconds to switch off the power of the unit.2. Press OPEN button to slide down the panel.3. Ho...
Page 17 - Cleaning
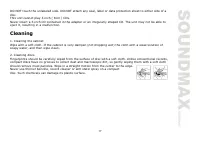
17 DO NOT touch the unlabeled side. DO NOT attach any seal, label or data protection sheet to either side of adisc.This unit cannot play 3-inch ( 8cm ) CDs.Never insert a 3-inch CD contained in the adapter or an irregularly shaped CD. The unit may not be able to eject it, resulting in a malfunction....
Page 18 - Troubleshooting guide
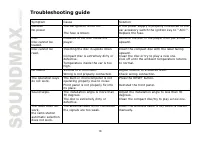
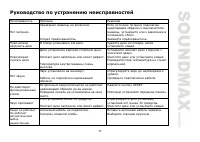
18 Troubleshooting guide Symptom Cause Solution GeneralNo power The car ignition is not on. The fuse is blown. If the power supply is properly connected to thecar accessory switch the ignition key to " ACC ".Replace the fuse. DiscDisc cannot beloaded. Presence of CD disc inside theplayer. Re...
Page 19 - Specification; Current consumption
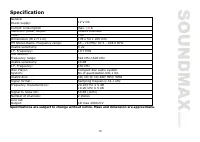
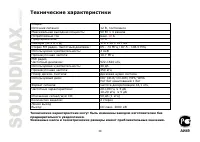
19 Specification Specifications are subject to change without notice. Mass and dimension are approximate. GeneralPower supply: 12 V DC Current consumption max. 1 0 A Maximum power output: 50Wx4 channels Fuse: 1 0 A Dimensions (W x H x D) 178 x 50 x 165 mm FM Stereo Radio. Frequency range: 65 - 74 MH...
Page 27 - BASS TREBLE
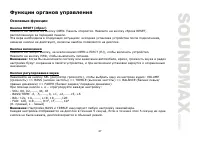
27 RESET ( ) OPEN. . RESET, . : , , . , OPEN EJECT (EJ), . PWR, . : , , , . SEL ( ), : VOLUME ) => BASS ( ) => TRE LE ( ) => BALANCE ( / ) => FADER ( / ). + : - VOL: 00, 02,......, 44, 46- BASS/TREB: -6, -5,......, 0, +1, +2,......+5, +6- BAL: 12L, 11L,......, L=R, 1R,......,12R - FAD: 1...
Page 29 - LOUD
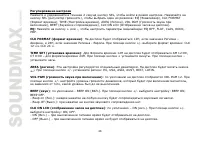
29 MU, . , . LOUD LOUD, LOUD ON ( .), LOUD OFF ( .) STEREO/ MONO ST, : STEREO MONO. , CLK. 5 . , : + . . MOD, : RADIO ( ), CD ( , ). RADIO, BAND, : FM1, FM2, FM3, MW1, MW2. B ND, : FM1, FM2, FM3, MW1, MW2. / - : << >>, . MANUAL. <</ >>, . - : << >>, . , . , .
Page 30 - EJECT
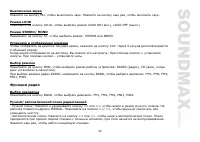
30 6 5 . - : - ( ). - <</ >>. - 1~6, . - : - ( ). - 1~6. - : A.P, 5 . . , A.P. - : A. 2 , , 5 , . - . - OPEN, . . - EJECT , . / - , PLAY/ PAUSE, . , , , . - PLAY/PAUSE, . PLAY/PAUSE , .
Page 31 - MP3 WMA; Intro
31 - 2 PLAY/ PAUSE, . MP3 WMA 5 6, . - <<, . - << , . - >>, . - 5 (-10)/ 6 (+10) . <</ >>, . , . R , . , . 2 , . , . RDM, . , . 2 , . , . Intro 10 . INT, . , .
Page 32 - WMA
32 2 , . , . 3 WMA : MP3 WMA BAND , TRACK , . a. SEL +/-, Number Search ( ). b. rack number ( ) : 001, 1 ( ) . +/-, . c. SEL, . 2 SEL, . d. . +/-, . SEL, . 2 SEL, . e. . +/-, . SEL, . f. : , +/- , . SEL, . MP3 WMA BAND, NAVIGA , . a. SEL +/-, Navigate Search ( ). b. , SEL, . c. +/-, . SEL, . d. , -.
Page 34 - PWR
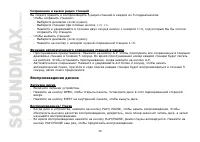
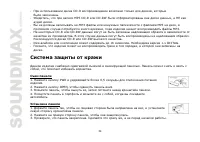
34 - CD-R , . - , MP3 CD-R CD-RW , . - 3 3 , , 3. - CD-R CD-RW . . CD-R CD-RW . - 16 . 1. ID3TAG. - , , . . , . 1. PWR 0,5 . 2. OPEN, . 3. , , . 4. , . 1. , , . 2. , . 3. , . , .
Page 37 - CD
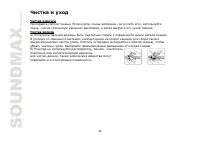
37 . . , « ». . CD . , . . . . . . . . . . . . . RESET. . 30 . . , 30 . . . . . . .