Soundmax SM-CDM1031 - User Manual

Soundmax SM-CDM1031 Car Radio – User Manual, read for free online in PDF format. We hope this helps you resolve any issues you may have. If you have further questions, please contact us through the contact form.

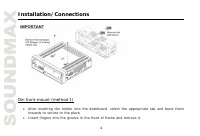
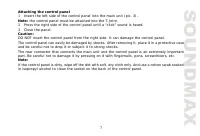
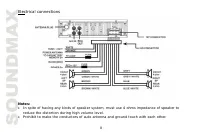
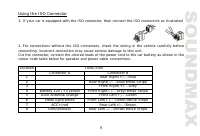

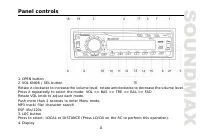
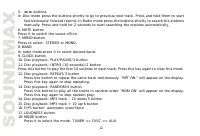

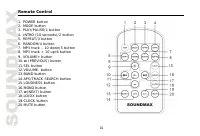
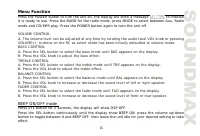
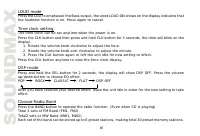
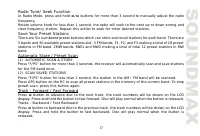
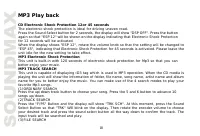
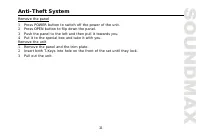
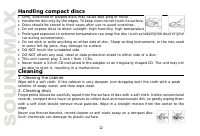

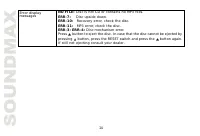
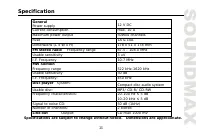
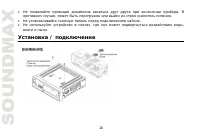
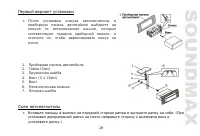
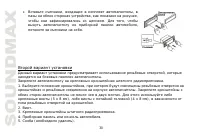
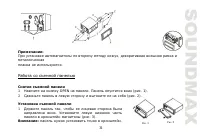
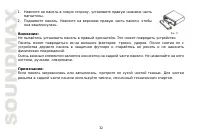
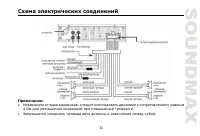
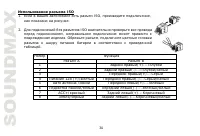
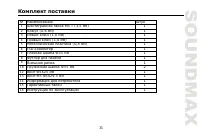

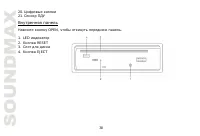
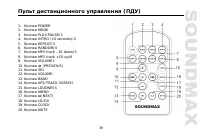
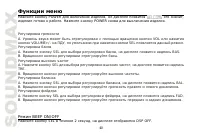
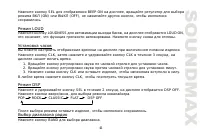
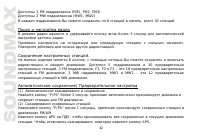

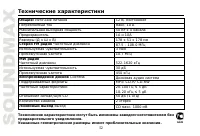
Table of Contents:
- Page 2 – Table of contents
- Page 3 – Important safeguards
- Page 4 – Installation/Connections
- Page 6 – Detachable control panel; Detaching the control panel
- Page 7 – Attaching the control panel
- Page 8 – Electrical connections
- Page 9 – Using the ISO Connector; Location
- Page 10 – Accessories
- Page 11 – Panel controls
- Page 13 – seconds to power off.; Inner panel; Press the OPEN button on the front panel to flip it down.
- Page 14 – Remote Control
- Page 15 – Menu Function; to indicate
- Page 16 – Press the CLK button anytime to view the time clock display.; DSP mode
- Page 17 – Radio Tune/ Seek Function; In Radio Mode, press and hold; Save Your Preset Stations; Press
- Page 18 – MP3 Play back; CD Electronic Shock Protection 12or 45 seconds; The electronic shock protection is ideal for driving uneven road.; MP3 Electronic Shock Protection; better enjoy your music.; MP3 TRACK SEARCH; input track will be searched and play.
- Page 19 – MP3 Overview; Notes on MP3
- Page 20 – Notes on creating your own CD-Rs or CD-RWs containing MP3 files
- Page 22 – Cleaning the cabinet
- Page 23 – Troubleshooting guide; General
- Page 25 – Specification; FM stereo radio Frequency range
- Page 31 – OPEN
- Page 34 – ISO
- Page 50 – ACC
- Page 52 – CD
SM-CDM1031
CD/MP3-RECEIVER CD/MP3-
Instruction manual
"Loading the manual" means you need to wait until the file loads and becomes available for online reading. Some manuals are very large, and the time they take to appear depends on your internet speed.
Summary
2 Dear customer!Thank you for purchasing our product. For safety, it is strongly recommended to read this manualcarefully before connecting, operating and/or adjusting the product and keep the manual forreference in the future. Table of contents Table of contents .......................................
3 Important safeguards Read carefully through the manual to familiarize yours with this high-quality sound system.Disconnect the vehicle's negative battery terminal while mounting and connecting the unit.When replacing the fuse, be sure to use one with an identical amperage rating. Using a fuse with...
4 Installation/Connections Din front-mount (method 1) After inserting the holder into the dashboard, select the appropriate tab and bend theminwards to secure to the placeInsert fingers into the groove in the front of frame and remove it.