Smeg SAI74 - Manual
Smeg SAI74 Hob – Manual, read for free online in PDF format. We hope this helps you resolve any issues you may have. If you have further questions, please contact us through the contact form.


Table of Contents:
- Page 3 – SUMMARY
- Page 4 – SAFETY; Precautions before using
- Page 5 – Précautions not to damage the appliance
- Page 7 – DESCRIPTION OF THE APPLIANCE; Technical characteristics
- Page 8 – USE OF THE APPLIANCE; Display; Ventilation; STARTING-UP AND APPLIANCE MANAGEMENT; Before the first use
- Page 11 – Automatic cooking
- Page 13 – COOKING ADVICES; Pan quality; Not adapted materials:; Pan dimension
- Page 14 – Examples of cooking power setting; MAINTENANCE AND CLEANING; The hob or the cooking zone doesn’t start-up:
- Page 15 – ENVIRONMENT PRESERVATION
- Page 16 – INSTALLATION INSTRUCTIONS; How to stick the gasket:
- Page 17 – ELECTRICAL CONNECTION
- Page 18 – been earthed or has been equipped with a faulty earth connection.
- Page 19 – Warranty
INSTRUCTION MANUAL
INDUCTION COOKTOPS
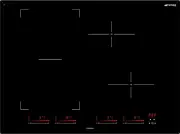
SAI64
SAI74
"Loading the manual" means you need to wait until the file loads and becomes available for online reading. Some manuals are very large, and the time they take to appear depends on your internet speed.
Other Manuals for Smeg SAI74
Summary
SUMMARY SAFETY ......................................................................................................................................... 4 P RECAUTIONS BEFORE USING ........................................................................................................ 4 U SING THE A...
4 SAFETY Precautions before using • Unpack all the materials. • The installation and connecting of the appliance must be done by a qualified electrican. The manufacturer can not be responsible for damage caused by building-in or connecting errors. • The appliance must be installed in a proper workto...
5 • In general do not place any metallic object except cooking pots on the glass surface. • Never cover the appliance with a cloth or a protection sheet. This may become very hot and catch fire. • This appliance is not intended for use by persons (including children) with reduced physical, sensory o...