Page 2 - Contents
Contents Controls ........................................................................... 2-3 Using the clock radio for the first time ................................. 4 Operating your clock radio .................................................. 5 Selecting a station - DAB ......................
Page 3 - Controls
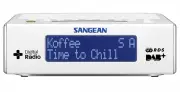
GB Controls 1 2 3 5 7 8 9 10 4 6 . Loudspeaker. Sleep button 3. Menu / Info button4. Band button5. Tuning Up / Down / Snooze button 6. LCD display 7. Alarm button 8. Select button 9. On / Standby button0. Station preset buttons
Page 5 - Using the clock radio for the first time
4 GB Using the clock radio for the first time 1. Place your clock radio on a flat surface. . Fully extend the wire aerial located on the rear of your clock radio. Place the wire antenna so that it is as straight as possible extending either above or below the radio. 3. Insert the adaptor plug into t...
Page 6 - Operating your clock radio
5 Operating your clock radio . Press the On / Standby button to switch on your clock radio. The display will show “Welcome to Digital Radio” for a few seconds. 2. If this is the first time the radio is used to scan of the Band III DAB channels will be carried out. The display will show “Welcome to D...
Page 7 - Selecting a station - DAB
6 GB Selecting a station - DAB . The display will show “Connecting” for a few seconds. The top line of the display shows the name of the station currently selected. . Press the Band button to select DAB mode. The display will show the name of the radio station currently selected. 3. Press the Tuning...
Page 8 - Secondary services - DAB
7 Secondary services - DAB . Certain radio stations have one or more secondary services associated with them. If a station has a secondary service associated with it the display will show “>>” next to the station name on the station list. The secondary service will then appear immediately afte...
Page 10 - Finding new stations - DAB
9 Finding new stations - DAB From time to time, new DAB radio stations may become available. Or you may have moved to a different part of the country. In this case you may need to cause your radio to scan for new stations. . Press the band button to select DAB radio mode. . Once in DAB mode, press a...
Page 11 - Station order setup
0 GB Station order setup Your radio has 3 station order settings from which you can choose. The station order settings are, alphanumeric, ensemble and valid. Note: The default station order on your radio is alphanumeric. . Press the Standby button to switch on your radio. . Press the Band button as ...
Page 12 - Manual tuning – DAB
Manual tuning – DAB Manual tuning allows you to tune your radio to a particular DAB frequency in Band III. Any new stations found will be added to the station list. This function can also be used to assist the positioning of the aerial or radio to optimise reception for a specific channel or frequen...
Page 16 - Scan setting
5 Scan setting When using the FM mode your radio can be set to either scan local stations or to scan all stations including distant radio stations. . Press the Band button as needed to select FM radio mode. . Press and hold the Menu/ Info button to enter the FM menu. Press the Tuning up / down butto...
Page 18 - Presetting stations; Recalling a preset station
7 Presetting stations You may store your preferred DAB and FM radio stations to the preset station memories. There are 0 memory presets in your radio, 5 for DAB and 5 for FM. Presets are remembered by your radio in the event of a power failure. The procedure for setting presets and using them to tun...
Page 19 - Clock and Alarms; Setting the time format
8 GB Clock and Alarms Setting the time format The clock display used in stand-by mode and on the playing mode screens can be set to or 4 hour format. The selected format is then also used when setting the alarms. . Press and hold the Menu/ Info button to enter the menu setting. . Press the Tuning up...
Page 20 - Automatically updating the clock
9 Automatically updating the clock You can specify that the unit sets its clock from DAB or FM radio broadcasts. After a power failure the radio will then set its clock the next time that you turn on the radio in DAB or FM mode. Alternatively you can specify that the time is not automatically update...
Page 21 - Setting the clock manually
0 GB Setting the clock manually Normally your clock radio will set its clock automatically via the DAB signal. If no DAB signal is available and you need to set the time manually, please follow the procedure shown below. Note: The DAB signal will always override any manual time setting. . To set the...
Page 22 - Setting the alarm times
Setting the alarm times Your clock radio has two alarms which can be set to wake you to either radio or buzzer alarm. Each alarm can be set to sound once, daily, on weekdays or at weekends. The alarms can only be set when your clock radio is switched on and in DAB or FM mode. . Press the On / Standb...
Page 25 - Snooze
4 GB Snooze . When the radio or buzzer alarm sounds, pressing the Snooze button will silence the alarm for the selected number of minutes. The Snooze down can be adjusted between 5 and 0 minutes in 5 minute increments. Default setting is 5 minutes. The display will show the Snooze symbol “Z”. This s...
Page 26 - Sleep timer
5 Sleep timer Your clock radio can be set to turn off after a preset time has elapsed. The sleep setting can be adjusted between 5 and 0 minutes in 5 minutes increments. Ensure your clock radio switched on. . To set the desired sleep time, press and release the Sleep button to enter the setting menu...
Page 29 - System reset
8 GB System reset If your radio fails to operate correctly, or some digits on the display are missing or incomplete carry out the following procedure. . Switch on your radio. . Press and hold in the Info button to enter the setting menu. Press the Tuning up or down until ‘System Setting’ shown on th...
Page 30 - Software upgrade
9 Software upgrade From time to time, new software features for your radio may be developed. Your radio has therefore been designed to allow its internal software to be updated using your USB upgrade port. You should not attempt to update your radio unless it is recommended to you by Sangean Custome...
Page 31 - Cautions
30 GB Cautions Do not allow this clock radio to be exposed to water, steam or sand. Do not leave your clock radio where excessive heat could cause damage such as in a parked car where the heat from the sun can build up even though the outside temperature may not seem too high. ● The name plate is lo...
Page 32 - Specification; Power Requirements; Frequency Coverage; Circuit Feature; Aerial System
3 Specification Power Requirements Mains Frequency Coverage AC 00 40V 50/60 Hz (switching adaptor) FM 87.5 - 08MHzDAB 74.98 - 39.00MHz The Company reserves the right to amend the specification without notice. If at any time in the future you should need to dispose of this product please note that: W...


 Sangean 180 Manual
 Sangean ATS-404 Manual
 Sangean ATS-505P Manual
 Sangean ATS-808A Manual
 Sangean ATS909 Manual
 Sangean DT-120 Manual
 Sangean DT-210 Manual
 Sangean DT400W Manual
 Sangean H201 Manual
 Sangean H202 Manual
 Sangean HDR-1 Manual
 Sangean HDT-1 Manual
 Sangean HDT-1X Manual
 Sangean K-200 Manual
 Sangean MMR-77 Manual
 Sangean MMR-99 User Manual
 Sangean PR-D5 User Manual