Page 2 - Contents; PREPARATION; Product Specification
Contents PREPARATION Safety information 3 INSTALLATION Name of the parts 13 Accessories 14 Installing the wall mount 15 Assembling the wall mount 15 Installing the wall mount 15 OPERATION Using the vacuum cleaner 16 Using the wall mount 16 Charging the battery 17 Operating the vacuum cleaner 18 Usin...
Page 3 - Safety information; retain it for your reference.
P REP ARA TION Safety information PREPARATION • Before operating the appliance, please read this manual thoroughly and retain it for your reference. • Because the following operating instructions cover various models, the characteristics of your vacuum cleaner may differ slightly from those describe...
Page 4 - General
P REP ARA TION Failure to meet these requirements could cause damage to the internal parts of the vacuum and void your warranty. General • Read all instructions carefully. Before switching the vacuum on, make sure that the voltage of your electricity supply is the same as that indicated on the ratin...
Page 5 - • The battery must be removed from the main unit before cleaning or
P REP ARA TION • This appliance is not intended for use by persons (including children) with reduced physical, sensory or mental capabilities, or lack of experience and knowledge, unless they have been given supervision or instruction concerning use of the appliance by a person responsible for their...
Page 6 - Wall mount
P REP ARA TION Wall mount • Do not modify the polarized plug to fit a non-polarized outlet or extension cord. • Do not use outdoors or on wet surfaces.• Unplug the wall mount from the outlet when not in use and before servicing. • Use only the wall mount supplied by the manufacturer to recharge.• Do...
Page 7 - Vacuum cleaner
P REP ARA TION Vacuum cleaner • Do not pick up hard or sharp objects such as glass, nails, screws, coins, etc.• Do not use without a filter in place. When servicing the unit, never put fingers or other objects into the fan chamber in case the unit accidentally turns on. • Do not put any objects into...
Page 8 - Power related
P REP ARA TION Power related WARNING • When installing the wall mount, do not bend the battery charger with excessive force or put heavy objects on the battery charger. – Otherwise, electric shock or fire may occur. • If there is dust, water, etc. on a pin or contact point of the power plug, wipe th...
Page 10 - CAUTION
P REP ARA TION CAUTION • Do not use the product near combustible material. Also do not use: – In a place where a burning candle or desk lamp is placed on the floor. – In an area where an unattended place heater is turned on or an area in which there are unextinguished embers in a fireplace, in an as...
Page 11 - • Do not step heavily on the upper part of the wet brush while using it.
P REP ARA TION • Do not step heavily on the upper part of the wet brush while using it. – Otherwise, product damage or floor damage may occur. • When using the vacuum cleaner, be careful not to hurt yourself on the moving or spinning parts. – Be careful not to suction body parts into a brush of the ...
Page 12 - Maintenance
P REP ARA TION Maintenance WARNING • Before removing foreign matter inside the vacuum, turn off the vacuum cleaner first. – If the vacuum is on while you are removing the foreign matter, you can hurt yourself or damage the vacuum. • When cleaning the exterior of the product, turn off the product fir...
Page 13 - Name of the parts
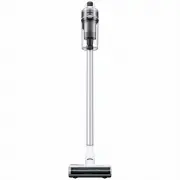
INSTALLA TION Name of the parts INSTALLATION 01 Pipe 02 Dustbin 03 Metal mesh grille filter 04 Washable micro filter 05 Ultra fine dust filter 06 Dustbin release button 07 Display 08 Power( ) button 09 Suction power control button 10 Handle 11 Battery level indicator 12 Battery release button 13 Pip...
Page 14 - Accessories
INSTALLA TION Accessories Accessories may differ depending on the models. Pipe Combination Tool Extension Crevice Tool Battery Wall mount (Screws: 2 EA / Screw anchors: 2 EA) Battery charger User manual *Mini Motorized Tool *Soft Action Brush *Turbo Action Brush *Flexible Tool *Wet Brush / Multi-us...
Page 15 - Installing the wall mount; Assembling the wall mount
INSTALLA TION Installing the wall mount CAUTION • Install the wall mount on a hard concrete wall. – If it is installed on a wood or plaster wall, the product may fall. Assembling the wall mount 1 2 • To disassemble the wall mount, follow steps in reverse order. Installing the wall mount Wall mount h...
Page 16 - Using the vacuum cleaner; Using the wall mount; Charging
OPERA TION OPERATION Using the vacuum cleaner Using the wall mount Charging ❇ ❇ Make sure the back of the battery is correctly placed onto the vacuum charging part. ❇ ❇ Check if the battery level indicator is displayed while charging. ❇ ❇ The battery level indicator blinks while charging. When charg...
Page 17 - Charging the battery; Ejecting the battery; Re-inserting the battery
OPERA TION Charging the battery ❇ ❇ When the battery level indicator is at its lowest level and blinks( ) charge the battery. ❇ ❇ When charging the vacuum, make sure the connection part of the wall mount is correctly connected. ❇ ❇ The vacuum cleaner cannot be used while it is charging. CAUTION • Be...
Page 18 - Operating the vacuum cleaner; Controlling suction power
OPERA TION Operating the vacuum cleaner When the brush clings to the floors such as a carpet, a mat, bedding, etc. or does not spin properly, change the suction power to ‘MIN’ or ‘MID’ mode. Power ( ) on / off When pressing the power button, the vacuum cleaner starts operation in ‘MID’ mode.• When t...
Page 19 - Using the accessories; Disassembling the accessories; Soft Action Brush; Turbo Action Brush; Mini Motorized Tool
OPERA TION Using the accessories If the vacuum operates with the spinning brush not working, check whether the brush gets excessive force or clogged with a foreign matter. (Please refer to the troubleshooting part of this manual.) Disassembling the accessories • When disassembling the pipe, press th...
Page 20 - Combination Tool; Extension Crevice Tool; Flexible Tool
OPERA TION 2 1 ‘Click’ Combination Tool Use to remove dust from curtains, furniture, sofas, etc. 2 1 ‘Click’ Extension Crevice Tool Use to remove dust in grooves of window frames, chinks, corners, etc. ‘Click’ Flexible Tool Use to clean the places hard to reach such as upper or rear parts of furnitu...
Page 21 - Wet Brush
OPERA TION Velcro side Single-use wet pad Multi-use wet pad <Back> <Front> Using the single-use wet pad Using the multi-use wet pad 1 2 3 ‘Click’ ‘Click’ Attachable pad Velcro Spin disk Wet Brush Use to clean a floor with a wet pad (wood and linoleum). ❇ ❇ The Wet Brush does not have a d...
Page 22 - Maintaining the vacuum cleaner; When to empty the dustbin
MAINTENANCE Maintaining the vacuum cleaner MAINTENANCE When to empty the dustbin Emptying the dustbin easily without causing dust clouds Emptying and cleaning the dustbin 1 2 1 2 Filter handle After pressing the dustbin release button, pull the dustbin in the direction of the arrow. Pull the washabl...
Page 24 - Cleaning the filter; Washable micro filter; Cleaning the accessories
MAINTENANCE Cleaning the filter • To maintain the best performance of the filter, remove the dust on the filter frequently and clean the filter with water once a month. – After cleaning, dry completely for more than 24 hours in the shade before use. – When heat is applied, product malformation may o...
Page 26 - Battery usage; Notes and cautions
APPENDIX Battery usage NOTE • If your vacuum cleaner does not work after you charge the battery, change the battery. If it still does not work with the new battery, contact a Samsung service center. • When you purchase a battery in a Samsung service center, check for the genuine Samsung logo on the ...
Page 27 - Operation
APPENDIX • When attaching the battery to the vacuum, insert it until you hear a click. This assures that the battery is firmly attached. – Otherwise, the battery may fall and could cause product damage or injury. • Do not drop or strike the battery or subject it to a sudden shock.• Do not disassembl...
Page 30 - Troubleshooting
APPENDIX Troubleshooting Before calling for service, review the problems and solutions below. If none of the suggested solutions resolve your problem, please visit our website at www.samsung.com or call Samsung Customer Care. Note that you will be charged for any service calls in which no defects we...