Page 2 - AFTER THE RANGE HAS; WARNING; Do not step, lean, or sit on the doors of the range
2 English WARNING To reduce the risk of tipping the range, the range must be secured by a properly installed Anti-Tip device. AFTER THE RANGE HAS BEEN INSTALLED, CONFIRM THAT THE ANTI-TIP DEVICE HAS BEEN PROPERLY INSTALLED AND VERIFY THAT THE ANTITIP DEVICE IS PROPERLY ENGAGED . Refer to the install...
Page 3 - Contents
English 3 C ontents Contents Important safety instructions 4 Introducing your new range 18 Overview 18What’s included with your range 18 Dual Door ™ (NE59*785*** only) 19 How to use the upper door 19 How to use the full door 19 Before you begin 20 Energy saving tips 20 Cooktop cooking 20 About cookt...
Page 4 - Important safety instructions; severe personal injury; minor personal injury; CAUTION; CALIFORNIA PROPOSITION 65 WARNING
4 English Impor tant saf ety ins truc tions Important safety instructions Important safety instructions Read and follow all instructions before using your oven to prevent the risk of fire, electric shock, personal injury, or damage when using the range . This guide does not cover all possible condit...
Page 5 - FOR YOUR SAFETY; User servicing
English 5 Impor tant saf ety ins truc tions FOR YOUR SAFETY When using electrical appliances, you should follow basic safety precautions, including the following: CAUTION • Use this appliance only for its intended purpose as described in this Owner’s Manual. • Potentially hot surfaces include the co...
Page 6 - SURFACE COOKING UNITS; Never leave surface units unattended at high heat settings.
6 English Impor tant saf ety ins truc tions Important safety instructions • The appliance is not intended for use by persons (including children) with reduced physical, sensory or mental capabilities, or lack of experience and knowledge, unless they have been given supervision or instruction concern...
Page 7 - Do not Use Decorative Surface Element Covers
English 7 Impor tant saf ety ins truc tions • Cleaning. Read and follow all instructions and warnings on the cleaning cream labels. • Be sure you know which control knob operates each surface unit. Make sure you turned on the correct surface unit. • Always turn the surface units off before removing ...
Page 8 - The range should not be placed on a base.; CHILD SAFETY; - switch off all cooking zones
8 English Impor tant saf ety ins truc tions Important safety instructions WARNING • Ensure that the appliance is switched off before replacing the lamp to avoid the possibility of electric shock. • The range should not be placed on a base. CHILD SAFETY WARNING • This appliance is not intended for us...
Page 9 - OVEN
English 9 Impor tant saf ety ins truc tions • Use care when opening the door. Let hot air or steam escape before you remove food from or put food into the oven. • Protective liners. Do not use aluminum foil to line the oven bottoms, except as suggested in the manual. Improper installation of these l...
Page 10 - Do not use the drawer to dry newspapers.; Do not attempt to operate the oven during a power failure.; WARMING DRAWER; Use care when opening the drawer.
10 English Impor tant saf ety ins truc tions Important safety instructions • Do not use the drawer to dry newspapers. If overheated, newspapers can catch on fire. • Do not use aluminum foil to line the drawer. Foil is an excellent heat insulator and will trap heat beneath it. This will upset the per...
Page 11 - GLASS/CERAMIC COOKING SURFACES; DO NOT TOUCH SURFACE UNITS OR AREAS NEAR UNITS.
English 11 Impor tant saf ety ins truc tions GLASS/CERAMIC COOKING SURFACES • DO NOT TOUCH SURFACE UNITS OR AREAS NEAR UNITS. Surface units may be hot even though they are dark in color. Areas near surface units may become hot enough to cause burns. During and after use, do not touch, or let clothin...
Page 12 - CRITICAL INSTALLATION WARNINGS
12 English Impor tant saf ety ins truc tions Important safety instructions • This appliance must be properly grounded. • Do not ground the appliance to a gas pipe, plastic water pipe, or telephone line. - This may result in electric shock, fire, an explosion, or problems with the product • Do not cu...
Page 13 - CRITICAL USAGE WARNING
English 13 Impor tant saf ety ins truc tions • Always observe safety precautions when using your oven. Never try to repair the oven on your own - there is dangerous voltage inside. If the oven needs to be repaired, contact an authorized service center near you. • If you use the appliance when it is ...
Page 15 - USAGE CAUTIONS
English 15 Impor tant saf ety ins truc tions USAGE CAUTIONS CAUTION • If the surface is cracked, turn the appliance off. - Failing to do so may result in electric shock. • Dishes and containers can become hot. Handle with care. • Hot foods and steam can cause burns. Carefully remove container coveri...
Page 17 - - You may hurt yourself on the sharp edges of the appliance.; CRITICAL CLEANING WARNINGS; Do not use benzene, thinner, or alcohol to clean the appliance.
English 17 Impor tant saf ety ins truc tions • Take care not to hurt yourself when cleaning the appliance (externally or internally). - You may hurt yourself on the sharp edges of the appliance. • Do not clean the appliance with a steam cleaner. - This may result in corrosion. • Keep the inside of t...
Page 18 - Overview; Introducing your new range
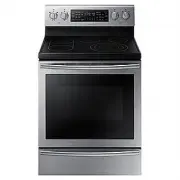
18 English Intr oducing y our ne w rang e Overview 07 06 05 01 02 04 03 09 08 08 09 10 11 (NE59J7750**) (NE59J7750**) (NE59*785***) (NE59*785***) 01 Oven control panel (See page 25 for more information) 02 Glass surface 03 Oven door 04 Warming drawer 05 Surface control knobs* (See page 22 for more i...
Page 19 - How to use the upper door
English 19 Dual Door ™ Dual Door ™ (NE59*785*** only) This oven has a unique Dual Door™ that is hinged in the middle, so you only need to open the top half to access the upper cavity. When you’re using the Flex Duo™ capability, you can access the top oven space much more easily and with greater ener...
Page 20 - Energy saving tips
20 English Befor e you begin Cooktop cooking Before you begin Clean the oven thoroughly before using it for the first time. Then, remove the accessories, set the oven to bake, and then run the oven at 400 °F for 1 hour. There will be a distinctive odor. This is normal.Ensure your kitchen is well ven...
Page 22 - Cooktop cooking; How to set the appliance for cooktop cooking
22 English C ookt op c ooking Cooktop cooking How to set the appliance for cooktop cooking CAUTION • The surface elements may be hot and burns may occur. Do not touch the surface elements until they have cooled down sufficiently. • At high or medium-high settings, never leave food unattended. Boilov...
Page 24 - Choosing the proper cookware
24 English C ookt op c ooking Cooktop cooking Choosing the proper cookware What your cookware is made of determines how evenly and quickly heat is transferred from the surface element to the pan bottom. • ALUMINUM - Excellent heat conductor. Some types of food will cause the aluminum to darken. (Ano...
Page 25 - Operating the oven; The oven control panel
English 25 Oper ating the o v en Operating the oven The oven control panel READ THE INSTRUCTIONS CAREFULLY BEFORE USING THE OVEN. For satisfactory use of your oven, become familiar with the various features and functions of the oven as described below. Detailed instructions for each feature and func...
Page 26 - Setting the clock
26 English Oper ating the o v en Operating the oven 02 Number Pad : Press to set any function requiring numbers such as the time of day on the clock, the timer, the oven temperature, the start time, and length of operation for timed baking. 03 Convection Bake 03-1 Press to select the Convection bake...
Page 27 - Setting the kitchen timer
English 27 Oper ating the o v en How to set the oven for timed cooking1. To use Twin Mode, insert the Partition. If you are using Single Mode, skip this step. 2. Press the pad of the cooking operation you want, eg. CONV. BAKE . The default temperature is 350 °F. 3. Enter the temperature you want, eg...
Page 28 - Minimum and maximum settings; Turning the oven light on and off
28 English Oper ating the o v en Operating the oven Minimum and maximum settings All of the features listed in the table below have minimum and maximum time or temperature settings. A beep will sound each time a pad on the control panel is pressed and the entry is accepted. An error tone will sound ...
Page 29 - Twin cooking mode temperature setting ranges
English 29 Oper ating the o v en LOWER OVEN UPPER OVEN Available function settings and temp. Mode Set Temp. BROIL Convection BAKE & ROAST LOW HI MIN MAX Bake 480 °F O O 400 °F 480 °F 450 °F O O 350 °F 480 °F 350 °F O X 275 °F 450 °F 325 °F O X 275 °F 400 °F 250 °F X X 225 °F 300 °F 175 °F X X 17...
Page 30 - Using the oven racks
30 English Oper ating the o v en Operating the oven Oven rack positions (twin mode) 1 2 3 4 A B The upper oven has 2 rack positions (A, B)The lower oven has 4 rack positions (1~4) Type of food Rack Position Upper Lower Frozen pies A 2 Angel food cakes - 2 Bundt or pound cakes - 2 Muffins, Brownies, ...
Page 32 - Baking
32 English Oper ating the o v en Operating the oven Baking The oven can be programmed to bake at any temperature from 175 °F to 550 °F.Baking temperature and time will vary depending on the ingredients and the size and shape of the baking pan used. Dark or nonstick coatings may cook faster with more...
Page 33 - Convection baking
English 33 Oper ating the o v en How to set the oven for convection baking1. To use Twin mode, insert the partition. If you are using Single mode, skip this step. 2. Press Bake on the Upper/Single oven control side if you are using the upper oven. Press Bake on the Lower/Single oven control side if ...
Page 34 - Broiling; Convection roasting
34 English Oper ating the o v en Operating the oven Broiling Broil mode is best for meats, fish, and poultry up to 1” thick. Broiling is a method of cooking tender cuts of meat by direct heat under the broil element of the oven. The high heat cooks quickly and gives a rich, brown outer appearance. B...
Page 35 - Using the easy cook feature
English 35 Oper ating the o v en Using the easy cook feature You can use the easy cook feature in Single cooking mode. Slow Cook The Slow Cook feature cooks food more slowly at lower oven temperatures. The extended cooking times allow better distribution of flavors in many recipes. This feature is i...
Page 36 - Using the keep warm feature; Using the favorite cook feature
36 English Oper ating the o v en Operating the oven How to recall a setting1. Press Favorite Cook the number of times that corresponds to the position in which the recipe setting is stored, eg. for Custom Cook position 2, Press Favorite Cook twice. 2. Start the stored cooking operation.Press START/S...
Page 37 - Using the sabbath feature
English 37 Oper ating the o v en Do not to attempt to activate any other program feature except BAKE while the Sabbath feature is active. ONLY the following key pads will function correctly with the Sabbath feature on: NUMBER , BAKE , START/SET and OFF/ CLEAR . ALL OTHER KEYPADS should not be used o...
Page 38 - Extra features
38 English Oper ating the o v en Operating the oven Convection auto conversion feature When you use the auto conversion feature, the convection auto conversion feature will automatically convert entered regular baking temperatures to convection baking temperatures.If this feature is activated, the d...
Page 39 - Using the warming drawer; About the warming drawer
English 39 Using the w arming dr awer Using the warming drawer About the warming drawer The warming drawer will keep hot, cooked food warm. Always start with hot food. Do not use to warm cold food other than bread, crackers, chips, or dry cereal.Allow approximately 25 minutes for the warming drawer ...
Page 40 - Turning the warming drawer on or off
40 English Maint aining y our applianc e Using the warming drawer Maintaining your appliance Turning the warming drawer on or off 1. Set the warming drawer to the heat level you want.Press Warming Drawer once for low, twice for medium, or 3 times for high, or 4 times for off.The warming drawer start...
Page 42 - Maintaining your appliance; Care and cleaning of the oven
42 English Maint aining y our applianc e Maintaining your appliance NOTE If you press Steam Clean when the oven temperature is above 100˚F, Hot will appear in the display. Because these functions produce the best results when started while the oven is cool, we recommend that you wait until the oven ...
Page 44 - Care and cleaning of the glass cooktop
44 English Maint aining y our applianc e Maintaining your appliance Removing heavy, burned-on residue 1. Allow the cooktop to cool. 2. Use a single-edge razor-blade scraper at approximately a 45° angle against the glass surface and scrape the soil. It will be necessary to apply pressure to remove th...
Page 45 - Removing and replacing the oven door
English 45 Maint aining y our applianc e Removing and replacing the oven door How to remove the door You can remove the upper door the same way you remove the full door (NE59*785***). CAUTION • The door is very heavy. Be careful when removing and lifting the door. Do not lift the door by the handle....
Page 46 - Removing and replacing the warming drawer
46 English Maint aining y our applianc e Maintaining your appliance Removing and replacing the warming drawer CAUTION Turn the power OFF before removing the warming drawer. How to remove the warming drawer1. Pull out the drawer until it stops. 2. Locate the locking clips near the back of each full-e...
Page 47 - Troubleshooting; Changing the oven light
English 47 Tr ouble shoo ting Troubleshooting Troubleshooting Samsung works hard to ensure that you don’t have problems with your new electric range. If you run into unexpected trouble, look first for a solution in the table below. If, after trying the suggested solution, you’re still having trouble...
Page 52 - Information codes
52 English Tr ouble shoo ting Troubleshooting Displayed code Possible cause Solution C-30 The PCB sensor is open when the oven is operating. Press OVEN OFF , and then restart the oven. If the problem persists, disconnect all power to the oven for at least 30 seconds and then reconnect the power. If ...
Page 57 - Estufa eléctrica; Manual del usuario
Estufa eléctrica Manual del usuario NE59*785***/NE59J7750**
Page 58 - DESPUÉS DE INSTALAR LA ESTUFA, CONFIRME; ADVERTENCIA; . Puede causar que la estufa se incline o vuelque,; Dispositivo anti inclinación
2 Español ADVERTENCIA Para reducir el riesgo de inclinación o vuelco de la estufa, ésta debe estar asegurada mediante un Dispositivo Anti Inclinación correctamente instalado. DESPUÉS DE INSTALAR LA ESTUFA, CONFIRME QUE EL DISPOSITIVO ANTI INCLINACIÓN ESTÉ CORRECTAMENTE INSTALADO Y VERIFIQUE QUE ESTÉ...
Page 59 - Contenido
Español 3 Contenido Contenido Instrucciones de seguridad importantes 4 Introducción a su nueva estufa 18 Descripción general 18 Elementos incluidos con su estufa 18 Dual Door™ (NE59*785*** solamente) 19 Cómo utilizar la puerta superior 19 Cómo utilizar toda la puerta 19 Antes de comenzar 20 Sugerenc...
Page 60 - Instrucciones de seguridad importantes; lesiones; lesiones leves o; PRECAUCIÓN; CALIFORNIA PROPOSICIÓN 65 ADVERTENCIA
4 Español Instruccione s de seg uridad impor tantes Instrucciones de seguridad importantes Instrucciones de seguridad importantes Lea y siga todas las instrucciones antes de utilizar su horno con el fin de evitar riesgos de incendio, descargas eléctricas, lesiones personales o daños al utilizar su e...
Page 61 - PARA SU SEGURIDAD; Mantenimiento del usuario-
Español 5 Instruccione s de seg uridad impor tantes PARA SU SEGURIDAD Cuando utilice electrodomésticos, debe seguir precauciones de seguridad básicas, a saber: PRECAUCIÓN • Utilice este electrodoméstico solo para el uso para el que fue destinado, tal como se describe en este Manual del Usuario. • La...
Page 62 - UNIDADES DE SUPERFICIE DE COCCIÓN; No levante la cubierta.
6 Español Instruccione s de seg uridad impor tantes Instrucciones de seguridad importantes • El uso de este electrodoméstico no es apto para personas (incluye niños) con capacidades físicas, sensoriales o mentales reducidas, o que no tengan experiencia y conocimientos, a menos que sean supervisados ...
Page 63 - No use cubiertas decorativas para elementos de superficie
Español 7 Instruccione s de seg uridad impor tantes • Limpieza. Lea y siga todas las instrucciones y advertencias de las etiquetas de las cremas de limpieza. • Asegúrese de saber cuál de las perillas controla cada unidad de superficie. Asegúrese de que encendió la unidad de superficie correcta. • Si...
Page 64 - La estufa no debe colocarse sobre una base.; SEGURIDAD DE LOS NIÑOS; - apague todas las zonas de cocción
8 Español Instruccione s de seg uridad impor tantes Instrucciones de seguridad importantes ADVERTENCIA • Asegúrese de que el electrodoméstico esté apagado antes de reemplazar la bombilla de luz para evitar la posibilidad de una descarga eléctrica. • La estufa no debe colocarse sobre una base. SEGURI...
Page 65 - HORNO
Español 9 Instruccione s de seg uridad impor tantes • Cuando abra la puerta, hágalo con precaución. Permita la salida del vapor o aire caliente antes de retirar o volver a colocar los alimentos en el horno. • Revestimientos protectores. No utilice papel de aluminio para revestir el fondo del horno, ...
Page 66 - Cuando abra el cajón, hágalo con precaución.; HORNOS AUTO-LIMPIANTES; No limpie la junta selladora de la puerta.; CAJÓN DE CALENTAMIENTO
10 Español Instruccione s de seg uridad impor tantes Instrucciones de seguridad importantes El propósito del cajón de calentamiento es mantener los alimentos cocidos calientes a la temperatura apropiada para servir. Siempre comience con alimentos calientes. Los alimentos fríos no pueden ser calentad...
Page 67 - SUPERFICIES DE COCCIÓN VITRO-CERÁMICAS; No cocine sobre una cubierta quebrada.
Español 11 Instruccione s de seg uridad impor tantes SUPERFICIES DE COCCIÓN VITRO-CERÁMICAS • NO TOQUE LAS UNIDADES DE SUPERFICIE NI LAS ÁREAS CERCANAS A LAS UNIDADES. Las unidades de superficie pueden estar calientes aun cuando su color sea oscuro. Las áreas cercanas a las unidades de superficie pu...
Page 69 - ADVERTENCIA FUNDAMENTAL PARA EL USO
Español 13 Instruccione s de seg uridad impor tantes • Siempre respete las precauciones de seguridad cuando utilice su horno. Nunca intente reparar el horno: contiene voltaje peligroso en el interior. Si se debe reparar el horno, comuníquese con un centro de servicio técnico autorizado cercano. • Si...
Page 71 - PRECAUCIONES PARA EL USO
Español 15 Instruccione s de seg uridad impor tantes PRECAUCIONES PARA EL USO PRECAUCIÓN • Si la superficie está rajada, apague el electrodoméstico. - No hacerlo puede provocar una descarga eléctrica. • La vajilla y los envases pueden calentarse. Manipúlelos con cuidado. • Los alimentos calientes y ...
Page 73 - - Puede lastimarse con los bordes puntiagudos del; descarga eléctrica o incendio.
Español 17 Instruccione s de seg uridad impor tantes • Tenga cuidado de no lastimarse cuando limpia el electrodoméstico (exterior/interior). - Puede lastimarse con los bordes puntiagudos del electrodoméstico. • No limpie el electrodoméstico con un limpiador a vapor. - Esto puede provocar corrosión. ...
Page 74 - Descripción general; Introducción a su nueva estufa
18 Español Introduc ción a su nue va estuf a Descripción general 07 06 05 01 02 04 03 09 08 08 09 10 11 (NE59J7750**) (NE59J7750**) (NE59*785***) (NE59*785***) 01 Panel de control del horno (consulte la página 25 para obtener más información) 02 Superficie de vidrio 03 Puerta del horno 04 Cajón de c...
Page 75 - Cómo utilizar la puerta superior
Español 19 Dual Door ™ Dual Door™ (NE59*785*** solamente) Este horno tiene una única puerta Dual Door™ con bisagra en el centro, lo que permite abrir solo la mitad superior para acceder a la cavidad de arriba. Cuando utiliza la capacidad Flex Duo™, puede acceder al espacio superior del horno mucho m...
Page 76 - Cocción en cubierta; Sugerencias para ahorrar energía; Acerca de la cocción en cubierta
20 Español Antes de c omenz ar Cocción en cubierta Antes de comenzar Limpie el horno a fondo antes de utilizarlo por primera vez. Luego, retire los accesorios, programe el horno para hornear y luego haga funcionar el horno a 400 °F durante una hora. Se notará un olor característico. Esto es normal.A...
Page 78 - Como regular su estufa para la cocción de cubierta
22 Español Coc ción en cubier ta Cocción en cubierta Como regular su estufa para la cocción de cubierta PRECAUCIÓN • Los elementos de superficie pueden estar calientes y pueden causar quemaduras. No toque los elementos de superficie hasta que se hayan enfriado lo suficiente. • Nunca deje la comida d...
Page 80 - Selección de los recipientes de cocción correctos
24 Español Coc ción en cubier ta Cocción en cubierta Selección de los recipientes de cocción correctos El material del que están hechos sus recipientes de cocción determina que tan rápida y parejamente se transfiere el calor del elemento calentador de la superficie al fondo del recipiente. • ALUMINI...
Page 81 - Funcionamiento del horno; Panel de control del horno
Español 25 Funcionamient o del horno Funcionamiento del horno Panel de control del horno LEA LAS INSTRUCCIONES CON ATENCIÓN ANTES DE UTILIZAR EL HORNO. Para obtener un funcionamiento satisfactorio del horno, familiarícese con las diversas características y funciones del horno, tal como se describen ...
Page 82 - Ajuste del reloj
26 Español Funcionamient o del horno Funcionamiento del horno 03 Convection Bake (Hornear por convección) 03-1 Presione para seleccionar la función de horneado por convección del horno simple o superior. 03-2 Presione para seleccionar la función de horneado por convección del horno simple o inferior...
Page 83 - Cómo programar el temporizador de cocina; Cocción por temporizador
Español 27 Funcionamient o del horno Cómo programar el horno para cocción regida por el temporizador1. Para utilizar el modo doble, inserte la partición. Si está usando el modo simple, omita este paso. 2. Presione la tecla de la operación de cocción que desea, por ejemplo CONV. BAKE (Hornear por con...
Page 84 - Ajustes mínimos y máximos; Inicio retardado
28 Español Funcionamient o del horno Funcionamiento del horno Ajustes mínimos y máximos Todas las funciones enumeradas en la siguiente tabla tienen ajustes de tiempo o temperatura mínimos y máximos. Se oirá una señal sonora cada vez que se presione una cubierta de vidrio y la hornalla radiante del p...
Page 85 - Rangos de ajuste de temperatura del modo de cocción doble
Español 29 Funcionamient o del horno HORNO INFERIOR HORNO SUPERIOR Ajustes de función y temperatura disponibles Modo Ajuste de temperatura ASAR A LA PARRILLA Hornear y asar por convección BAJO Alta MÍN MÁX Hornear 480 °F O O 400 °F 480 °F 450 °F O O 350 °F 480 °F 350 °F O X 275 °F 450 °F 325 °F O X ...
Page 86 - Uso de las parrillas del horno
30 Español Funcionamient o del horno Funcionamiento del horno Posiciones de las parrillas del horno (modo doble) 1 2 3 4 A B El horno superior tiene 2 posiciones de parrillas (A, B)El horno inferior tiene 4 posiciones para las parrillas (1~4) Tipo de alimento Posición de la parrilla Superior Inferio...
Page 88 - Hornear; Uso de la partición
32 Español Funcionamient o del horno Funcionamiento del horno Hornear El horno puede programarse para hornear a cualquier temperatura en el rango de 175 °F a 550 °F.La temperatura y el tiempo de horneado varían según los ingredientes y el tamaño y la forma de la bandeja de hornear utilizada. Los rec...
Page 89 - Hornear por convección
Español 33 Funcionamient o del horno Cómo ajustar el horno para hornear por convección.1. Para utilizar el modo doble, inserte la partición. Si está usando el modo simple, omita este paso. 2. Presione Bake (Hornear por convección) en el lado del control del horno superior/ simple si está usando el h...
Page 90 - Asar a la parrilla; Asar por convección
34 Español Funcionamient o del horno Funcionamiento del horno Asar a la parrilla El modo asar a la parrilla es el mejor para carnes, pescados y aves de hasta 1" de grosor. Asar a la parrilla es un método de cocinar cortes tiernos de carne mediante el calor directo bajo el elemento radiante del h...
Page 91 - Cómo utilizar la función de cocción fácil
Español 35 Funcionamient o del horno Cómo utilizar la función de cocción fácil Puede usar la función de cocción fácil en el modo de cocción simple. Cocción lenta La función Cocción lenta cocina los alimentos más lentamente a más baja temperatura del horno. Los tiempos de cocción prolongados permiten...
Page 92 - Cómo usar la función de mantener caliente; Cómo utilizar la función de cocción favorita
36 Español Funcionamient o del horno Funcionamiento del horno Cómo recuperar un ajuste1. Presione Favorite cook (Cocción favorita) la cantidad de veces que corresponda a la posición en la cual está almacenado el ajuste, por ejemplo para Cocción personalizada posición 2, presione Favorite Cook (Cocci...
Page 93 - Uso de la función Shabat
Español 37 Funcionamient o del horno No intente activar ninguna otra función de programa excepto BAKE (HORNEAR) mientras la función Shabat está activa. ÚNICAMENTE las siguientes teclas funcionarán correctamente con la función Shabat activada: NÚMERO , BAKE (HORNEAR) , START/SET (INICIO/CONFIGURAR) y...
Page 94 - Funciones adicionales
38 Español Funcionamient o del horno Funcionamiento del horno Función de auto-conversión por convección Cuando se utiliza la función de autoconversión, la función de autoconversión por convección convertirá automáticamente las temperaturas normales ingresadas a las temperaturas correspondientes para...
Page 95 - Uso del cajón de calentamiento; Acerca del cajón de calentamiento
Español 39 Uso del c ajón de c alent amient o Uso del cajón de calentamiento Acerca del cajón de calentamiento El cajón de calentamiento mantendrá comidas cocidas y calientes a temperaturas aptas para servir. Siempre comience con alimentos calientes. No lo utilice para calentar alimentos fríos, exce...
Page 96 - Encendido y apagado del cajón de calentamiento
40 Español Mant enimient o de su elec tr odomé stic o Uso del cajón de calentamiento Mantenimiento de su electrodoméstico Encendido y apagado del cajón de calentamiento 1. Regule el nivel de calor que desea para el cajón de calentamiento.Presione Warming Drawer (Cajón de calentamiento) una vez para ...
Page 98 - Mantenimiento de su electrodoméstico; Cuidado y limpieza del horno
42 Español Mant enimient o de su elec tr odomé stic o Mantenimiento de su electrodoméstico NOTA Si presiona Steam Clean (Limpieza con vapor) cuando la temperatura del horno se encuentra por encima de los 100 ˚F, aparecerá la palabra Hot (caliente) en la pantalla. Dado que estas funciones producen me...
Page 100 - Cuidado y limpieza de la cubierta de vidrio
44 Español Mant enimient o de su elec tr odomé stic o Mantenimiento de su electrodoméstico Cómo quitar gruesas capas de residuos quemados y adheridos 1. Espere que la cubierta se enfríe. 2. Utilice una rasqueta de navaja de un solo filo a un ángulo de 45° sobre la superficie de vidrio y raspe la suc...
Page 101 - Cómo retirar y volver a colocar la puerta del horno
Español 45 Mant enimient o de su elec tr odomé stic o Cómo retirar y volver a colocar la puerta del horno Cómo retirar la puerta Puede retirar la puerta superior de la misma manera que retira la puerta completa (NE59*785***). PRECAUCIÓN • La puerta es muy pesada. Tenga cuidado al retirarla y levanta...
Page 102 - Cómo retirar y volver a colocar el cajón de calentamiento
46 Español Mant enimient o de su elec tr odomé stic o Mantenimiento de su electrodoméstico Cómo retirar y volver a colocar el cajón de calentamiento PRECAUCIÓN Desconecte la electricidad antes de retirar el cajón de calentamiento. Cómo retirar el cajón de calentamiento1. Tire del cajón hacia afuera ...
Page 103 - Resolución de problemas; Recambio de la luz del horno
Español 47 Re solución de pr oblemas Resolución de problemas Resolución de problemas Samsung hace grandes esfuerzos para asegurar que usted no experimente problemas con su nueva estufa eléctrica. Si se encuentra con problemas inesperados, como primera medida busque la solución en la siguiente tabla....
Page 108 - Códigos de información
52 Español Re solución de pr oblemas Resolución de problemas Código mostrado Causa posible Solución C-30 El sensor PCB está abierto cuando el horno está funcionando. Presione OVEN OFF (APAGAR HORNO) y reinicie el horno. Si el problema persiste, desconecte toda alimentación eléctrica al horno durante...
Page 113 - Cuisinière électrique; Manuel d’utilisation
Cuisinière électrique Manuel d’utilisation NE59*785***/NE59J7750**
Page 114 - APRÈS AVOIR; AVERTISSEMENT; L’appareil risquerait de basculer et; Dispositif anti-basculement
2 Français AVERTISSEMENT Afin d’éviter tout risque de basculement de la cuisinière, fixez-la correctement à l’aide d’un dispositif anti-basculement. APRÈS AVOIR INSTALLÉ LA CUISINIÈRE, CONFIRMEZ QUE LE DISPOSITIF ANTI-BASCULEMENT EST BIEN INSTALLÉ ET VÉRIFIEZ QUE CE DERNIER EST BIEN FIXÉ. Reportez-v...
Page 115 - Table des matières
Français 3 Table de s matièr es Table des matières Consignes de sécurité importantes 4 Présentation de votre nouvelle cuisinière 18 Présentation 18Accessoires fournis 18 Dual Door ™ (NE59*785*** uniquement) 19 Comment utiliser la porte supérieure 19 Comment utiliser la porte complète 19 Avant de com...
Page 116 - Consignes de sécurité importantes; blessures graves, voire mortelles; blessures légères ou des dégâts matériels; ATTENTION
4 Français Consigne s de sécurit é impor tantes Consignes de sécurité importantes Consignes de sécurité importantes Lisez et suivez toutes les consignes avant d’utiliser votre four afin d’éviter tout risque d’incendie, d’électrocution, de blessure ou de dommage lors de l’utilisation de la cuisinière...
Page 117 - CALIFORNIA PROPOSITION 65 AVERTISSEMENT; POUR VOTRE SÉCURITÉ; Entretien par l’utilisateur
Français 5 Consigne s de sécurit é impor tantes CALIFORNIA PROPOSITION 65 AVERTISSEMENT AVERTISSEMENT Cancer et Troubles de l’appareil reproducteur – www.P65Warnings.ca.gov. POUR VOTRE SÉCURITÉ Lorsque vous utilisez des appareils électriques, respectez les consignes de sécurité de base suivantes : A...
Page 118 - Utilisez uniquement des maniques sèches.
6 Français Consigne s de sécurit é impor tantes Consignes de sécurité importantes • Utilisez uniquement des maniques sèches. L’utilisation de maniques humides ou mouillées sur les surfaces chaudes peut entraîner des brûlures en raison de la vapeur qui se dégage à ce moment-là. Les maniques ne doiven...
Page 119 - Utilisez des plats de taille appropriée.; TABLES DE CUISSON; Ne soulevez pas la table de cuisson.
Français 7 Consigne s de sécurit é impor tantes • Posez les ustensiles de cuisine sur la table de cuisson avec précaution, surtout lorsque celle-ci fonctionne. Vous risqueriez entre autre de vous brûler. • Utilisez des plats de taille appropriée. La cuisinière est dotée de foyers de différentes tail...
Page 120 - SÉCURITÉ ENFANTS; N’utilisez pas de caches décoratifs sur les éléments de la table
8 Français Consigne s de sécurit é impor tantes Consignes de sécurité importantes • En cas de dysfonctionnement ou de détérioration (cassure, fêlure) de l’appareil : - éteignez toutes les zones de cuisson - débranchez la cuisinière de la prise murale CA - contactez le centre de dépannage Samsung le ...
Page 121 - FOUR
Français 9 Consigne s de sécurit é impor tantes • Ne faites pas chauffer des aliments contenus dans des récipients fermés. L’accumulation de pression pourrait faire exploser le contenant et provoquer des blessures. • N’utilisez pas le four pour sécher des journaux. En cas de surchauffe, les journaux...
Page 122 - Soyez prudent à l’ouverture du tiroir.; N’essayez pas d’utiliser le four pendant une panne de courant.
10 Français Consigne s de sécurit é impor tantes Consignes de sécurité importantes Le tiroir chauffe-plat sert à conserver les aliments cuits à température de consommation. Les aliments doivent être déjà chauds. Le tiroir chauffe-plat ne permet pas de faire réchauffer ou de cuire des aliments froids...
Page 123 - SURFACES DE CUISSON EN VITROCÉRAMIQUE; Les éléments de la table de cuisson peuvent être; FOURS AUTO-NETTOYANTS; Ne nettoyez jamais le joint de la porte.
Français 11 Consigne s de sécurit é impor tantes • Si le mode d’auto-nettoyage ne fonctionne pas, éteignez le four et débranchez-le de la prise d’alimentation. Faites-le réparer par un technicien qualifié. • Nettoyez les projections les plus importantes avant de procéder à l’auto-nettoyage. SURFACES...
Page 124 - Nettoyez la table de cuisson avec précaution.
12 Français Consigne s de sécurit é impor tantes Consignes de sécurité importantes • Branchez le cordon d’alimentation sur une prise adaptée correctement reliée à la terre. Ne branchez aucun autre appareil électrique sur ce même circuit. • Gardez tous les éléments d’emballage hors de la portée des e...
Page 127 - AVERTISSEMENTS RELATIFS À L’UTILISATION
Français 15 Consigne s de sécurit é impor tantes • N’exercez pas de pression excessive sur la porte ou à l’intérieur de l’appareil. Évitez tout choc sur la porte ou à l’intérieur de l’appareil. - S’accrocher à la porte de l’appareil risque de le faire basculer et de provoquer de graves blessures. - ...
Page 130 - Présentation; Présentation de votre nouvelle cuisinière
18 Français Pr ésentation de v otr e nouv elle cuisinièr e Présentation 07 06 05 01 02 04 03 09 08 08 09 10 11 (NE59J7750**) (NE59J7750**) (NE59*785***) (NE59*785***) 01 Tableau de commande du four (Voir page 25 pour plus d’informations) 02 Surface vitrée 03 Porte du four 04 Tiroir chauffe-plat 05 B...
Page 131 - Comment utiliser la porte supérieure
Français 19 Dual Door ™ Dual Door ™ (NE59*785*** uniquement) Ce four dispose d’une porte unique Dual Door™ munie de charnières au milieu. Vous aurez donc besoin d’ouvrir uniquement la moitié supérieure pour accéder à la cavité supérieure. Lorsque vous utilisez la fonctionnalité Flex Duo™, vous pouve...
Page 132 - Cuisiner sur la table de cuisson; Conseils pour économiser de l’énergie; À propos de la cuisine sur la table de cuisson
20 Français Av ant de c ommenc er Cuisiner sur la table de cuisson Avant de commencer Nettoyez soigneusement le four avant de l’utiliser pour la première fois. Ensuite, retirez les accessoires, lancez un cycle de cuisson traditionnelle et faites fonctionner le four à 400 °F pendant 1 heure. Il est n...
Page 134 - Comment régler la cuisinière pour utiliser la table de cuisson ?
22 Français Cuisiner sur la t able de cuis son Cuisiner sur la table de cuisson Comment régler la cuisinière pour utiliser la table de cuisson ? ATTENTION • Les foyers de la table de cuisson peuvent être chauds et provoquer des brûlures. Ne touchez pas les foyers avant qu’ils n’aient suffisamment re...
Page 136 - Choix des ustensiles de cuisine appropriés
24 Français Cuisiner sur la t able de cuis son Cuisiner sur la table de cuisson Choix des ustensiles de cuisine appropriés Le matériau de l’ustensile de cuisine assure que la chaleur émise par le foyer se propage uniformément et rapidement au fond de la casserole. • ALUMINIUM - Excellent conducteur ...
Page 137 - Utilisation du four; Tableau de commande du four
Français 25 Utilisation du f our Utilisation du four Tableau de commande du four LISEZ ATTENTIVEMENT LES CONSIGNES D’UTILISATION AVANT DE VOUS SERVIR DU FOUR. Afin de profiter au mieux de votre four, familiarisez-vous avec les fonctionnalités décrites ci-dessous. Vous trouverez un descriptif détaill...
Page 138 - Réglage de l’horloge
26 Français Utilisation du f our Utilisation du four 04 Convection Roast (Rôtissage Par Convection) : utilisé pour activer la fonction de rôtissage par convection dans la partie supérieure du four ou le four en mode unique. 05 Bake (Cuisson Traditionnelle) : utilisé pour activer la fonction de cuiss...
Page 139 - Réglage de la minuterie
Français 27 Utilisation du f our Comment régler le four pour la cuisson minutée ?1. Pour utiliser le mode Twin (Double), vous devez insérer la plaque de séparation dans le four. Si vous utilisez le mode Single (Unique), sautez cette étape. 2. Appuyez sur la touche correspondant à la cuisson de votre...
Page 140 - Réglages minimum et maximum; Départ différé; Activation et désactivation de l’éclairage du four
28 Français Utilisation du f our Utilisation du four Réglages minimum et maximum Toutes les fonctions listées dans le tableau ci-dessous ont un réglage minimum et un réglage maxi-mum de la durée ou de la température. Un signal sonore retentit chaque fois que vous appuyez sur une touche et que la sai...
Page 141 - Plages de réglage de la température en mode de cuisson double
Français 29 Utilisation du f our PARTIE INFÉRIEURE DU FOUR PARTIE SUPÉRIEURE DU FOUR Réglages et températures pour la fonction disponible Mode Réglage de la température GRIL CUISSON ET RÔTISSAGE par Convection FAIBLE ÉLEVÉE MINI. MAXI. Cuisson traditionnelle 480 °F O O 400 °F 480 °F 450 °F O O 350 °...
Page 142 - Utilisation des grilles du four
30 Français Utilisation du f our Utilisation du four Positions des grilles de cuisson (mode double) 1 2 3 4 A B Le compartiment supérieur du four comporte 2 niveaux (A et B)Le compartiment inférieur du four comporte 4 niveaux (1~4) Type d’aliment Hauteur de grille Supérieur Inférieur Tartes surgelée...
Page 144 - Cuisson
32 Français Utilisation du f our Utilisation du four Cuisson Le four peut être programmé pour cuire à toute température comprise entre 175 °F et 550 °F.La température et le temps de cuisson varient en fonction des ingrédients, ainsi que de la taille et de la forme du plat de cuisson utilisé. Les rev...
Page 145 - Cuisson par convection
Français 33 Utilisation du f our Comment régler le four pour la cuisson par convection ?1. Pour utiliser le mode Twin (Double), vous devez insérer la plaque de séparation dans le four. Si vous utilisez le mode Single (Unique), sautez cette étape. 2. Appuyez sur Bake (Cuisson traditionnelle) sur le c...
Page 146 - Cuisson au gril; Rôtissage par convection
34 Français Utilisation du f our Utilisation du four Cuisson au gril Le mode de cuisson au gril est le mode le plus adapté aux viandes, aux poissons et à la volaille d’une épaisseur maximale de 1”. La cuisson au gril est une méthode de cuisson des morceaux de viande tendres utilisant la chaleur dire...
Page 147 - Utilisation de la fonction Cuisson facile
Français 35 Utilisation du f our Utilisation de la fonction Cuisson facile Vous pouvez utiliser la fonction Easy Cook (Cuisson facile) en mode de cuisson en mode unique. Cuisson lente La fonction Slow Cook (Cuisson lente) peut être utilisée pour cuire les aliments plus lentement à une température pl...
Page 148 - Utilisation de la fonction de maintien au chaud; Comment enregistrer une recette préréglée ?
36 Français Utilisation du f our Utilisation du four Comment appeler un réglage?1. Appuyez sur Favorite Cook (Cuisson favorite) le nombre de fois correspondant à la position à laquelle vous souhaitez mémoriser la recette paramétrée. Par exemple, pour une cuisson favorite en position 2, appuyez deux ...
Page 149 - Utilisation de la fonction Shabbat
Français 37 Utilisation du f our Il est déconseillé d’activer un programme autre que la fonction BAKE (CUISSON) pendant que la fonction Shabbat est activée. Seules les touches suivantes fonctionnent correctement en parallèle avec la fonction Shabbat : PAVÉ NUMÉRIQUE , BAKE (CUISSON TRADITIONNELLE), ...
Page 150 - Fonctions complémentaires
38 Français Utilisation du f our Utilisation du four Fonction de convection par conversion automatique Lorsque vous utilisez la fonction de conversion automatique, la fonction de convection par conversion automatique permet de convertir automatiquement les températures de la cuisson classique en tem...
Page 151 - Utilisation du tiroir chauffe-plat; À propos du tiroir chauffe-plat
Français 39 Utilisation du tir oir chauf fe-plat Utilisation du tiroir chauffe-plat À propos du tiroir chauffe-plat Le tiroir chauffe-plat conserve les aliments cuits au chaud. Les aliments doivent être déjà chauds. Ne l’utilisez pas pour faire chauffer des aliments froids, à l’exception du pain, de...
Page 152 - Activation ou désactivation du tiroir chauffe-plat
40 Français Entretien de v otr e appar eil Utilisation du tiroir chauffe-plat Entretien de votre appareil Activation ou désactivation du tiroir chauffe-plat 1. Réglez le tiroir chauffe-plat sur la puissance souhaitée. Appuyez une fois sur Warming Drawer (Tiroir chauffe-plat) pour obtenir une puissan...
Page 154 - Entretien de votre appareil; Entretien et nettoyage du four
42 Français Entretien de v otr e appar eil Entretien de votre appareil REMARQUE Si vous appuyez sur Steam Clean (Nettoyage vapeur) alors que la température du four est supérieure à 100 °F, l’indication Hot (Chaud) s’affiche à l’écran. Pour assurer des résultats optimaux, il est préférable de démarre...
Page 156 - Entretien et nettoyage de la table de cuisson vitrée
44 Français Entretien de v otr e appar eil Entretien de votre appareil Élimination des résidus importants de brûlé 1. Laissez refroidir la table de cuisson. 2. À l’aide d’un grattoir à lame de rasoir unique incliné d’environ 45° sur la surface vitrée, grattez les salissures. Vous devez appuyer et fr...
Page 157 - Retrait et remise en place de la porte du four
Français 45 Entretien de v otr e appar eil Retrait et remise en place de la porte du four Comment retirer la porte ? Vous pouvez retirer la porte supérieure de la même manière que vous retirez la porte complète (NE59*785***). ATTENTION • La porte est très lourde. Soyez prudent lorsque vous retirez e...
Page 158 - Retrait et remise en place du tiroir chauffe-plat
46 Français Entretien de v otr e appar eil Entretien de votre appareil Retrait et remise en place du tiroir chauffe-plat ATTENTION Éteignez la cuisinière avant de retirer le tiroir chauffe-plat. Comment retirer le tiroir chauffe-plat ?1. Tirez le tiroir vers vous jusqu’à ce qu’il arrive en butée. 2....
Page 159 - Dépannage; Remplacement de l’ampoule du four
Français 47 Dépannag e Dépannage Dépannage Samsung veille à ce que vous ne rencontriez pas de problèmes lors de l’utilisation de votre nouvelle cuisinière électrique. En cas de problème inattendu, recherchez en premier lieu une solution dans le tableau ci-dessous. Si, après avoir essayé la solution ...
Page 164 - Codes d’information
52 Français Dépannag e Dépannage Code affiché Cause possible Solution C-30 Le capteur de la carte de circuit imprimé est en circuit ouvert lorsque le four est utilisé. Appuyez sur OVEN OFF (ARRÊT DU FOUR) puis redémarrez le four. Si le problème persiste, coupez toute l’alimentation du four pendant a...