Page 2 - Mains plug; Remove fuse cover and fuse.; How to connect a plug; Norge; Typeskilt finnes på apparatens under side.
2 Important notes for users in theU.K. Mains plug This apparatus is fitted with an approved 13Amp plug. To change a fuse in this type of plugproceed as follows: 1 Remove fuse cover and fuse. 2 Fix new fuse which should be a BS1362 5 Amp,A.S.T.A. or BSI approved type. 3 Refit the fuse cover. If the f...
Page 7 - English; rançais; Español; Index; LGPL Library written offer
7 English F rançais Español Deutsch Index English ------------------------------------------------ 8 Français -------------------------------------------- 49 Español --------------------------------------------- 91 Deutsch ------------------------------------------- 133 LGPL Library written offer Th...
Page 8 - Contents
8 English Contents General Information About WACS700 ............................................... 10Supplied accessories .......................................... 10Philips on-line support ...................................... 11Environmental information .............................. 12Mainten...
Page 9 - FM radio
9 English FM radio Tuning to radio stations .................................... 39Storing preset radio stations ........................... 39 Autostore: automatic programmingManual programmingTo listen to a preset station RDS ....................................................................... ...
Page 10 - General Information; comprise a; Supplied accessories
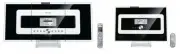
10 English General Information About WACS700 WACS700 comprise a WAC700 Center and a WAS700 Station. Up to 5 WAS700 Stations can be connected to a WAC700 Center. On WAC700 ’s 40GB* hard disk, you can centrally store up to 750 audio CDs. All thestored music can be wirelessly streamed, viaWi-Fi**, from...
Page 11 - Philips on-line support; FAQ
11 English General Information Philips on-line support Philips products have been designed and manufactured to the highest qualitystandards. If your Philips Connected Planet product is not working correctly, werecommend you check your User Manual to verify that your product is properlyconnected and ...
Page 12 - Environmental information; Disposal of your old product; Maintenance; Cleaning the Sets; Safety information
12 English Environmental information All unnecessar y packaging has been omitted. We have tried to make the packaging easy toseparate into three materials: cardboard (box),polystyrene foam (buffer) and polyethylene (bags,protective foam sheet). Your system consists of materials which can be recycled...
Page 13 - Controls; Controls on the Center; Always point the remote control
13 English Controls (illustrations on page 3) Controls on the Center (Top and front panels) 1 STANDBY-ON/ ECO POWER – press briefly to switch Center on orto standby mode ; – press and hold to switch Center toEco Power mode or on 2 CD slot loader 3 EJECT – ejects a disc from the slot loader 4 ACTIVE ...
Page 14 - Controls on the Station
14 English Controls (illustrations on page 4) Controls on the Station ( front panel) 1 SAME ARTIST – HD: plays all the tracks of current ar tist SAME GENRE – HD: plays all the tracks of current genre SMART EQUALIZER – HD: selects match sound setting for current genre MENU – enter s or exits setup me...
Page 15 - Center’s 2-way remote control; ÉÅ
15 English Controls Center’s 2-way remote control 1 y – press briefly to switch the set to standby mode – press and hold to switch the set to Eco Powermode or on 2 Synchro display – synchronous display of the set’s status 3 Source buttons CD/MP3-CD – selects CD source – In standby mode: switches the...
Page 16 - Station’s remote control
16 English Controls Station’s remote control 1 Source buttons Center – selects HD source (located on Center) – In standby mode: switches the set on and selects HD source (located on Center) Tuner/Aux – selects Radio source or the audio input from an additional connected appliance – In standby mode: ...
Page 17 - plays all the tracks of current Genre
17 English Controls 4 Ç – stops playback or recording 5 3 / 4 Scroll – scroll the display screen upward or downward 6 View – toggles playback display and previous option list 7 Repeat – selects continuous playback Shuffle – selects random playback 8 VOL + , - – adjusts the volume level 9 Sleep – aju...
Page 18 - Installation; Center; AC power cord
18 English Installation ETHERNET 75 FM ANTENNA VOLTAGESELECTOR NOT FOR ALLVERSIONS AUX IN R L R L LINEOUT Center Station AC power cord FM antenna AC power cord FM antenna 75 Ω FM ANTENNA 75 Ω FM ANTENNA p001-p048_WACS700_EngNEW2 9/16/2005, 09:48 18
Page 19 - Rear connections; into; Placing Center and Station; Appendix: How to mount your Center
19 English Rear connections Warning:Never make or change connections withthe mains supply switched on. A Antenna Connection 1 Extend the wire antenna and fit it to FM ANTENNA as shown below. Installation 2 To improve FM reception, fit the plug of the wireantenna, as shown, into the plug of the exten...
Page 20 - Station
20 English Installation AUX IN R L Helpful hints: – If the connected device has only a single audioout terminal, connect it to the AUX IN left terminal.Alternatively, you can use a “single to double” cinchcable, but the output sound still remain mono.– Always refer to the owner’s manual of otherequi...
Page 21 - Connecting to an additional appliance; Using AC power; To disconnect
21 English Installation ETHERNET 75 FM ANTENNA VOLTAGESELECTOR NOT FOR ALLVERSIONS AUX IN R L R L LINEOUT LINE OUT R L AUX IN Center D Connecting to an additional appliance with powerful speakers To enjoy the sound effect brought by powerfulspeakers on an external appliance, e .g. a hi-fi minisystem...
Page 22 - Installation Preparation; Using the remote control; If there is interference from neighborhood,; Using Center’s remote control; As a remote control with; To operate Station using; On Center’s remote control:
22 English Using the display on the Center’s remotecontrol You can synchronize the status of your Center or Station onto the display of Center’s 2-wayremote control. With the synchronized display,your operation of remote control becomesquicker and easier. Installation Preparation Using the remote co...
Page 23 - Preparation; button on the; To replace the remote controls’ batteries; Station’s remote control:
23 English Preparation Note: – Avoid placing your Center or Station close to theplasma TV. It may resuit in improper display onyour Center’s remote control.– If you switch on your Center or Station using the STANDBY-ON/ ECO POWER button on the set, press REFRESH on Center’s remote control to synchro...
Page 24 - Using the navigation controls; OK
24 English Preparation Using the navigation controls When selecting options on the set’s screen, you often need to use the navigation controls 1 / 2 / 3 / 4 . 1 Press 3 / 4 to highlight an option 2 Enter its submenu by pressing 2 3 Press 1 to return to the previous option list screen 4 Press OK or 2...
Page 25 - Switching to power-saving mode; Basic functions
25 English Switching to power-saving mode In the power-saving Eco power mode, the set’sdisplay and Wi-Fi connection are turned off. TheCenter’s harddisk also stops working. When youswitch Center to Eco power, it is impossible tomove music between Center and Station orimpor t music from PC to Center....
Page 26 - MUTE; Sound control; Equalizer; Bass adjustment; DBB; Incredible surround
26 English MUTE During playback, you can tempor arily switch offthe sound without switching off the set. 1 Press MUTE to switch off the sound ➜ The icon appears. Playback continues without sound 2 To switch on the sound, press MUTE again or adjust the volume with VOL +/- – You can also switch on the...
Page 27 - Display adjustment; Selecting languages
27 English Basic functions Display adjustment You can adjust the display’s backlight andcontrast settings 1 Press MENU to enter the MENU screen 2 Use the navigation controls 3 or 4 and 2 to select Settings 3 Press 3 or 4 and 2 to select Display 4 Press 1 / 2 / 3 / 4 to select your options: Backlight...
Page 28 - HD; For Station; Selecting and searching; Selecting a different album or track
28 English HD Playing Harddisk (HD) On WAC700 Center is located a 40GBhard disk, where music is centrally stored.Via Wi-Fi, all the stored music can bestreamed and played on Station. 1 Check the Center or Station is switched on or to standby ● For Station : also check the Center is switched on or to...
Page 29 - Selecting tracks of a particular artist; SMART EQUALIZER
29 English HD Selecting tracks of a particular artist ● During playback, press SAME ARTIST ➜ Playback of current ar tist’s tracks continues after current track Selecting tracks of a particular genre ● During playback, press SAME GENRE ➜ Playback of current genre’s tracks continues after current trac...
Page 31 - Building music library on Center; Ripping CDs
31 English HD Building music library on Center By ripping CDs , Importing from PC and Recording from radio or external source you can build your music librar y on Center’shard disk. IMPORTANT!– Recording is permissible if copyrightor other rights of third parties are notinfringed upon.– For CDs enco...
Page 32 - It takes some time to convert the ripped tracks
32 English Importing from PC The supplied PC Installer CD contains DigitalMedia Manager (DMM) software . It will helpyou organize the music files on your PC andimpor t them to WAC700 Center. For details,see DMM’s help file. Refer to the manual Connect to your PC to learn how to install DMM software....
Page 33 - MUSIC FOLLOWS ME; Display track information
33 English HD Moving between Center andStation Up to 5 WAS700 Stations can be to connectedto WAC700 Center. Via Wi-Fi, music can movebetween Center and Stations. Even in differentplaces of your house, you and your family willenjoy and share music with ease. MUSIC FOLLOWS ME As you move around at hom...
Page 34 - Station management; Adding a station
34 English MUSIC BROADCAST MUSIC BROADCAST allows you to broadcast music from Center to Station (s) . On Station(s) 1 Check you have selected HD/AUX source onthe Station(s) or have switched the Station(s) tostandby mode (see Basic functions, Switch on/to standby and selecting functions) On Center 2 ...
Page 35 - Viewing station status; Firmware; Upgrading firmware
35 English HD Viewing station status 1 Switch on WAC700 Center and select HD source 2 To select Station Status on Center a. Press MENU b. Use the navigation controls 3 or 4 and 2 to enter Station Mgnt menu c. In Station Mgnt menu, use the navigation controls 3 or 4 and 2 to select ➜ On the Center ‘s...
Page 36 - Discs for playback; Playing discs; Reading CD; Others
36 English Discs for playback With this system, you can play – all pre-recorded audio CDs (CDDA) – all finalized audio CD-Rs and CD-RWs (12cm CD and 8cm 185 or 200 MB CD) – MP3WMA-CDs (CD-Rs/CD-RWs with MP3/ WMA files) IMPORTANT!– This system is designed for regulardiscs. Therefore, do not use anyac...
Page 37 - Selecting a different album/track
37 English CD (on Center only) Using the fast skip 3 or 4 Use this function to find an option (e.g. an album or a track) in a long option list. ● Press and hold the navigation controls 3 or 4 in the long option list ➜ You will skip the options faster and faster ➜ At the high speed skip, the initial ...
Page 39 - Tuning to radio stations; Autostore: automatic programming
39 English Tuning to radio stations 1 Check the set is switched on or to standby(See Basic functions, Switching on/to standby and selecting functions,Switching to Eco power/ on ) 2 Press SOURCE once or more to select Radio (on the remote control, press TUNER/AUX once or more) ➜ Playback screen appea...
Page 40 - RDS; Activating NEWS; automatic programming; Deactivating NEWS
40 English FM radio RDS RDS ( R adio D ata S ystem) is a service that allows FM stations to send additional informationalong with FM radio signal 1 Tune to the desired RDS radio station (see Autostore: automatic programming ) 2 Press RDS/NEWS repeatedly to view the following information (if availabl...
Page 41 - SLEEP
41 English AUX/ SLEEP AUX (Listening to an externalsource) You can listen to the sound of the connected external device through your Center or Station. 1 Check the external device has been proper lyconnected. (See Installation, Connecting an additional appliance ) 2 Check the set is switched on or t...
Page 42 - Reset
42 English Reset 6 Select your desired language: English, French, Spanish, Dutch, Italian and German ➜ The set enters Installation Mode ➜ The search for Center or Stations star ts. The Wi-Fi connection is being re-established If the Center is reset and Stations arenot reset: ● On the Stations, selec...
Page 43 - Specifications; General
43 English Specifications General AC Power WA C700 ..................................................... 220V ±10% WA S700 ...................................................... 220V ±10% Power consumption Active WA C700 ............................................................... < 35W WA S70...
Page 44 - Troubleshooting
44 English WARNINGUnder no circumstances should you try to repair the system yourself, as this willinvalidate the warranty. Do not open the system as there is a risk of electric shock. If a fault occurs, first check the points listed below before taking the system for repair. Ifyou are unable to rem...
Page 45 - CD; The disc skips tracks
45 English Troubleshooting Stations react when you operateCenter’s remote control “x” flashes on the sychro display ofCenter’s remote control After the set is switched on, nothingappears on the sychronous display ofCenter’s remote control The remote control does not functionproperly. CD “No Disc”/ “...
Page 46 - Tuner; Radio reception is poor; Wall mounting; mount your Center or Station onto Walls
46 English Tuner Radio reception is poor There will be interference on the radioreception whenever my Center orStation is near the PC. Such interference happens to most of the built-intuner product. Wall mounting How do I mount the Center or Stationonto walls? ✔ If the signal is too weak, adjust the...
Page 47 - Appendix; What’s in the supplied mounting kits
47 English Appendix How to mount your Center andStation onto walls IMPORTANT!– The wall mounting instructions are forthe use of the qualified wall mountingperson only!– Ask a qualified person to help youwith the wall mounting, which includesdrilling holes on the wall, fixing themounting brackets to ...
Page 48 - To detach the stand from Center or Station,
48 English 5 To detach the stand from Center or Station, a. As shown, hold down the Lock • unlock button(s).b. Move out the stand to detach. Station 7 As shown, hook and mount Center or Stationin place. 6 On Center, inser t the supplied protective cardsheet where the stand was installed. Center Stat...


 Philips VRZ250AT Manual
 Philips VSS2285/00T Manual
 Philips WAC700 Manual
 Philips WAC7500/05 User Manual
 Philips WACS700 Manual
 Philips WACS7000, WACS7005 Manual
 Philips WACS7000/05 Quick Guide
 Philips WACS7500 Manual
 Philips WAS7000/05 Quick Guide
 Philips WAS7500/05 Quick Guide
 Philips Wireless Equipment Box Manual