Philips TAB7207/10 - User Manual
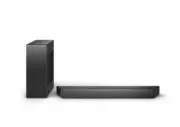
Philips TAB7207/10 – User Manual, read for free online in PDF format. We hope this helps you resolve any issues you may have. If you have further questions, please contact us through the contact form.


Table of Contents:
- Page 2 – Contents; Important safety instructions; Factory reset
- Page 3 – Safety; Read and understand all instructions before
- Page 4 – Note; Care for your product; Use only micro�ber cloth to clean the
- Page 5 – FCC information; turning the equipment off and on, the user is
- Page 6 – Your soundbar; What’s in the box; Remote control sensor; Status; LED state; welcome to Philips! To fully bene�tt; Soundbar’s LED indicator
- Page 7 – LED State; AC in
- Page 8 – Remote control; Prepare the remote control; within the effective range 19.7 feet
- Page 9 – Placement; those speci�ed
- Page 10 – Wall mount; Screw length/diameter; Suggested wall mounting height
- Page 11 – Connect; Dolby Audio-Dolby Digital Plus; Connect to HDMI ARC; Use Dolby Audio-Dolby Digital Plus
- Page 12 – Connect to Optical socket; HDMI ARC
- Page 13 – Tips
- Page 14 – Turn ON and OFF; Auto standby; Select source; effect; Use your; Before you start; EQ
- Page 15 – Stadium
- Page 16 – Bluetooth operation
- Page 17 – ARC operation; Tip; USB operation; Button; such as an MP3 player and USB �ash
- Page 18 – Bluetooth; Bluetooth pro�les; Soundbar; Supported Audio formats; Optical
- Page 19 – Troubleshooting; Warning
User manual
Register your product and get support at
www.philips.com/support
TAB7207
7000
Series
Soundbar
"Loading the manual" means you need to wait until the file loads and becomes available for online reading. Some manuals are very large, and the time they take to appear depends on your internet speed.
Was this manual helpful?
About this manual
- Brand
- Philips
- Model
- TAB7207/10
- Document type
- User Manual
- Language(s)
- English
- Pages
- 22
- File size
- 2.8 MB
- Format
Other Manuals for Philips TAB7207/10
Summary
2 EN Contents 1 Important safety instructions 3 Safety 3 Care for your product 4 Care of the environment 4 Compliance 4 Help and support 4 2 Your soundbar 6 What’s in the box 6 Main unit 6 Connectors 7 Wireless subwoofer 7 Remote control 8 Prepare the remote control 8 Placement 9 Wall mount 10 3 Con...
3 EN 1 Important safety instructions Safety Read and understand all instructions before you use your product. If damage is caused by failure to follow instructions, the warranty does not apply. Risk of electric shock or �re! • Before you make or change any connections, make sure that all devices are...
4 EN Note • The rating label is pasted on the bottom or back of the equipment. Care for your product Care of the environment Declaration of conformity Help and support Your product is designed and manufactured with high quality materials and components, which can be recycled and reused. This symbol ...
Ask a question
Related manuals
Popular Philips Other


More Philips Other models
 Philips TAB5308/10 User Manual
 Philips TAB5309/10 User Manual
 Philips TAB5706/37 User Manual
 Philips TAB6305/10 User Manual
 Philips TAB6309/10 User Manual
 Philips TAB6405/10 User Manual
 Philips TAB7305/10 User Manual
 Philips TAB7807/10 User Manual
 Philips TAB7908/10 User Manual
 Philips TAB8205/10 User Manual
 Philips TAB8405/10 User Manual
 Philips TAB8505/10 Quick Guide