Page 2 - Important; Safety
1 Important Safety a Read these instructions. b Keep these instructions. c Heed all warnings. d Follow all instructions. e Do not use this apparatus near water. f Clean only with dry cloth. g Do not block any ventilation openings. Install in accordance with the manufacturer’s instructions. h Do not ...
Page 3 - Notice
m Battery usage CAUTION – To prevent battery leakage which may result in bodily injury, property damage, or damage to the unit: Install the batter y correctly. • Remove the batter y when the unit is not used for a long • time. n Apparatus shall not be exposed to dripping or splashing. o Do not place...
Page 4 - Your Clock Radio; Introduction
normal household waste.Please inform yourself about the local rules on separate collection of batteries because correct disposal helps to prevent negative consequences for the environmental and human health. Environmental information All unnecessar y packaging has been omitted. We have tried to make...
Page 5 - Overview of the main unit
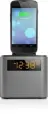
Quick star t guide • Overview of the main unit c d e b c i h gf lkj a n n m
Page 7 - Get started; Install battery
Show current status. • Switch between mono and stereo broadcast. • Confirm a selection. • n Display panel 3 Get started Caution Use of controls or adjustments or per formance of procedures • other than herein may result in hazardous radiation exposure or other unsafe operation. Always follow the ins...
Page 9 - Connect power
Connect power Caution Risk of product damage! Ensure that the power voltage corresponds • to the voltage printed on the back or the underside of the apparatus. Risk of electric shock! When you unplug the AC power cord, always • pull the plug from the socket. Never pull the cord. Before connecting th...
Page 10 - Turn on; Set clock
Turn on 1 Press to turn on the unit. 2 Press repeatedly to switch between standby mode and different sources (FM/DAB/ MP3-LINK). The time and date (if set) are displayed. » To switch the unit to standby mode: 1 Press for 3 seconds. Set clock 1 In standby mode, press SET TIME for over 3 seconds. » [S...
Page 11 - Listen to DAB radio; Tune to DAB radio station; Access DAB menu
4 Listen to DAB radio Tune to DAB radio station Digital Audio Broadcasting (DAB) is a way of broadcasting radio digitally through a network of transmitters. It provides you with more choice, more information and better sound quality. 1 Press SOURCE repeatedly to select DAB . The radio begins to scan...
Page 12 - Store DAB radio stations in memory; Select a preset DAB radio station
1 In DAB mode, press MENU until [Manual tune] is displayed, then press ENTER to confirm. A channel and its frequency appear on the display. » 2 Press + TUNING - repeatedly to tune to your desired station. 3 Press ENTER to confirm. [DRC value] • [DRC off] : DRC (Dynamic Range Control) is switched off...
Page 13 - Show DAB information; Listen to FM radio; Tune to FM radio station
Show DAB information 1 While listening to DAB radio, press DISPLAY repeatedly to scroll through the following information (if available): Dynamic label segment (DLS) » Program type (PTY) » Ensemble Name » Channel and frequency » Signal error rate » Bit rate and audio status » Time/date » 5 Listen to...
Page 14 - Store FM radio stations automatically; Store FM radio stations in memory
Store FM radio stations automatically Note You can store a maximum of 20 preset radio stations. • 1 Press SOURCE repeatedly to select FM tuner. 2 Press PROG for over 3 seconds. All available stations are stored in the order of waveband » reception strength.The first stored radio station broadcasts a...
Page 15 - Other features; Set alarm
Select a preset FM radio station 1 In FM tuner mode, press PRESET + / RRESET - to select a preset number. Select stereo/mono broadcast Note For stations with weak signals, to improve the reception, change to • monaural sound. 1 In FM tuner mode, press and hold ENTER to switch between mono and stereo...
Page 16 - Activate/Deactivate alarm timer; Snooze alarm; Stop alarm sound
Note If no button is pressed in one minute, the system exits alarm setting mode. • Activate/Deactivate alarm timer Note Ensure that you have already set the alarms successfully. • 1 Press AL1 or AL2 repeatedly. If the alarm timer is activated, » or appears. If the alarm timer is deactivated, » or di...
Page 17 - Set sleep timer; Adjust display brightness; Listen to external audio device
Set sleep timer The unit can switch to standby mode automatically after a period. 1 Press SLEEP repeatedly to select time period. » is displayed. The volume decreases gradually in the last 5 minutes. » To turn off the sleep timer: 1 Press SLEEP repeatedly until [Sleep off ] is displayed. » disappear...
Page 18 - Product information; Specifications
7 Product information Note Product information is subject to change without prior notice. • Specifications Tuner (FM) Tuning Range 87.5 - 108MHz Tuning grid 50KHz Sensitivity - Mono, 26dB S/N Ratio <22 dBf Search Selectivity >28dBf Total Harmonic Distor tion <3% Signal to Noise Ratio >50...
Page 19 - General information; Troubleshooting
General information AC Power Input: 220 - 230 V, 50 Hz Operation Power Consumption 3.0 W Dimensions - Main Unit (W x H x D) 207 x 60 x 88 mm Weight - With Packing - Main Unit 0.53kg 0.4kg 8 Troubleshooting Caution Never remove the casing of this apparatus. • To keep the warranty valid, never tr y to...
Page 21 - sense and simplicity; PHILIPS CONSUMER ELECTRONICS
sense and simplicity PHILIPS CONSUMER ELECTRONICS WARRANTY POLICY FOR AUSTRALIA Effective 1st July 2009 Philips provides its Consumer Electronics products with a 1 Year Manufacturers Warranty. The benefits given to the purchaser by this warranty are in addition to all other rights and remedies, whic...
Page 23 - NEW ZEALAND
c. Reception problems, replacement of worn or used batteries or other consumables. d. Second hand products or refurbished products. e. Products failure, caused by other products. Version 1.3: 1 st July 2009 NEW ZEALAND -Guarantee and Service for New Zealand Thank-you for purchasing this quality Phil...