Page 3 - ENGLISH 4
Page 4 - Always unplug this razor from the electrical outlet; WARNING; Use this razor for its intended household use asdescribed
4 IMPORTANT SAFETY INSTRUCTIONS When using an electric razor, basic precautions should alwaysbe followed, including the following:Read all instructions before using this appliance. DANGER To reduce the risk of electric shock:1 Do not reach for a razor that has fallen into water. Unplug immediately. ...
Page 6 - 0 - DAY M O N E Y- B AC K G UA R A N T E E
6 6 0 - DAY M O N E Y- B AC K G UA R A N T E E To enjoy the closest and most comfor table shave from your new Norelco Men’s Razor, the razor should be used exclusively for 3 weeks. This allows your hair and skin enough time to adapt to the Norelco Shaving System. If, after that period of time , you ...
Page 7 - TABLE OF CONTENTS
7 TABLE OF CONTENTS FEATURES 8 - 9 LCD DISPLAY 10 - 11 CHARGE METER 11 CHARGING 11 - 12 PUT IT TO THE TEST & SHAVING TIPS 13 HOW TO SHAVE WITH AN ELECTRIC RAZOR 13 TRIMMING 13 CLEANING 14 - 17 ASSISTANCE 18 ACCESSORIES 18 BATTERY REMOVAL 18 WARRANTY 19
Page 8 - FEATURES
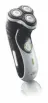
8 FEATURES Quadra Action Shaving System Razor Head Assembly Protective Razor Head Cap Individually Floating Heads Razor Head Release Button• Hair Chamber captures shaven hair Electronic ON/OFF Button LCD Display• Shows remaining power level in batteries • Actual shaving “Minutes Left” Automatic Clea...
Page 13 - Shaving with a clean, dry face gives the best results.; To groom sideburns and moustache:
13 HOW TO SHAVE WITH AN ELECTRIC RAZOR TRIMMING At first you may not get as close a shave as you expect,or your face may even become slightly irritated. This isnormal since your beard and skin will need time toadjust. Invest 3 weeks and you'll soon experience the fulljoy of your new razor.* Stick wi...
Page 14 - CLEANING; Close Trimmer by sliding Trimmer switch down.
14 CLEANING 2 Push up Trimmer Slide Switch.The Trimmer can be activated while the razor is running. 3 Hold Trimmer as shown and move in downward strokeswith gentle pressure. 4 Close Trimmer by sliding Trimmer switch down. 5 Turn razor OFF. Every Week: Razor HeadsThe easiest and most hygienic way to ...
Page 15 - Close the Razor Head Assembly and shake off excess water.
15 3 Clean razor heads and hair chamber by running underhot water. 4 Close the Razor Head Assembly and shake off excess water. 5 Open Razor Head Assembly again and leave open to airdry. 6 You may also clean the hair chamber without waterbyusing the supplied brush.DO NOT clean the razor heads with th...
Page 16 - Remove and clean one set of heads at a time.
16 4 Remove and clean one set of heads at a time. 5 Separate the cutter from the head and rinse clean underhot water. Do not clean the razor heads with the brush.Do not clean more than one cutter and head at a time,since they are all matching sets. If you accidentallyinterchange the cutters and head...
Page 17 - Push Trimmer Slide Switch up to pop up Trimmer.
17 CLEANING Once A Month: Razor HeadsFor optimum performance, razor cutters andcombsshould be cleaned in a degreasing liquid (e.g.Norelco Razor Cleaner, model RC1776, or alcohol)and lubricated with Norelco Razor Lubricant, modelAL80, or one drop of mineral oil (in the center of thehead). Every Six M...
Page 18 - ASSISTANCE; Authorized Norelco Service Location information is; ACCESSORIES
18 ASSISTANCE For assistance or the Authorized Norelco Service Location nearest you, call toll free: 1-800-243-3050or visit our website: www.norelco.com Authorized Norelco Service Location information is available 24 hours a day, 7 days a week. ACCESSORIES Replacement HeadsModel HQ6 - For maximum ra...
Page 23 - INDICE DE CONTENIDOS
23 INDICE DE CONTENIDOS CARACTERÍSTICAS 24 - 25 PANTALLA LCD 26 - 27 MEDIDOR DE CARGA 27 CARGA 27 - 28 PRUEBA Y CONSEJOS DE AFEITADO 28 - 29 CÓMO AFEITARSE CON UNA AFEITADORA ELÉCTRICA 29 CORTAPATILLAS 30 - 31 LIMPIEZA 31 - 33 ASISTENCIA 34 ACCESORIOS 34 CÓMO QUITAR LAS BATERÍAS 34 GARANTÍA 35
Page 24 - CARACTERÍSTICAS; queda en las baterías.
24 CARACTERÍSTICAS Sistema de Afeitado Quadra Action Montaje del Cabezal de la Afeitadora Cubierta protectora del Cabezal de la Afeitadora Conjuntos Cortantes que flotan individualmente Botón de apertura del Cabezalde la Afeitadora• La Cámara del Pelo recoge el pelo afeitado. Botón electrónico deenc...
Page 25 - proporciona un confortable apurado:
Cortapatillas Adaptación automática a cualquier voltaje Cepillo de limpieza Bolsa Soporte para guardarla (sólo en modelo 6886/6885XL) Recargable: Inicialmente carga completa durante 4 horas, lo que proporcionará un tiempo de afeitado sin cable de hasta 45 minutos. Carga rápida: 1 hora Con/sin cable ...
Page 29 - CÓMO AFEITARSE CON UNA AFEITADORA ELÉCTRICA; Apague la afeitadora.
29 CÓMO AFEITARSE CON UNA AFEITADORA ELÉCTRICA Al principio puede que no obtenga un afeitado tanapurado como esperaba, o incluso es posible que su carase irrite ligeramente. Esto es normal, ya que su barba ysu piel necesitarán tiempo para adaptarse. Emplee 3 semanas y podrá disfrutar por completo de...
Page 30 - Ponga la afeitadora en marcha.
30 LIMPIEZA CORTAPATILLAS Para recortar las patillas y el bigote 1 Ponga la afeitadora en marcha. 2 Presione hacia arriba el interruptor deslizante delcortapatillas.El cortapatillas puede ponerse en marcha mientras laafeitadora está en funcionamiento. 3 Sostenga el cortapatillas como se indica y hag...
Page 31 - LIMPIEZA
31 2 Presione el botón de liberación del Cabezal Afeitador yabra el Bloque del Cabezal Afeitador. 3 Limpie los conjuntos cortantes y la cámara de recogidadel pelo bajo el agua caliente del grifo. 4 Cierre el Bloque del Cabezal Afeitador y sacuda el excesode agua. 5 Vuelva a abrir el Bloque del Cabez...
Page 32 - Quite y limpie sólo un conjunto cortante cada vez.
32 2 Presione el botón de liberación del cabezal afeitador yabra el bloque del cabezal afeitador. 3 Gire la rueda en sentido antihorario y quite el marco deretención 4 Quite y limpie sólo un conjunto cortante cada vez. 5 Separe la cuchilla del protector y límpielos bajo el aguacaliente del grifo. No...
Page 33 - Vuelva a poner el marco.
33 7 Repita el proceso con los otros dos juegos de conjuntoscortantes. 8 Vuelva a poner el marco. 9 Presione hacia abajo y gire la rueda en sentido horariohasta que quede fijada en su lugar. 10 Vuelva a poner el Bloque del Cabezal Afeitador en laafeitadora.Si los conjuntos cortantes han sido adecuad...