Page 2 - ENGLISH 4
ENGLISH 4 ESPAÑOL 34 7775X 3 7775X DFURR 11/25/03 12:35 PM Page 3 (Black plate)
Page 3 - Read all instructions before using this appliance.; DANGER; To reduce the risk of electric shock:; WARNING; E N G L I S H
IMPORTANT SAFETY INSTRUCTIONS When using an electric razor, basic safety precautions shouldalways be followed, including the following: Read all instructions before using this appliance. DANGER To reduce the risk of electric shock: 1. Do not reach for a charging stand that has fallen into water. Unp...
Page 6 - Table of Contents
Table of Contents Features .........................................................8-9 Important .......................................................10 Introduction ..................................................10 Before First Use .....................................10-12 Advanced Multi-Fun...
Page 7 - Features
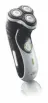
Features Nivea for Men Shaving Lotion/Gel Applicator Reflex Action ® System Glide Rings Razor Head Assembly Quick Clean System Individually Floating Heads Razor Head Release Button• Hair Chamber captures shaven hair Electronic LockingOn/Off Button Advanced Multi-Function Color LED Display• 3 Levels ...
Page 8 - How the Unique Norelco Lift and Cut
Click-On Trimmer Attachment for beard, moustache and sideburns Automatic Worldwide Voltage 100V to 240V AC Cleaning Brush Travel / Storage Pouch Rechargeable Cordless- Initial 4 hour full charge for up to 40 minutes of cordless shave time 1-Hour Full Charge Charging Stand Full 2-Year Warranty 60-Day...
Page 11 - You can stop the demonstration by; Advanced Multi-Function Color LED Display; Indications during use; Charging; Batter y performance is best if you recharge
E N G L I S H 1 2 2 You can stop the demonstration by pressing the on/off button. Advanced Multi-Function Color LED Display Indications during use All indications mentioned below are shown duringever y shaving session and they are alwaysdisplayed in the same order. As a result, some symbols will lig...
Page 12 - Do not charge razor in pouch.; Charge indications; Low Battery Indicator
only when batteries are (almost) completelyempty. ◗ Do not leave the charging stand with the razorin it continuously plugged into outlet. If storingrazor in stand, remove the plug from outlet assoon as the razor is fully charged. ◗ Do not charge razor in pouch. ◗ First time charging and recharging a...
Page 13 - Recharging; First time charging requires 4 hours.
Battery indications during shaving The three batter y lights show the remainingbatter y capacity for 5 seconds after you switchthe razor on or off. ◗ The lower two batter y lights burn green when66% of the entire batter y capacity is left. ◗ The bottom batter y light burns green when33% of the batte...
Page 14 - Inserting the First Cartridge
◗ When batteries have been fully charged, thethree green indicator lights will glowcontinuously. A fully charged razor has cordlessshaving time of up to approx. 40 minutes.Return razor to charging stand after shaving. ◗ Red recharging indicator light will blink whenbatteries are almost empty. ◗ Remo...
Page 15 - Replacing Cartridges
C 3 Slide the cartridge with the connector inplace into the razor. It only fits properly ifthe white side of the connector is pointingupwards. Close the cover. 4 Press the applicator button a few times until the Nivea for Men shaving lotion orgel appears in the small hole located onrazor head assemb...
Page 16 - Wall holder; You can conveniently store the other car tridges; Put It To The Test & Shaving Tips
E N G L I S H 1 7 Do not throw the connector away when you replace an empty car tridge. You will need to use the same connector for the other car tridges. The Nivea for Men shaving lotion or gelcar tridges should be stored at a temperaturebetween 32ºF and 104ºF. Wall holder C You can conveniently st...
Page 17 - How To Shave With An Electric Razor; Switching the razor on
◗ Stick with it! If you alternate shaving methodsduring the adjustment period, it may make itmore difficult to adapt to the Norelco shavingsystem. ◗ If you are still not convinced after 21 days,Norelco will refund you the full purchase price,guaranteed. How To Shave With An Electric Razor ◗ Use this...
Page 19 - Trimming; To Groom Sideburns and Moustache:; Switch the razor off.
E N G L I S H 2 0 3 If necessary, check the remaining batterycapacity by pressing the on/off button.One or more indicator lights will go on for 5 seconds to indicate the remainingbattery capacity. C 4 Put the protection cap on the razor whenyou store it, to prevent the shaving headsfrom getting dama...
Page 21 - Travel lock; Activating the travel lock; Deactivating the travel lock; The yellow key symbol goes out.
Travel lock If you are going to store the razor for a longertime period or if you are going to travel, it ispossible to lock the razor. The travel lock preventsthe razor from being switched on by accident. Activating the travel lock 1 Press the on/off button for 3 seconds. Themotor is switched off. ...
Page 22 - Checking if the appliance is locked properly; Replace razor head assembly.; Cleaning; Important
Checking if the appliance is locked properly 1 Press the on/off button briefly (less than 3 seconds). 2 The yellow key symbol lights up for 3 seconds to confirm that the travel lock isactive. Replace razor head assembly. Cleaning Important ◗ Always switch Razor OFF and remove fromcharging stand befo...
Page 23 - Make sure the razor is switched off.
◗ If the red shaving unit symbol and the cleaningreminder light up together, the shaving headshave become so dir ty or damaged that theymight cause the motor to become blocked. Ifthe shaving heads are dir ty, you need to cleanthem. If the shaving heads are damaged, youneed to replace them. We advise...
Page 24 - Shaving Unit: Every Week
Shaving Unit: Every Week We advise you to clean the appliance thoroughlyat least once a week to maintain optimal shavingperformance. You can also follow this procedure when theshaving heads have to be cleaned. 1 Switch the razor off. C 2 Press the Razor Head Release Buttonlocated under razor heads o...
Page 25 - Charging Stand; Unplug the charging stand.; After Each Use: Trimmer
Charging Stand 1 Unplug the charging stand. 2 Clean the charging stand with a moist cloth. After Each Use: Trimmer 1 Clean the outside of the Trimmer with thebrush supplied after every use. The Trimmer can also be cleaned by rinsing itunder the tap. C 2 Lubricate Trimmer teeth twice a year withNorel...
Page 27 - Press Razor Head Assembly back on razor.; Replacing the razor heads; Razor head check indication
C 7 While holding Razor Head Assembly inone hand, replace cutter and comb backinto the Razor Head Assembly. 8 Repeat the process for the other two setsof cutters and combs. C 9 Replace frame back into Razor Head Assembly. While pressing down, turnwheel clockwise to lock frame into place. 10 Press Ra...
Page 30 - Accessories; Norelco Razor Lubricant.
Accessories ◗ Replacement HeadsModel HQ177 - For maximum razor performance, replace your Norelco Cool Skin7000 Series razor heads once a year. ◗ NOTE: Model HQ156 & HQ167 CoolSkin or Advantage Replacement HeadsDO NOT fit this razor. ◗ DO NOT USE shaver sharpeners as this willdamage your blades a...
Page 33 - E S PA Ñ O L; IMPORTANTES; Lea todas las instrucciones antes de utilizar este aparato.; PELIGRO; Para reducir el riesgo de choque eléctrico:; No intente recuperar una base de carga que se haya caído al; ADVERTENCIA; niños o personas discapacitadas, o cerca ellos.
E S PA Ñ O L 3 4 IMPORTANTES INSTRUCCIONES DE SEGURIDAD Siempre que utilice una afeitadora eléctrica, debe respetar ciertasprecauciones básicas, incluyendo las indicadas a continuación. Lea todas las instrucciones antes de utilizar este aparato. PELIGRO Para reducir el riesgo de choque eléctrico: 1....
Page 34 - GUARDE ESTAS; La clavija adaptadora incorpora un; IMPORTANTE
enchufe están dañados, si no funcionan correctamente, si han sufrido una caída o se han dañado o si la base se ha caído al agua.Lleve la afeitadora a un centro de servicio autorizado de Norelco para que sea examinada y reparada. 4. Mantenga el cordón alejado de las superficies calientes.5. No deje c...
Page 35 - 0 D I A S D E G A R A N T I A D E
Nombre Dirección Ciudad Estado Zip Número de teléfono de dia: ( ) Dirección de email MOTIVO DE LA DEVOLUCIÓN: E S PA Ñ O L 3 6 6 0 D I A S D E G A R A N T I A D E D E VO L U C I Ó N D E L D I N E RO Para disfrutar de la afeitada mas cómoda y al ras de su nueva Afeitadora Norelco paraHombres, la afei...
Page 36 - Indice de Contenidos
E S PA Ñ O L 3 7 Indice de Contenidos Características ....................................... 38-39 Importante .....................................................40 Introducción ..................................................40 Antes Del Primer Uso.... .....................40-42 Exhibición De L...
Page 37 - Características
E S PA Ñ O L 3 8 Características Aplicador para la Loción de afeitar Nivea for Men Sistema Reflex Action ® Glide Rings Conjunto de cabezales de la afeitadora Sistema QuickClean Cabezales flotantes individuales Botón de liberación del cabezal de la afeitadora• Cámara de captura de la barba afeitada E...
Page 40 - La demostración comenzará automáticamente.
◗ Quite todas las pegatinas y láminas protectorasde la pantalla. Función de bloqueo para viajes El aparato está equipado con una función debloqueo para viajes.Puede usar la función de bloqueo cuando vaya aguardar la afeitadora durante un largo periodo detiempo o si se va a llevar la afeitadora de vi...
Page 41 - Exhibición De LED De Múltiples Funciones; Indicaciones durante el uso; Después de mostrar el aviso de limpieza, aparece
◗ Batería baja ◗ Aviso de limpieza / Batería baja ◗ Indicación de comprobación de los conjuntoscor tantes ◗ Bloqueo para viajes 2 Puede parar la demostración pulsando elbotón de marcha/parada (on/off) Exhibición De LED De Múltiples Funciones Indicaciones durante el uso Las indicaciones que se mencio...
Page 42 - Carga; No cargue la afeitadora dentro de la bolsa.; Indicaciones de carga; La batería se está agotando
E S PA Ñ O L 4 3 brevemente la indicación de capacidad de labatería. Carga ◗ La carga o la recarga en temperaturas inferioresa 40ºF (4°C) o superiores a 95ºF (35°C) puedeafectar adversamente la vida útil de las baterías. ◗ El mejor rendimiento de las baterías se obtienesi se recargan exclusivamente ...
Page 43 - Batería completamente cargada
sucederá cuatro veces con pausas entre una yotra. Batería completamente cargada ◗ Si comienza a cargar la batería cuando ésta seestá agotando, el piloto inferior de la bateríaparpadeará en color rojo durante 3 minutoscomo máximo. ◗ Durante la carga, los tres pilotos de la bateríaparpadearán en color...
Page 44 - Cómo cargar la afeitadora; Recarga; La primera carga requiere 4 horas.
Cómo cargar la afeitadora 1 Conecte el conector pequeño en elsoporte de carga y coloque la clavija delenchufe en cualquier enchufe de 100V a240 V de CC. Utilice solamente el cordóny el soporte suministrados. C 2 Coloque la afeitadora en el soporte decarga. Se encenderá la luz verde delindicador de c...
Page 45 - Cómo Insertar El Primer Cartucho
E S PA Ñ O L 4 6 ◗ Quite el enchufe de energía del enchufe tan pronto como la batería se carguecompletamente. Usted puede entoncesalmacenar la afeitador en el sopor te de carga. Cómo Insertar El Primer Cartucho ◗ Un conectador se provee para el uso de loscuatro car tuchos. No lance el conectador lej...
Page 46 - Reemplazo De Los Cartuchos; Abra la cubierta posterior de la afeitadora.
Cierre la cubierta. 4 Presione varias veces el botón delaplicador hasta que el gel o la loción deafeitar para hombres Nivea for Mencomience a aparecer. La afeitadora estáahora lista para su uso. Reemplazo De Los Cartuchos C 1 Abra la cubierta posterior de la afeitadora. 2 Retire el cartucho vacío, s...
Page 47 - Soporte de pared; Prueba Y Consejas Para El Afeitado
El gel o la loción de afeitar Nivea for Men debealmacenarse a temperaturas entre 32ºF (0ºC) y104ºF (35ºC). Soporte de pared C ◗ Puede guardar cómodamente los otroscar tuchos, fijándolos al sopor te de pared quese suministra. El sopor te tiene ventosas quepermiten fijarlo fácilmente a la pared. De es...
Page 50 - Limpie la afeitadora.; Recorte De Las Patillas; Apague la afeitadora.
2 Limpie la afeitadora. Limpie la afeitadora después de cada uso. Quite elcar tucho si no va a usar el aparato durante másde una semana (consulte el capítulo 'Limpieza ymantenimiento'). 3 Si fuera necesario, compruebe la capacidadde batería disponible pulsando el botón demarcha/parada (on/off). Se i...
Page 51 - Cómo usar el cortapatillas; Encienda la afeitadora.
directamente bajo los cabezales, pararemover el conjunto de cabezales de laafeitadora. 4 Retire el conjunto de cabezales de laafeitadora tirando hacia arriba y haciaafuera. C 5 Incline ligeramente el cortapatillas hacia atrás. C 6 Encaje el cortapatillas a la afeitadora (oirá un clic). Ahora el cort...
Page 52 - Cómo quitar el cortapatillas; Bloqueo para viajes; Cómo activar el bloqueo para viajes; Se apagará el símbolo de la llave en amarillo.
Cómo quitar el cortapatillas 1 Apague la afeitadora. 2 Presione el botón ubicado en el frente dela afeitadora, directamente bajo loscabezales, para destrabar y quitar el cortapatillas de la afeitadora. 3 Coloque nuevamente el conjunto de cabezales de la afeitadora. Bloqueo para viajes Si no va a usa...
Page 54 - Limpieza y mantenimiento; Importante
Limpieza y mantenimiento Importante ◗ Siempre apague la afeitadora y retírela de la base antes de limpiarla. ◗ Guárdela siempre con la cubier ta protectorade los cabezales colocada en su sitio. ◗ Nunca limpie, retire ni vuelva a colocar elconjunto de los cabezales mientras la afeitadoraestá encendid...
Page 55 - Limpieza; Asegúrese de que la afetadora está apague.; Unidad afeitadora: todas las semanas
◗ Le recomendamos que evite esta situaciónlimpiando los conjuntos cor tantesregularmente. Limpieza Después de cada afeitado, el aparato le recuerdaque hay que limpiarlo mediante el aviso delimpieza. Unidad afeitadora: Quick Clean después de cada afeitado 1 Asegúrese de que la afetadora está apague. ...
Page 56 - Soporte de carga; Desconecte el soporte de carga.
1 Apague la afeitadora. C 2 Presione el botón liberador de loscabezales ubicado debajo de los mismos,en el frente de la afeitadora. C 3 Abra el conjunto de los cabezales y limpielos cabezales y la cámara de la barbaenjuagándolos bajo el chorro de aguacaliente del grifo. El agua del grifo debeestar c...
Page 58 - quemaduras o escaldaduras.
quemaduras o escaldaduras. C 4 Sostenga el conjunto de cabezales con unamano y empuje hacia abajo y gire la perilladel marco en dirección contraria a lasagujas del reloj para soltarlo, luegolevántelo hacia arriba. Coloque el marco aun lado. C 5 Retire una cuchilla y un cabezal por vez,sacándolos fue...
Page 59 - Sustitución de los conjuntos cortantes
8 Repita el procedimiento para los otros doscabezales. C 9 Vuelva a colocar el marco en el conjuntode cabezales. Mientras presiona haciaabajo, gire la perilla del marco en ladirección de las agujas del reloj paratrabarlo en su sitio. 10 Presione para volver a colocar el conjuntode cabezales en el co...
Page 60 - Ser vicio de Asistencia Ténica Norelco.; Cómo guardar el aparato
Esta afeitadora no tiene mas par tes que sean usadas por el usario para ser reparadas.Cualquier otro ser vicio debe ser realizado por un Ser vicio de Asistencia Ténica Norelco. Cómo guardar el aparato Soporte de carga C ◗ Después de limpiarla, la afeitadora mojadapuede colocarse en el soporte de car...
Page 61 - Asistencia; o visite nuestro sitio web:; Retiro De Las Baterías
6 2 Asistencia ◗ Si necesita asistencia o información acerca delcentro de ser vicio autorizado de Norelco máscercano a su domicilio, llame gratis al: 1-800-243-3050 o visite nuestro sitio web: www.norelco.com ◗ La información sobre centros de ser vicioautorizados de Norelco está disponible 24horas a...
Page 62 - Accesorios; Reemplazo de los cabezales
Accesorios ◗ Reemplazo de los cabezales Tipo HQ177 - Para obtener el máximo rendimiento, reemplace los cabezales de suafeitadora Norelco Cool Skin 7000 Series una vezpor año. Nota:Tipo HQ156 or HQ167 Advantage oCool Skin Reemplazo de los cabezales nopuede ser utilizado por esta afeitadora. NO UTILIC...