Page 2 - Contents; BLUETOOTH
2 > Before Start > Part Names > Install > Initial Setup > Playback Supplementary information | Advanced Setup | Others E N Before Start Contents Before Start What's in the box ............................................................................................... 3 Part Names ...
Page 7 - Remote Controller
> Before Start > Part Names > Install > Initial Setup > Playback Supplementary information | Advanced Setup | Others 7 E N Remote Controller 1. Í button: Turns the unit on or into standby mode. 2. Input selector buttons: Switches the input to be played.3. Q (QUICK MENU) button: You ca...
Page 9 - Sound Bar
> Before Start > Part Names > Install > Initial Setup > Playback Supplementary information | Advanced Setup | Others 9 E N Sound Bar 1. Height left speaker2. Height right speaker3. Front left speaker4. Center speaker5. Front right speaker6. Speaker jacks: Connect to the main unit usin...
Page 10 - Subwoofer
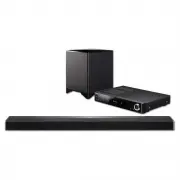
10 > Before Start > Part Names > Install > Initial Setup > Playback Supplementary information | Advanced Setup | Others E N Subwoofer 1. LINK LED: Lights when paired with the main unit.2. LINK button: Used to pair the subwoofer and the main unit.3. AC INLET: The supplied power cord is...
Page 11 - Connect the Speakers; Setting up the sound bar
11 > Before Start > Part Names > Install > Initial Setup > Playback Supplementary information | Advanced Setup | Others E N Install 1. Connect the Speakers a Non-skid pads a 1 3 2 Setting up the sound bar The sound bar outputs the audio for the front speakers and center speaker from t...
Page 12 - Connecting the sound bar
12 > Before Start > Part Names > Install > Initial Setup > Playback Supplementary information | Advanced Setup | Others E N a Sound bar connection cable a 1 2 a a Connecting the sound bar Refer to the illustration to connect the sound bar. Match the facing of the cable connector to th...
Page 13 - To ARC TV; Setup
13 > Before Start > Part Names > Install > Initial Setup > Playback Supplementary information | Advanced Setup | Others E N 2. Connect the TV a HDMI cable, b Digital optical cable a b DIGITAL OPTICAL OUT 1 To ARC TV For a TV that supports the ARC (Audio Return Channel) ( Ä P64) featur...
Page 14 - Connect the HDMI AV Components; GAME
14 > Before Start > Part Names > Install > Initial Setup > Playback Supplementary information | Advanced Setup | Others E N 3. Connect the HDMI AV Components a HDMI cable e.g. BD a HDMI OUT 1 BD/DVD GAME a Cable/Satellite set-top box Streaming media player This is an example of connec...
Page 15 - Connect the Audio Components; CD; Connecting a CD player
15 > Before Start > Part Names > Install > Initial Setup > Playback Supplementary information | Advanced Setup | Others E N 4. Connect the Audio Components a Analog audio cable CD a Connecting a CD player Use an analog audio cable to connect a CD player to the AUDIO IN jack.
Page 16 - Connect Other Cables; Antenna Hookup; Network Hookup; Power Cord Hookup
16 > Before Start > Part Names > Install > Initial Setup > Playback Supplementary information | Advanced Setup | Others E N 5. Connect Other Cables a FM indoor antenna, b Ethernet cable, c Power cord (Main unit), d Power cord (for subwoofer) b a c d d c 1 2 3 4 Antenna Hookup Connect ...
Page 17 - Initial Setup with Auto Start-up Wizard; Initial Setup starts automatically
17 > Before Start > Part Names > Install > Initial Setup > Playback Supplementary information | Advanced Setup | Others E N Initial Setup Initial Setup with Auto Start-up Wizard 1 3 4 2 TV's remote controller Initial Setup starts automatically 1. Switch the input on the TV to that ass...
Page 18 - AccuEQ Room Calibration
18 > Before Start > Part Names > Install > Initial Setup > Playback Supplementary information | Advanced Setup | Others E N 1. AccuEQ Room Calibration Place the supplied speaker setup microphone in the listening position, measure the test tones emitted by the speakers, then the unit a...
Page 19 - AV Component Playback; Basic operations
19 > Before Start > Part Names > Install > Initial Setup > Playback Supplementary information | Advanced Setup | Others E N Playback AV Component Playback Basic operations Play an AV component or TV connected to this unit with an HDMI cable or other cable.1. Switch the input on the TV...
Page 20 - Internet Radio; Regarding the TuneIn Radio
20 > Before Start > Part Names > Install > Initial Setup > Playback Supplementary information | Advanced Setup | Others E N Internet Radio Basic operations When this unit is connected to a network, you can listen to TuneIn or other preregistered Internet radio services.Depending on th...
Page 21 - Spotify
21 > Before Start > Part Names > Install > Initial Setup > Playback Supplementary information | Advanced Setup | Others E N Spotify Wi-Fi Onkyo HT-L05 XXXX b d e c a 1 2 3 4 Basic operations Spotify Connect play is possible by connecting this unit to the same network as a smartphone o...
Page 22 - Music Server; Configuring Windows Media; Windows Media; Playing
22 > Before Start > Part Names > Install > Initial Setup > Playback Supplementary information | Advanced Setup | Others E N Music Server It is possible to stream music files stored on PCs or NAS devices connected to the same network as this unit. The network servers this unit is compa...
Page 23 - Controlling Remote Playback from a PC
> Before Start > Part Names > Install > Initial Setup > Playback Supplementary information | Advanced Setup | Others 23 E N The following remote controller operations are also possible.(a) When the folder or file lists are not shown on one screen, you can change the screen. (c) Presse...
Page 24 - USB Storage Device; Basic play
24 > Before Start > Part Names > Install > Initial Setup > Playback Supplementary information | Advanced Setup | Others E N USB Storage Device e g h f a c b d 1 2 Basic play Play music files on a USB storage device.1. Switch the input on the TV to that assigned to the unit.2. Plug you...
Page 25 - USB Storage Device Requirements
> Before Start > Part Names > Install > Initial Setup > Playback Supplementary information | Advanced Setup | Others 25 E N USB Storage Device Requirements 0 Note that operation is not guaranteed with all USB storage devices. 0 This unit can use USB storage devices that comply with th...
Page 26 - AirPlay; iPhone
26 > Before Start > Part Names > Install > Initial Setup > Playback Supplementary information | Advanced Setup | Others E N AirPlay ® Wi-Fi 1 2 Onkyo HT-L05 XXXXXX iPhone 3 4 5 e.g., iOS 10 Basic play You can wirelessly enjoy the music files on an iPhone ® , iPod touch ® , or iPad ® c...
Page 27 - Pairing
27 > Before Start > Part Names > Install > Initial Setup > Playback Supplementary information | Advanced Setup | Others E N BLUETOOTH ® Playback Pairing Playing Back Pairing 1. When you press the button on the remote controller, "Now Pairing..." is displayed on this unit's dis...
Page 28 - Listening to the FM Radio; Tuning Automatically; Tuning Manually; Presetting a Radio Station; Using RDS
28 > Before Start > Part Names > Install > Initial Setup > Playback Supplementary information | Advanced Setup | Others E N Listening to the FM Radio Tuning Automatically 1. Press TUNER on the remote controller.2. Press MODE (e) on the remote controller so that "AUTO" appears ...
Page 30 - Listening Modes; Selecting Listening Modes
30 > Before Start > Part Names > Install > Initial Setup > Playback Supplementary information | Advanced Setup | Others E N Listening Modes Selecting Listening Modes Select the optimum listening mode for movies, TV, music, and games by repeatedly pressing the MOVIE/TV, MUSIC, and GAME...
Page 31 - Listening Mode Effects
> Before Start > Part Names > Install > Initial Setup > Playback Supplementary information | Advanced Setup | Others 31 E N Listening Mode Effects In alphabetical order AllCh Stereo Ideal for background music. This mode creates a stereo image by playing stereo sound from all the speak...
Page 33 - Selectable Listening Modes
> Before Start > Part Names > Install > Initial Setup > Playback Supplementary information | Advanced Setup | Others 33 E N Selectable Listening Modes You can select a variety of listening modes to suit the audio format of the signal being input. 0 Listening modes available when headp...
Page 34 - MUSIC button
34 > Before Start > Part Names > Install > Initial Setup > Playback Supplementary information | Advanced Setup | Others E N MUSIC button This is a list of listening modes you can select according to the audio format of the input signal. Input Format Listening Mode DTS DTS * 1 DTS Neur...
Page 36 - GAME button
36 > Before Start > Part Names > Install > Initial Setup > Playback Supplementary information | Advanced Setup | Others E N GAME button This is a list of listening modes you can select according to the audio format of the input signal. Input Format Listening Mode DTS-HD HR Stereo DTS-...
Page 38 - Tone; Other
38 > Before Start > Part Names > Install > Initial Setup > Playback Supplementary information | Advanced Setup | Others E N Quick Menu By pressing the Q button on the remote controller during play, you can adjust frequently used settings, such as the sound quality, using on-screen men...
Page 40 - Other Functions
40 > Before Start > Part Names > Install > Initial Setup > Playback Supplementary information | Advanced Setup | Others E N Other Functions Playing Audio and Video from Separate Sources It is possible to play audio and video from different sources. For example, you can play audio from...
Page 42 - Setup Menu
42 > Before Start > Part Names > Install > Initial Setup > Playback Supplementary information | Advanced Setup | Others E N Advanced Setup Setup Menu The unit allows you to configure advanced settings to provide you with an even better experience.1. Switch the input on the TV to that ...
Page 44 - Analog Audio Input
44 > Before Start > Part Names > Install > Initial Setup > Playback Supplementary information | Advanced Setup | Others E N ■ 4. Analog Audio Input You can change input assignment between the input selectors and AUDIO IN jacks. If you do not assign a jack, select "-----". 2. S...
Page 45 - Dolby Enabled Speaker
45 > Before Start > Part Names > Install > Initial Setup > Playback Supplementary information | Advanced Setup | Others E N ■ 2. Level Calibration ■ 3. Dolby Enabled Speaker Front Left Select a value between " j 12 dB" and " i 12 dB" (in 1 dB increments). A test tone w...
Page 47 - Audio Select
47 > Before Start > Part Names > Install > Initial Setup > Playback Supplementary information | Advanced Setup | Others E N 4. Source ■ 1. IntelliVolume Adjust the volume level difference between the devices connected to the unit. Select the input selector to configure. ■ 2. Name Edit...
Page 54 - Firmware Update; Update function of this unit
54 > Before Start > Part Names > Install > Initial Setup > Playback Supplementary information | Advanced Setup | Others E N Firmware UpdateFirmware Update Firmware Update Update function of this unit This unit has functionality to update the firmware (the system software) over a netwo...
Page 55 - Updating via USB
55 > Before Start > Part Names > Install > Initial Setup > Playback Supplementary information | Advanced Setup | Others E N 4. Press ENTER with "Update" selected to start update. 0 During the update, the TV screen may go black depending on the updated program. In that case, ch...
Page 57 - Troubleshooting; Before starting the procedure; Audio
57 > Before Start > Part Names > Install > Initial Setup > Playback Supplementary information | Advanced Setup | Others E N Others Troubleshooting Before starting the procedure Problems may be solved by simply turning the power on/off or disconnecting/connecting the power cord, which ...
Page 59 - Linked operation
59 > Before Start > Part Names > Install > Initial Setup > Playback Supplementary information | Advanced Setup | Others E N Images flicker 0 It is possible that the resolution of the player is not compatible with the TV's resolution. If you have connected the player to this unit with ...
Page 60 - USB storage device; Wireless LAN Network
60 > Before Start > Part Names > Install > Initial Setup > Playback Supplementary information | Advanced Setup | Others E N Cannot access the network server 0 This unit needs to be connected to the same router as the network server. 0 This unit is compatible with Windows Media ® Playe...
Page 62 - General Specifications
62 > Before Start > Part Names > Install > Initial Setup > Playback Supplementary information | Advanced Setup | Others E N General Specifications Network AV Receiver (HT-L05) Amplifier (Audio) section Rated Output Power (IEC) 5 ch k 50 W at 4 ohms, 1 kHz, 1 ch driven of 1% THD Input ...
Page 63 - Handling
63 > Before Start > Part Names > Install > Initial Setup > Playback Supplementary information | Advanced Setup | Others E N Output Sound Pressure Level 78 dB/W/m (FRONT L/R, CENTER)78.6 dB/W/m (HEIGHT L/R) Frequency Response 100 Hz - 20 kHz Crossover Frequency 180 Hz Dimensions (W k H...
Page 64 - About HDMI; Compatible functions; Supported Audio Formats
64 > Before Start > Part Names > Install > Initial Setup > Playback Supplementary information | Advanced Setup | Others E N About HDMI Compatible functions HDMI (High Definition Multimedia Interface) is a digital interface standard for connecting TVs, projectors, Blu-ray Disc/DVD play...
Page 65 - License and Trademark Information
65 > Before Start > Part Names > Install > Initial Setup > Playback Supplementary information | Advanced Setup | Others E N License and Trademark Information Manufactured under license from Dolby Laboratories. Dolby, Dolby Atmos, Dolby Surround and the double-D symbol are trademarks o...