Onkyo LS-5200B - User Manual
Onkyo LS-5200B Home Theater – User Manual, read for free online in PDF format. We hope this helps you resolve any issues you may have. If you have further questions, please contact us through the contact form.


Table of Contents:
- Page 4 – Front Panel
- Page 5 – Rear Panel
- Page 6 – Remote Controller
- Page 7 – Display
- Page 8 – Front speakers
- Page 9 – Subwoofer
- Page 10 – Connect the Speakers; Before Installing
- Page 11 – When Fitting the Front Speakers to the Wall
- Page 12 – To ARC TV; Setup
- Page 13 – Connect the HDMI AV Components; GAME
- Page 14 – Connect the Audio Components; CD; Connecting a CD player
- Page 15 – Connect Other Cables; Antenna Hookup; Power Cord Hookup
- Page 16 – Initial Setup with Auto Start-up Wizard; Initial Setup starts automatically
- Page 17 – Network Connection
- Page 18 – AV Component Playback; Basic operations
- Page 19 – Internet Radio; Regarding the TuneIn Radio
- Page 20 – Spotify
- Page 21 – Music Server; Configuring Windows Media; Windows Media; Playing
- Page 22 – Controlling Remote Playback from a PC
- Page 23 – USB Storage Device; Basic play
- Page 24 – USB Storage Device Requirements
- Page 25 – AirPlay; iPhone
- Page 26 – BLUETOOTH; Pairing
- Page 27 – Listening to the FM/DAB Radio; Listening to FM Radio; Tuning Automatically; Tuning Manually; Using RDS
- Page 28 – Listening to DAB Digital Radio
- Page 29 – Presetting a Radio Station
- Page 30 – Listening Modes; Regarding the Listening Modes
- Page 31 – Tone
- Page 32 – Other Functions
- Page 34 – Setup Menu
- Page 36 – Analog Audio Input
- Page 46 – Firmware Update; Update function of this unit
- Page 47 – Updating via USB
- Page 49 – Troubleshooting; Before starting the procedure; Power; Audio
- Page 51 – Linked operation
- Page 52 – USB storage device; Wireless LAN Network
- Page 54 – General Specifications
- Page 55 – Handling
- Page 56 – About HDMI; Compatible Functions; Supported Audio Formats
- Page 57 – License and Trademark Information
E
N
What's in the box .................................................................... 2
Front Panel ............................................................................. 4
Rear Panel .............................................................................. 5
Remote Controller .................................................................. 6
Display .................................................................................... 7
Front speakers ........................................................................ 8
Subwoofer .............................................................................. 9
1. Connect the Speakers ...................................................... 10
2. Connect the TV ................................................................. 12
3. Connect the HDMI AV Components ................................. 13
4. Connect the Audio Components ....................................... 14
5. Connect Other Cables ...................................................... 15
Initial Setup with Auto Start-up Wizard ................................. 16
AV Component Playback ...................................................... 18
Internet Radio ....................................................................... 19
Spotify ................................................................................... 20
Music Server ......................................................................... 21
USB Storage Device ............................................................. 23
AirPlay
................................................................................ 25
Playback ...................................................... 26
Listening to the FM/DAB Radio ............................................ 27
Listening Modes ................................................................... 30
Quick Menu .......................................................................... 31
Other Functions .................................................................... 32
Supplementary information for player functions .................... 33
Setup Menu ........................................................................... 34
Firmware Update .................................................................. 46
Troubleshooting .................................................................... 49
General Specifications .......................................................... 54
About HDMI .......................................................................... 56
License and Trademark Information ..................................... 57
> Install
> Playback
Supplementary Information | Advanced Setup | Others
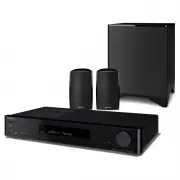
2.1ch HOME CINEMA SYSTEM
LS5200
Instruction
Manual
"Loading the manual" means you need to wait until the file loads and becomes available for online reading. Some manuals are very large, and the time they take to appear depends on your internet speed.
Summary
4 > Before Start > Part Names > Install > Initial Setup > Playback Supplementary Information | Advanced Setup | Others E N Par t Names Front Panel 1. Í ON/STANDBY button: Turns the unit on or into standby mode. 2. HYBRID STANDBY indicator: Lights if the unit enters standby mode when t...
> Before Start > Part Names > Install > Initial Setup > Playback Supplementary Information | Advanced Setup | Others 5 E N Rear Panel 1. ANTENNA DAB/FM jack: Connect the supplied antenna.2. Wireless antenna: Raise for Wi-Fi connection or when using a BLUETOOTH enabled device. The diag...
6 > Before Start > Part Names > Install > Initial Setup > Playback Supplementary Information | Advanced Setup | Others E N Remote Controller 1. Í button: Turns the unit on or into standby mode. 2. Input selector buttons: Switches the input to be played.3. Q (QUICK MENU) button: You ca...