Page 2 - Introduction; Important Safety Instructions; OSE THIS A; WA R N I N G
2 En Introduction Important Safety Instructions 1. Read these instructions. 2. Keep these instructions. 3. Heed all warnings. 4. Follow all instructions. 5. Do not use this apparatus near water. 6. Clean only with dry cloth. 7. Do not block any ventilation openings. Install in accordance with the ma...
Page 3 - Precautions; POWER; For Canadian Models
3 En Precautions 1. Recording Copyright —Unless it’s for personal use only, recording copyrighted material is illegal without the permission of the copyright holder. 2. AC Fuse —The AC fuse inside the unit is not user- serviceable. If you cannot turn on the unit, contact your Onkyo dealer. 3. Care —...
Page 4 - Supplied Accessories; Make sure you have the following accessories:; Remote controller and two batteries
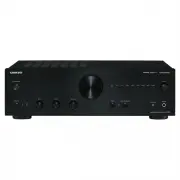
4 En For British models Replacement and mounting of an AC plug on the power supply cord of this unit should be performed only by qualified service personnel. IMPORTANT The wires in the mains lead are coloured in accordance with the following code: Blue: Neutral Brown: Live As the colours of the wire...
Page 5 - Features; A-9050 Integrated Digital Amplifier
5 En Features A-9050 Integrated Digital Amplifier • Three-stage Inverted Darlington Circuitry• Digital Inputs (Optical/Coaxial)• Wolfson 192 kHz/24 bit DACs withDIDRC Circuitry Inside (WM8718)• Phase Matching Bass Technology• 1.6 mm Full Flat Chassis• 75 W/ch (1 kHz, 8 ohms, 0.08 % THD, 2ch Driven F...
Page 6 - Contents; Advanced Operations
6 En Contents Introduction Important Safety Instructions ..........................................2Precautions .......................................................................3Supplied Accessories ......................................................4Features ..................................
Page 7 - Before Using the Integrated Amplifier; Installing the Batteries; Replace the cover and slide it shut.; Using the Remote Controller
7 En Before Using the Integrated Amplifier Note • If the remote controller doesn’t work reliably, try replacing the batteries. • Don’t mix new and old batteries or different types of batteries.• If you intend not to use the remote controller for a long time, remove the batteries to prevent damage fr...
Page 8 - Getting to Know the Integrated Amplifier; Front Panel
8 En Getting to Know the Integrated Amplifier For detailed information, see the pages in parentheses. a 8 ON/STANDBY button ( ➔ page 21 ) Sets the integrated amplifier to On or Standby. b Remote control sensor ( ➔ page 7 ) Receives control signals from the remote controller. c Volume controller ( ➔ ...
Page 9 - Rear Panel; o p
9 En a GND screw Connects the turntable’s ground wire. b u MODE selector (A-9050 only) c DIGITAL IN OPTICAL D3 jack (A-9050 only) Connects components such as CD players with optical digital audio output. d DIGITAL IN COAXIAL D1/D2 jacks (A-9050 only) Connect components such as CD players with coaxia...
Page 10 - Remote Controller
10 En For detailed information, see the pages in parentheses. a 8 button ( ➔ page 21 ) Sets the integrated amplifier to On or Standby. b DIMMER button Adjusts the display brightness. c ! / " / # / $ and ENTER buttons Select and adjust settings. d VOLUME q / w buttons ( ➔ page 22 ) Adjust the vol...
Page 12 - Connections; Screw-type speaker terminals; Connecting Your Speakers; Integrated Amplifier
12 En Connections Connections ■ Screw-type speaker terminals Strip 1/2" to 5/8" (12 to 15 mm) of insulation from the ends of the speaker cables, and twist the bare wires tightly, as shown. ■ Banana Plugs (North American models) • If you are using banana plugs, tighten the speaker terminal be...
Page 13 - SPEAKERS A; and; SPEAKERS B; , it separates high frequency from low
13 En Note • Make sure that the wires do not touch metal parts on the back panel or elsewhere. • Y plugs cannot be connected.• Two sets of speakers (Speakers A and Speakers B) can be connected to the integrated amplifier. You can select which speakers to output audio to when listening to music.You c...
Page 14 - Cable and Jacks; Connect all of your speakers and components.; AC INLET
14 En Note • Push plugs in all the way to make good connections (loose connections can cause noise or malfunctions). • To prevent interference, keep audio cables away from power cords and speaker cables.• The integrated amplifier’s optical digital jack have shutter-type covers that open when an opti...
Page 15 - This is an example of connection using the CD Player.; Analog Connection; Connecting a CD Player; COAXIAL; LINE IN 1
15 En This is an example of connection using the CD Player. Digital Connection (A-9050 only) Tip • The CD player can be connected to the COAXIAL D1 or D2 jack or the OPTICAL D3 jack. However, when using the u interlock function, be sure to connect the CD player to the COAXIAL D1 jack. Analog Connec...
Page 16 - This is an example of connection using the Tuner.; Connecting a Tuner
16 En This is an example of connection using the Tuner. Digital Connection (A-9050 only) Tip • The Tuner can be connected to the COAXIAL D1 or D2 jack or the OPTICAL D3 jack. However, when using the u interlock function, be sure to connect the Tuner to the COAXIAL D2 jack. Analog Connection Tip • A ...
Page 17 - This is an example of connection using the Onkyo; Connecting an Onkyo Dock; RI MODE
17 En This is an example of connection using the Onkyo u Dock. Digital Connection (A-9050 only) Tip • An Onkyo Dock can be connected to the COAXIAL D1 or D2 jack or the OPTICAL D3 jack. However, when using the u interlock function, be sure to connect the Onkyo Dock to the OPTICAL D3 jack. Analog Con...
Page 18 - Connecting Onkyo
18 En With u (Remote Interactive), you can use the following special functions: ■ Auto Power On When you start playback on a component connected via u while the integrated amplifier is on Standby, the integrated amplifier will automatically turn on and select that component as the input source. ■ Di...
Page 19 - The; input jacks are for use with moving-magnet; PHONO; jacks to the audio output jacks on the turntable, as shown.; Connecting a Turntable
19 En The PHONO input jacks are for use with moving-magnet (MM) type cartridges.Use an analog audio cable to connect the PHONO L/R jacks to the audio output jacks on the turntable, as shown. Tip • If the turntable has a ground wire, connect it to GND terminal. With some turntables, connecting the gr...
Page 21 - Turning On & Basic Operations; Basic Operations; Turning On the Integrated Amplifier; Turning Off the Integrated Amplifier; Operating with the remote controller; Turning On/Off the Integrated Amplifier; Press; Press
21 En Turning On & Basic Operations Basic Operations Turning On the Integrated Amplifier ■ Operating with the remote controller ■ Operating on the integrated amplifier Tip • After a certain time of warming up, the internal temperature of the integrated amplifier stabilizes, and the sound is soft...
Page 22 - Selecting Speakers A and Speakers B; The LED of the selected speakers lights.; Adjusting the Volume; VOLUME
22 En You can select to output sound from Speakers A, Speakers B, or both A + B. Note • While headphones are connected, this setting is disabled.• When this setting is set to A + B , the impedance of speakers is restricted. For further details, see “Connecting Your Speakers” ( ➔ page 12 ). ■ Operati...
Page 23 - The LED corresponding to the selected input will light up.; • When the DIRECT function is on, turn the function off; Selecting the Input Source; Using the Direct Function; Press the; The PHASE MATCHING BASS LED lights up.
23 En You can switch inputs to select the desired source component. Choose an input from the following: LINE1, LINE2, LINE3, LINE4, LINE5, PHONO ( D1, D2, D3 (A-9050 only)) The LED corresponding to the selected input will light up. Tip • The LED will blink when D1 , D2 or D3 is selected and a signal...
Page 24 - Adjusting the Bass, Treble and Balance; Turn the; Muting the Sound; Using Headphones; When connecting the headphones, the; MUTING
24 En You can adjust the bass, treble and left/right output balance respectively. ■ Operating on the integrated amplifier Tip • By default, bass, treble and balance is set to the center position. Note • While the Direct function is enabled, bass and treble are disabled. You can temporarily mute the ...
Page 25 - Custom Setup; Setting the Auto Standby Function; Setting the speaker impedance; Switch the
25 En Advanced Operations Custom Setup When the Auto Standby (ASb) function is activated, the integrated amplifier will automatically enter Standby mode if there is no operation for 30 minutes with no audio signal input. You can set the impedance of the speakers that you connect to the unit. (A-9050...
Page 26 - Others; Troubleshooting; Can’t turn on the Integrated Amplifier.; Before requesting repairs
26 En Others Troubleshooting First check the followings.Since the issue may be caused by other components that are connected, be sure to also check them while referring to their manuals.Further product operating procedures and FAQs (frequently asked questions) are available from the Onkyo web site.h...
Page 27 - Other; When the; The sound from turntable is distorted.; LINE IN
27 En There’s no sound. • Make sure that the Onkyo Dock is connected to the integrated amplifier properly. • Make sure that no video content is being played.• Reset the iPod. Other • When the Auto Standby (ASb) function is activated, the power of the Onkyo Dock connected via u is automatically turne...
Page 28 - Specifications; Audio Inputs
28 En Specifications ■ Audio Inputs ■ Audio Outputs ■ Others Specifications and features are subject to change without notice. A-9050 A-9030 Rated Output Power (North American)(FTC) 75 watts minimum continuous power per channel, 8 ohm loads, 2 channels driven at 1 kHz, with a maximum total harmonic ...
Page 29 - MEMO
Page 32 - The Americas
SN 29401270B (C) Copyright 2013 Onkyo Corporation Japan. All rights reserved. C1306-3 2-1, Nisshin-cho, Neyagawa-shi, OSAKA 572-8540, JAPANhttp://www.onkyo.com/ 18 Park Way, Upper Saddle River, N.J. 07458, U.S.A.For Dealer, Service, Order and all other Business Inquiries: Tel: 201-785-2600 Fax: 201-...