Page 2 - Contents
Contents 2 Caring for the environment .................................................................................. 6 Warning and Safety instructions ......................................................................... 7 Operating the washing machine ........................................
Page 5 - Settings
Contents 5 Settings .............................................................................................................. 103 Selecting settings ................................................................................................ 103Changing a setting .............................
Page 6 - Caring for the environment
Caring for the environment 6 Disposal of the packingmaterial The transport and protective packaginghas been selected from materials whichare environmentally friendly fordisposal, and can normally be recycled. Recycling the packaging reduces theuse of raw materials in themanufacturing process and als...
Page 7 - Warning and Safety instructions; Correct application; This washing machine is designed for domestic use and for use in
Warning and Safety instructions 7 This washing machine complies with current safety requirements.Inappropriate use can, however, lead to personal injury anddamage to property. To avoid the risk of accidents and damage to the machine, pleaseread these instructions carefully before using it for the fi...
Page 8 - Safety with children
Warning and Safety instructions 8 Safety with children Young children must not be allowed to use this appliance. Older children may only use the appliance when its operation has been clearly explained to them and they are able to use it safely,recognising the dangers of misuse. Cleaning work m...
Page 9 - The electrical safety of this washing machine can only be
Warning and Safety instructions 9 The electrical safety of this washing machine can only be guaranteed when continuity is complete between it and an effectiveearthing system which complies with current local and nationalsafety regulations. It is most important that this basic safetyrequirement is ...
Page 11 - Correct use; Do not install the washing machine in a room where there is a risk
Warning and Safety instructions 11 Correct use Do not install the washing machine in a room where there is a risk of frost. Frozen hoses may burst or split. The reliability of theelectronic control unit may be impaired at temperatures belowfreezing point. Before using the machine for the first t...
Page 13 - Colour run and dye removers contain sulphur compounds which; Accessories; Only use genuine Miele spare parts and accessories with this
Warning and Safety instructions 13 Colour run and dye removers contain sulphur compounds which can cause damage such as corrosion. Do not use these products inthis machine. If detergent comes into contact with the eyes, rinse them thoroughly with lukewarm water immediately. If swallowed, seekmed...
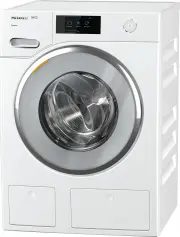
Page 14 - Operating the washing machine; Control panel; sensor; Touch display and sensor controls
Operating the washing machine 14 Control panel a sensor Takes you back a level in a menu. b Touch display c Start/Stop sensor Touching the Start/Stop sensor starts the selected programme or cancels a programme that has already been started. The sensor flashes slowly as soon asit is possible for ...
Page 15 - Main menu
Operating the washing machine 15 Main menu After switching on the washingmachine, the main menu will appear inthe display. You access all the important sub-menus from the main menu. Touch the sensor at any time to return to the main menu. Values setpreviously are not saved. 11:02 Program...
Page 16 - Option lists
Operating the washing machine 16 Examples on how to operatethe appliance Option lists Programme menu (single option list) 11:02 2:39 2:59 1:59 1:09 h h h h Cottons Cottons Delicates Minimum iron Programmes Help You can scroll to the right or the left byswiping your finger across the scr...
Page 17 - Setting numerical values; OK; Help display; Exiting a menu
Operating the washing machine 17 Setting numerical values You can set numerical values in somemenus. 12 00 11 59 10 58 13 01 14 02 Clock display OK Enter the numbers by swiping upwardsor downwards. Place your finger on thenumber that you want to change andmove your finger in the direction youwant. U...
Page 18 - Before using for the first time; Damage resulting from incorrect
Before using for the first time 18 Damage resulting from incorrect installation and connection.Installing and connecting thewashing machine incorrectly willcause serious damage to property.See “Installation and connection”. This washing machine has undergonea complete functional test at thefactory...
Page 20 - steps; Setting the language
Before using for the first time 20 Switching on the washingmachine Press the button. The welcome screen will light up. The display will guide you through the 6 steps of the initial commissioning process. 1. Setting the language You will be asked to select the languageyou require for the display....
Page 21 - Setting the clock format; Confirm with the; Removing the transit bars; Damage resulting from failure to; Confirm the message with the
Before using for the first time 21 3. Setting the clock format The time of day display can be in 12 hor 24 h clock format. Select the clock format you want andconfirm this with the OK sensor. The display will then bring up thescreen for setting the time of day. Setting the time of day This message...
Page 22 - Commissioning TwinDos
Before using for the first time 22 5. Commissioning TwinDos Skip Continue Set up "TwinDos"? Touch the Continue sensor to set up TwinDos straight away. Useful tip: To postpone set-up until later: touch the Skip sensor. The following message will then appear inthe display: It is possib...
Page 23 - Open the access panel for TwinDos.
Before using for the first time 23 Remove the foil from the detergentcartridge. Open the access panel for TwinDos. Push the UltraPhase 1 detergent cartridge into compartment 1 until it locks into position. The following message will appear inthe display: Now enter the settings for UltraPha...
Page 24 - Settings for compartment; UltraPhase 2
Before using for the first time 24 Settings for compartment The dispensing quantity forUltraPhase 2 for (hardness range I) is preset. 36 3534 37 38 Dosage for comp. ml 11:02 OK Confirm the preset value with the OK sensor, or change the value. UltraPhase 2 Hardness level I 36 ml Hardness ...
Page 25 - Touch the
Before using for the first time 25 6. Starting the calibrationprogramme For optimum water and energyconsumption and excellent washresults, it is important to calibrate thewashing machine. To do this, the Cottons programme must be run without laundry and without detergent. No other programmes can be ...
Page 26 - Washing environmentally and economically; Energy and water consumption
Washing environmentally and economically 26 Energy and water consumption – To get the most out of your machine, load the maximum dry load for theprogramme you are using.The energy and water consumptionwill be the lowest in relation to thesize of the load. – When smaller amounts of laundry are washed...
Page 27 - EcoFeedback; – An estimate of the energy and water; Actual consumption
Washing environmentally and economically 27 EcoFeedback You can view information about theenergy and water consumption of yourwashing machine with the pull-downmenu. The following information will appear inthe display: – An estimate of the energy and water consumption before the programmebegins. – T...
Page 28 - Preparing the laundry; Sorting the laundry
1. Preparing the laundry 28 Empty all pockets. Damage due to foreign objects. Nails, coins, paper clips, and so oncan cause damage to garments andcomponents in the machine.Check the laundry before washingand remove any foreign objects. Sorting the laundry Sort the laundry by colour and bycare ...
Page 29 - Selecting a programme
2. Selecting a programme 29 Switching on the washingmachine Press the button. The interior drum lighting will come on. The drum lighting will go outautomatically after five minutes. Useful tip: To switch the lighting on again, open the pull-down menu fromthe overview menu and then touch the s...
Page 30 - Selecting programme settings; Selecting the temperature; Switch TwinDos on or off
3. Selecting programme settings 30 Selecting the temperature You can alter the preset temperatureof a wash programme. Touch the Temperature sensor. Select the desired temperature. The display will change to show the Overview menu. Selecting a spin speed You can alter the preset spin speed ofa wa...
Page 31 - Selecting Extras; Activating CapDosing; Timer
3. Selecting programme settings 31 Selecting Extras You can supplement the washprogrammes with Extras. Touch the Extras sensor. Select one or more Extras. Not all Extras can be used with everyprogramme, e.g. Eco and Quick . Extras that cannot be combined are greyedout and cannot be selected. C...
Page 32 - Loading the washing machine; Opening the door; The maximum load for the; Closing the door; Shut the door with a gentle swing.
4. Loading the washing machine 32 Opening the door Take hold of the door and pull itopen. Check the drum for pets or foreignobjects before loading it withlaundry. The most efficient use of energy andwater is achieved when a full load iswashed. However, do not overload asthis reduces cleaning effic...
Page 33 - TwinDos; Activating TwinDos dispensing
5. Adding detergent 33 There are several options for addingdetergent. TwinDos The washing machine is equipped withthe TwinDos system. TwinDos has to be activated asdescribed in “Before using for the firsttime”. How UltraPhase 1 and UltraPhase 2work UltraPhase 1 is a liquid detergent whichdissolves d...
Page 34 - Degree of soiling
5. Adding detergent 34 Degree of soiling The level of soiling in laundry is dividedinto three settings: – Light No visible soiling or stains – Normal Visibly soiled and/or just a few slightstains – Heavy Heavily soiled and/or stains clearlyvisible. The dispensing amount for TwinDosand the amou...
Page 35 - Detergent dispenser drawer; Filling with detergent
5. Adding detergent 35 Detergent dispenser drawer Any detergent suitable for automaticfront loading washing machines can beused with this appliance. Pleaseobserve the instructions for use anddosage on the detergent packaging. Ensure that TwinDos dispensing isdeactivated. Add detergent in accordance ...
Page 37 - Inserting a capsule
5. Adding detergent 37 CapDosing If you selected CapDosing when setting the programme, detergent will bedispensed via the capsule for this washprogramme. Only one capsule can be selected perwash programme. Three different types of capsule areavailable: = Fabric care (e.g. fabric softener) = Addi...
Page 39 - Starting the programme - the end of the programme; Starting a programme; Time left; At the end of the programme
6. Starting the programme - the end of the programme 39 Starting a programme The programme can be started whenthe Start/Stop sensor is flashing on and off. Touch the Start/Stop sensor. The door will lock ( will appear in the display) and the programme will start. The programme status will appear...
Page 40 - Spinning
Spinning 40 Final spin speed in theprogramme When a programme is selected, theoptimum spin speed for this washprogramme will appear in the display. A faster spin speed can be selected forcertain wash programmes. The highest selectable spin speed isindicated in the table. Programme rpm Cottons 1600 C...
Page 41 - Starting the final spin; Ending the wash programme; Rinse and interim spin
Spinning 41 Omitting the final spin (Rinsehold) If Rinse hold is selected, the laundryremains in the water following the finalrinse cycle. This helps prevent creasingif the laundry is not going to beremoved from the drum immediatelyafter the end of the programme. Select the Rinse hold Extra. Start...
Page 42 - Programme chart
Programme chart 42 Cottons Cold to 90°C Max. load 9.0 kg Items Cottons, linens or cotton mix fabrics, e.g. table linen, towelling,underwear, T-shirts etc. Notes – The Cottons 60°/40 °C programme has a shorter programme duration, longer temperature holding times and higher energyconsumption than the ...
Page 43 - QuickPowerWash
Programme chart 43 QuickPowerWash 40°C – 60°C Max. load 5.0 kg Items Lightly soiled garments which are also suitable for washing in the Cottons programme. Notes A special saturation process and wash rhythm ensure that thelaundry is cleaned particularly quickly and thoroughly. Automatic plus Cold to ...
Page 44 - Silks
Programme chart 44 Shirts Cold to 60°C Max. load 1.0 kg/2.0 kg Items Shirts and blouses made of cotton and mixed fibre. Notes – Pre-treat collars and cuffs if necessary. – Wash silk shirts and blouses in the Silks programme. – If the preset Pre-ironing option is switched off, the maximum load ...
Page 45 - Outerwear
Programme chart 45 Outerwear Cold to 40°C Max. load 2.5 kg Items Performance outerwear (e.g. jackets and trousers) made frommembrane fabric such as Gore-Tex®, SYMPATEX®,WINDSTOPPER® etc. Notes – Zip up or close jackets before washing. – Do not use fabric softener. – If required, these garments can a...
Page 46 - Down duvets
Programme chart 46 Down duvets Cold to 60°C Max. load 2.5 kg 1 down duvet 2.20 m x 2.00 m Items Quilts, duvets and pillows with feather or down filling. Notes – Remove air from the items before washing to prevent an excessive build-up of foam. To do this, either push the items into a narrowlaundry b...
Page 47 - Curtains
Programme chart 47 Curtains Cold to 40°C Max. load 2.0 kg Items Curtains, including net curtains, specified as machine-washable bythe manufacturer. Notes – To remove dust, the Pre-wash Extra is selected automatically. – For curtains which crease easily, reduce the spin speed or deselect the spin. – ...
Page 48 - Freshen up
Programme chart 48 Freshen up Max. load 1.0 kg Items Dry, clean cotton, linen or mixed fibre garments which are slightlycreased. The garments must be suitable for drying in a tumble dryer and suitable for ironing . Notes – Smaller loads give a better result. – Remove garments as soon as the ...
Page 49 - Maintenance; Clean machine
Programme chart 49 Maintenance The washing machine has two maintenance programmes. 1. Clean machine for cleaning the washing machine. 2. Clean "TwinDos" for maintenance of the TwinDos compartments / . See “Cleaning and care – TwinDos maintenance” for more details. Clean machine 85°C No l...
Page 50 - Extras; Quick; Please note the following advice:
Extras 50 You can use the Extras sensors toaugment the wash programmes. Quick The programme duration is reduced.Mechanical action and energy usageare increased. Eco The Eco Extra helps to save energy. Thewash temperature is reduced and thewash duration is increased in return.The wash programme conti...
Page 51 - and suitable for ironing
Extras 51 Soak For heavily soiled and stained itemswith protein stains. A duration of between 30 minutes and6 hours can be chosen for the soakprocess in 30-minute increments. See“Settings” for more information. The factory default setting is30 minutes. Intensive For hard-wearing laundry that is very...
Page 52 - Wash programme chart - Extras
Wash programme chart - Extras 52 Quick Eco Water plus Extra rinse SingleWash Pre- ironing Cottons X X X X X X Cottons X – X X X X Minimum iron X X X X X X Delicates X X X X X X QuickPowerWash – – – X X Automatic plus X X X X X X Woollens – – – – X – Silks – – – – X – Express 20 – – – – X S...
Page 54 - Programme sequence
Programme sequence 54 Main wash Rinse Spin Water level Wash rhythm Water level Rinses Cottons 2-5 1)2)3) Cottons 2-5 2)3) Minimum iron 2-4 2)3) Delicates 2-4 2)3) QuickPowerWash 1 Automatic plus 2-4 2)3) Woollens 2 Silks 2 Expres...
Page 55 - Woollens
Programme sequence 55 = low water level = medium water level = high water level = intensive rhythm = normal rhythm = sensitive rhythm = ultra sensitive rhythm = handwash rhythm = carried out – = not carried out This washing machine has fullyelectronic controls with automatic loadco...
Page 56 - How it works
Programme sequence 56 PowerWash 2.0 PowerWash 2.0, a washing techniquedeveloped by Miele, is activated in thefollowing programmes with small andmedium-sized loads: – Cottons – Minimum iron – Shirts – Automatic plus How it works Conventional washing techniques washwith more water than the laundry can...
Page 57 - Changing the programme sequence; Cancelling a programme; Selecting another programme; Interrupting a programme
Changing the programme sequence 57 Cancelling a programme You can cancel a programme at anytime after it has started. Touch the Start/Stop sensor. The following will appear in the display: Cancel the programme? Select Yes. The following will appear in the display: Programme cancelled . The s...
Page 58 - Garment care label symbols
Garment care label symbols 58 Washing The figure quoted in the symbol is themaximum temperature at which thegarment can be washed. The numberof bars under the symbol indicates thelevel of agitation permitted. No bar under the symbol =normal agitation One bar under the symbol =reduced agitation ...
Page 59 - Favourite programmes; Option 1
Favourite programmes 59 Creating a Favouriteprogramme You can save your own customisedwash programmes under names of yourchoice. There are two ways to create aFavourite programme. Option 1 The main menu must be visible in thedisplay. Touch the Favourites sensor. The display will change to show the...
Page 61 - Setting the Timer
Timer 61 The Timer can be used to set the timeat which a programme starts or finishes.The programme start can be delayed byup to 24 hours. Setting the Timer Touch the Timer sensor. Select the Finish at or Start at option. Set the hours and the minutes andconfirm your entry with the OK sensor...
Page 62 - SmartStart
Timer 62 SmartStart The SmartStart function (only functional in selected countries) letsyou define a period of time duringwhich your washing machine will startautomatically. The appliance will starton receipt of a signal, e.g. from yourenergy supplier, that indicates that theelectricity tariff is pa...
Page 63 - Detergent; The correct detergent; – The soiling level of the laundry.; Detergent dispensing aids
Detergent 63 The correct detergent All detergents produced for automaticfront loading washing machines aresuitable. Follow the manufacturer'sinstructions and dosagerecommendations on the packaging. The right amount to dispensewill depend on the following: – The soiling level of the laundry. – The qu...
Page 64 - TwinDos dispensing
Detergent 64 Adding fabric softener or liquidstarch separately Prepare the starch in accordance withthe manufacturer's instructions on thepackaging. Useful tip: When adding fabric softener, activate the Water plus Extra. Dispensing via the detergentdispenser drawer Add fabric softener to the co...
Page 65 - Miele recommended detergents
Detergent 65 Miele recommended detergents Miele detergents and care products have been specially designed for Mielewashing machines. They are available to order via the internet at shop.miele.com(depending on country) or from Miele. Miele UltraPhase 1 / 2 Miele Cap Miele Cap Miele Cap Cottons ...
Page 67 - Cleaning and care; Risk of electric shock!
Cleaning and care 67 External casing and fasciapanel Risk of electric shock! Mains voltage is present when thewashing machine is switched off.Disconnect the machine from theelectricity supply before cleaning ormaintenance. Risk of damage due to ingress of water.The pressure of a water jet cancau...
Page 68 - Cleaning the siphon and the
Cleaning and care 68 Cleaning the siphon and the / compartment channel Liquid starch results in clogging. Ifclogged, the siphon in the / compartment will not work and thecompartment can overflow.Clean the siphon particularlythoroughly after using liquid starch afew times. 1. Remove the sipho...
Page 69 - TwinDos maintenance; Starting the maintenance programme; Cleaning the compartment
Cleaning and care 69 Cleaning the drum (Hygiene info) Washing at low temperatures and/orusing liquid detergent can causebacteria and unpleasant odours to buildup in the washing machine. Use the Clean machine programme to clean the machine. Run this programme regularlyor at the latest when the Hygien...
Page 70 - Cleaning the water inlet filter
Cleaning and care 70 Cleaning the water inlet filter The washing machine has a filter toprotect the inlet valve. The filter in thescrew connection of the water inlethose should be cleaned approximatelyevery 6 months, or more often if thereare frequent interruptions to the externalwater supply. Fir...
Page 71 - Problem solving guide; The programme does not start; Problem; Close the door again.
Problem solving guide 71 With the help of the following guide, minor faults in the performance of theappliance, some of which may result from incorrect operation, can be remediedwithout contacting Miele. This will save you time and money because you won'tneed a service call. Please note that a call-...
Page 72 - Fault messages after a programme has been cancelled
Problem solving guide 72 Fault messages after a programme has been cancelled Problem Possible cause and remedy Drainage fault. Cleandrain filter and pump.Check the drainhose. The water outlet is blocked or restricted.The drain hose has been fixed too high. Clean the filters and the drain pump. ...
Page 73 - Fault messages at the end of a programme; Excessive foam has built up during washing.
Problem solving guide 73 Fault messages at the end of a programme Problem Possible cause and remedy Check detergent Excessive foam has built up during washing. Check the amount of detergent dispensed. With automatic detergent dispensing, check thedosage amount set. Observe the instructions o...
Page 75 - Messages or faults with the TwinDos system
Problem solving guide 75 Messages or faults with the TwinDos system Problem Possible cause and remedy Only a few morewashes possiblebefore a newcartridge is neededfor compartment . The detergent in the cartridge is running low. Thereare between 4 and 8 wash cycles remaining. Order a new cartrid...
Page 76 - Problems with TwinDos
Problem solving guide 76 Problems with TwinDos Problem Possible cause and remedy There are dark specksin the liquid detergent. Mould has developed in the detergent. Pour the liquid detergent out of the container andthen clean the container thoroughly. No detergent and/orfabric softener wasdispense...
Page 77 - General problems with the washing machine
Problem solving guide 77 General problems with the washing machine Problem Possible cause and remedy The washing machinesmells. Hygiene info was ignored. A programme using atemperature above 60°C has not been run for a longperiod of time. In order to prevent bacteria and unpleasant odoursbuilding ...
Page 80 - An unsatisfactory wash result
Problem solving guide 80 An unsatisfactory wash result Problem Possible cause and remedy Liquid detergent doesnot give the requiredresult. Liquid detergents usually contain no bleachingagents. They do not remove fruit, coffee and teastains. Use the Miele 2 Phase System. The targetedaddition of Ult...
Page 81 - The door will not open; Steam care
Problem solving guide 81 The door will not open Problem Possible cause and remedy The door cannot bepulled open during aprogramme. The drum is locked during a programme. Touch the Start/Stop sensor to cancel the programme. The programme is cancelled, the door unlocks andyou can pull it open. There...
Page 82 - Switch off the washing machine.
Problem solving guide 82 Opening the door in the eventof a blocked drain outlet and/or power cut Switch off the washing machine. Open the drain pump access panel. Blocked drain outlet If the drain outlet is blocked, a largerquantity of water can remain in thewashing machine. Risk of scalding d...
Page 83 - Clean the filters thoroughly.
Problem solving guide 83 Clean the filters thoroughly. Remove any foreign objects (e.g.,buttons, coins etc.) and clean theinterior. Turn the impellers by hand tocheck that they rotate freely. Replace the filters correctly (on theright and left) and tighten them. Close the drain pump access p...
Page 84 - Service; Contact in case of fault
Service 84 Contact in case of fault In the event of any faults which youcannot remedy yourself, please contactMiele. Contact information for Miele can befound at the end of this booklet. Please quote the model and serialnumber of your appliance whencontacting Miele. This information canbe found on t...
Page 85 - Installation and connection; Front view
Installation and connection 85 Front view a Water inlet hose with Waterproofsystem for cold and for hot oralternative water supplies b Electrical connection c Flexible drain hose (with detachableswivel elbow) d Control panel e Detergent dispenser drawer f Door g Access to filters, pumps andemergency...
Page 86 - Rear view; Drain hose
Installation and connection 86 Rear view a Drain hose b Transport clips for inlet and drainhoses and mains connection cable c Electrical connection d Protruding lid for holding whenmoving the machine e Cold water inlet hose withWaterproof system f Water inlet hose with Waterproofsystem for hot or al...
Page 87 - Installation surface
Installation and connection 87 Installation surface A concrete floor is the most suitableinstallation surface. It is far less proneto vibration during the spin cycle thanwooden floorboards or a carpetedsurface. Please note: The machine must be level andsecurely positioned. To avoid vibrations du...
Page 88 - withdraw the transit bar.
Installation and connection 88 Using the spanner supplied, turn theleft-hand transit bar 90°, then withdraw the transit bar. Turn the right-hand transit bar 90°,then withdraw the transit bar.
Page 89 - Risk of injury from sharp edges.; Refitting the transit bars
Installation and connection 89 Risk of injury from sharp edges. There is a risk of injury from reachinginto holes that are not covered.To avoid the risk of injury, the holesfor the transit bars must be coveredafter the transit bars have beenremoved! Fit the stoppers onto the two holes. Secure ...
Page 90 - Levelling the machine; Screwing out and adjusting the feet
Installation and connection 90 Levelling the machine The washing machine must standperfectly level on all four feet to ensuresafe and proper operation. Incorrect installation may increaseelectricity and water consumption andmay cause the machine to move about. Screwing out and adjusting the feet The...
Page 91 - Risk of electric shock due to
Installation and connection 91 Installing under a continuousworktop Risk of electric shock due to exposed cables.There is a risk of coming into contactwith live parts while the lid isremoved.Do not remove the washing machinelid. This washing machine (with lid intact)can be pushed under a worktop i...
Page 92 - The inlet hoses
Installation and connection 92 The Miele water protectionsystem The Miele water protection systemprotects all parts of the washingmachine and surrounds from waterdamage. The system consists of three maincomponents: – the inlet hose – the electronic unit and drainage and overflow protection – the dra...
Page 93 - The electronic unit
Installation and connection 93 The electronic unit and drainage and overflow protection – Drainage protection Any leaking water is collected in thesump in the base of the machine. A float switch closes the solenoid valves , preventing any more water from flowing into the machine andwater in ...
Page 94 - Connection to the water supply
Installation and connection 94 Connection to the water supply Risk of electric shock! There are electrical wires in the waterinlet hose.The inlet hose must not beconnected in an area subject tospray water, e.g. in a bathroom orshower room. The casing on the water inlet hosemust not get wet. The pr...
Page 96 - Hot water
Installation and connection 96 Cold water (default setting) The washing machine will be operatedwith cold mains water only. The other inlet hose is secured to theback of the washing machine. Hot water – The preferred temperature is 55°C. The temperature must not not exceed60°C. Consult a qualified p...
Page 97 - Water intake overview depending on selection programmed
Installation and connection 97 Water intake overview depending on selection programmed Main wash Rinses First and subsequent rinses Final rinse Cold water Hot water main wash / Hot water MW + rinses / / Soft water Rain water Well water = Cold water inlet h...
Page 98 - Drainage; Drain hose connection options
Installation and connection 98 Drainage The suds are drained through a drainpump with a 1 m delivery head. For thewater to drain freely, the hose must beinstalled free of kinks.If required, the hose can be extended toa length of up to 5 m. The necessaryparts can be purchased from Miele. For a delive...
Page 99 - Electrical connection; Risk of fire from overheating!
Installation and connection 99 Electrical connection The washing machine is supplied with amains cable with moulded plug readyfor connection to a switched socket. Risk of fire from overheating! Connecting the washing machine toa multi-socket plug adapter or to anextension lead can overload thecabl...
Page 100 - Technical data
Technical data 100 Height 850 mm Width 596 mm Depth 643 mm Depth with door open 1.077 mm Height for building under 850 mm Width for building under 600 mm Weight approx. 96 kg Capacity 9 kg dry laundry Voltage See data plate Rated load See data plate Fuse rating See data plate Consumption data See “C...
Page 101 - Consumption data; Cottons
Consumption data 101 Consumption data for the nominated energy labellingprogramme according to AS/NZS 2040.1 & AS/NZS 2040.2 Load Consumption data Energy in kWh Water in litres Duration Normal Cold Water Cottons 9.0 kg 0.56 64 4 h 28 min Notes for test institutes: Detergent must be dispensed v...
Page 103 - Calling up settings; Selecting settings; Changing a setting
Settings 103 You can use the settings to alter themachine's electronics to suit changingrequirements. Settings can be altered at any time. Calling up settings Switch on the washing machine. Scroll to the second page in the mainmenu. Touch the Settings sensor. The display will change to show th...
Page 105 - Memory
Settings 105 Memory The washing machine will save thelast settings (temperature, spin speedand some of the Extras) selected for aprogramme after the programme hasstarted. When the programme is chosen again,the saved settings will appear in thedisplay. Memory is deactivated as standard. Clock display...
Page 107 - Maximum rinse level; Gentle action
Settings 107 Maximum rinse level The water level in the rinse can bepermanently set to the highest value. This function is important for allergysufferers as it achieves excellent rinseresults. The water consumption will beincreased. The maximum rinse level is deactivatedas standard. Soak duration Yo...
Page 108 - Network; The following values are displayed:
Settings 108 Network Miele@home Control the networking of yourwashing machine with your Wi-Finetwork. The following points may appear in thesubmenu: Set up This message only appears if thewashing machine has not yet beenconnected to a Wi-Fi network. Please refer to “Before using for the firsttime” f...
Page 110 - RemoteUpdate
Settings 110 RemoteUpdate The RemoteUpdate function is used forupdating the software in your washingmachine. The RemoteUpdate function isdeactivated as standard. If you do not install a RemoteUpdate,you can continue to use your washingmachine in the usual way. However,Miele recommends installingRemo...
Page 111 - Appliance parameters; Water intake
Settings 111 Appliance parameters Water intake You can programme 6 options for thewater intake. Options – Cold water (factory default setting) Uses mains water only. – Hot water main wash Hot water is used for the main washif a wash temperature over 30°C isselected. – Hot water MW + rinses Hot water...
Page 112 - Installation requirements; Low water pressure
Settings 112 Installation requirements Low water pressure If the water pressure is below 100 kPa(1 bar), the programme will becancelled and a fault message willappear. If the on-site water pressure cannot beincreased, activating this function willprevent the programme from beingcancelled. Low water ...
Page 113 - Optional accessories
Optional accessories 113 Detergent, fabric care, additives andmachine care products are available forthis machine. All the products havebeen designed for Miele appliances. These and many other useful productscan be ordered via the internet atshop.miele.com (depending on country)or from Miele (see en...
Page 114 - Specialist detergents; Sportswear; Fabric care; Fabric softener
Optional accessories 114 Specialist detergents Specialist detergents are available ascapsules in convenient single dose amounts or in a handy bottle. Sportswear – Liquid detergent for sportswear and fleece garments – Neutralises unpleasant odours – Retains the shape of the textiles Down Items – Li...
Page 115 - Additives; Booster; Machine care products; IntenseClean
Optional accessories 115 Additives Booster – For removing stains – Suitable for white and coloured laundry – Available as capsules in convenient single dose amounts Machine care products IntenseClean – For cleaning the washing machine thoroughly and effectively – Removes grease, bacteria and unple...
Page 119 - Miele New Zealand Limited
www.miele.com.au Miele Experience Centre and Head Office Melbourne: 1 Gilbert Park DriveKnoxfield, VIC 3180 Miele Experience Centre South Melbourne: 206-210 Coventry StreetSouth Melbourne, VIC 3205 Miele Experience Centre and Office Sydney: 3 Skyline PlaceFrenchs Forest, NSW 2086 Miele Experience Ce...