Page 3 - Contents
Contents 3 IMPORTANT SAFETY INSTRUCTIONS ............................................................ 4 Caring for the environment .............................................................................. 9 Appliance description .....................................................................
Page 4 - IMPORTANT SAFETY INSTRUCTIONS; Correct use; This vacuum cleaner can be used for all normal cleaning of car-
IMPORTANT SAFETY INSTRUCTIONS 4 READ ALL INSTRUCTIONS BEFORE USING THIS APPLI-ANCE This vacuum cleaner complies with all current local and nationalsafety requirements. Improper use can lead to personal injury anddamage to property. Please read the operating instructions before using the vacuumcleane...
Page 5 - Safety with children
IMPORTANT SAFETY INSTRUCTIONS 5 The vacuum cleaner must only be used to vacuum dry floor sur- faces. Do not vacuum people or animals. Any other types of use,modifications, or alterations are not permitted. Persons which lack physical, sensory or mental abilities or experi- ence with the machine ...
Page 7 - Proper use
IMPORTANT SAFETY INSTRUCTIONS 7 Proper use To avoid the risk of damage, do not use the vacuum cleaner with- out the FilterBag, dust compartment filter and exhaust filter in place. The dust compartment cover will not close without a FilterBag in- serted. Do not force it. Do not vacuum up anythi...
Page 8 - California Proposition 65; SAVE THESE INSTRUCTIONS
IMPORTANT SAFETY INSTRUCTIONS 8 California Proposition 65 THE FOLLOWING WARNING IS REQUIRED BY THE STATE OF CALIFORNIAFOR CALIFORNIA RESIDENTS ONLY: WARNING: Cancer and Reproductive Harm - www.P65Warnings.ca.gov. SAVE THESE INSTRUCTIONS
Page 9 - Caring for the environment; Disposing of sales packaging
Caring for the environment 9 Disposing of sales packaging The packaging material protects thevacuum cleaner from transport damage.The packaging materials used are se-lected from materials which are environ-mentally friendly for disposal and cantherefore be recycled. Recycling the packaging material ...
Page 10 - Appliance description
Appliance description 10 The illustration shows the maximum number of features available
Page 12 - Connection; Attaching the suction hose
12 Connection Attaching the suction hose Insert the hose connector into thesuction socket on the vacuumcleaner until it clicks into position. Todo this, line up the guides on the twopieces. Disconnecting the suction hose Press the release buttons at the sideof the hose connector, and lift thehos...
Page 13 - Adjusting the floorhead
13 To release the handle from the suc-tion wand, press the release buttonand pull the handle out of the wand,twisting it slightly as you do so. Adjusting the telescopic suctionwand One part of the telescopic suction wandis packed inside the other, and it can beadjusted to suit your height for comf...
Page 14 - Activating the TimeStrip
14 Vacuum carpets and rugs with thebrush retracted: Press the foot switch . Clean hard flooring which is not sus-ceptible to scratching, and flooring withgaps or deep crevices in it with thebrush protruding: Press the foot switch . If the suction power of the adjustablefloorhead seems too hi...
Page 15 - Using the accessories supplied
15 Remove the indicator strip. Press the TimeStrip ® exhaust filter change indicator. After approx. 10–15 seconds a thin redline will appear in the left-hand side ofthe display. Close the dust compartment lid se-curely, making sure it clicks into posi-tion. Take care not to trap the filterbag ...
Page 16 - Use; Unwinding the power cord
16 Opening the accessories compart-ment Press the release button on the ac-cessories compartment lid. The accessories compartment will thenopen. Take out the accessory you require. Press down firmly on the lid to closeit. Reversible floorhead (included as standard depending onmodel) For genera...
Page 18 - During vacuuming; Parking, transport and storage; Park system for storage
18 Open the air inlet valve on the handlefar enough to reduce the suctionpower. The floorhead will be easier to maneu-ver. During vacuuming When vacuuming, pull the vacuumcleaner behind you on its wheels. Youcan stand it upright for vacuumingstairs and curtains, etc. Parking, transport and stora...
Page 19 - Maintenance
19 Slot the floorbrush downwards intoone of the parking attachments onthe sides of the vacuum cleaner. This makes the vacuum cleaner easierto carry or store. Maintenance Always switch off the vacuum cleaner for maintenance work andremove the plug from the outlet. The Miele filtration system cons...
Page 20 - FilterBag change indicator
20 Every packet of original Miele FilterBagscontains four bags, one AirClean ex-haust filter, and one motor protection fil-ter. Original Miele multipacks contain 16FilterBags, four AirClean exhaust filters,and four motor protection filters. Original Miele exhaust filters can alsobe purchased separat...
Page 21 - How to replace the FilterBag
21 How to replace the FilterBag Press the release catches at the sideof the hose connector, and removethe hose from the socket. Lift the release catch for the dustcompartment lid and raise the lid asfar as it will go. The FilterBag has a flap which closesautomatically when the dust compart-ment ...
Page 25 - When changing the filter please note
25 Replacing one type of exhaust filterwith another Depending on model, your vacuumcleaner will be fitted as standard withone of the following exhaust filters: a AirClean b AirClean Plus 50 (light blue) c Active AirClean 50 (black) d HEPA AirClean 50 (white) Do not use more than one exhaust fil-ter ...
Page 26 - Cleaning and care; Risk of electric shock from volt-
26 Cleaning and care Risk of electric shock from volt- age.The supply voltage is applied to theappliance even if it is switched off.Before cleaning, unplug the appli-ance from the electrical socket. Vacuum cleaner and accessories Risk of electric shock from volt- age.If moisture gets into the va...
Page 27 - Frequently Asked Questions; Problem
27 Frequently Asked Questions With the help of the following guide minor faults in the performance of the ma-chine, some of which may result from incorrect operation, can be remedied with-out contacting the Service Department. This guide may help you to find the reason for the fault, and how to corr...
Page 28 - Customer Service; Contact in case of fault; Optional accessories; Floor tools / Brushes; Turbo Mini
28 Customer Service Contact in case of fault In the event of a fault which you cannotremedy yourself, please contact yourMiele dealer or Miele Service. Contact information for Miele Servicecan be found at the end of this docu-ment. Warranty For more information about warrantyconditions, please conta...
Page 30 - LIMITED WARRANTY - VACUUM CLEANERS USA
LIMITED WARRANTY - VACUUM CLEANERS USA 30 What This Warranty Covers and For What Period The Coverage Extends Miele, Inc. (hereinafter "Miele") warrants to the original purchaser of this product, living in the United States of America, who purchased their vacuum from a Miele Authorized Dealer...
Page 32 - National Headquarters; Canada; Headquarters and Miele Centre
9 Independence WayPrinceton, NJ 08540Phone:Fax:www.mieleusa.com U.S.A. Miele, Inc. National Headquarters Please have the model and serial numberof your appliance available whencontacting Customer Service. Canada ImporterMiele Limited Headquarters and Miele Centre 800-843-7231609-419-4298 Customer Se...
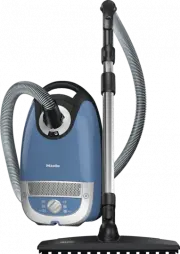


![Miele PT 7186 Vario [EL]](https://manualsarea.com/img/product/thumbs/48/69/3e/693e1219f5c0d53fde982888bd54a3ec.webp)

![Miele PLW 8617 [EL/S TH]](https://manualsarea.com/img/product/thumbs/48/fe/90/fe9010c5f8c3c4aada5d83b417c78507.webp)