Page 2 - Contents
Guide to the appliance . . . . . . . . . . . . . . . . . . . . . . . . . . . . . . . . . . . . . . . . . . . . . 4 Warning and Safety instructions . . . . . . . . . . . . . . . . . . . . . . . . . . . . . . . . . . . . . 6 Caring for the environment . . . . . . . . . . . . . . . . . . . . . . . . . ...
Page 3 - Technical data
Electrical connection U.K. . . . . . . . . . . . . . . . . . . . . . . . . . . . . . . . . . . . . . . . . . . . 32 Technical data . . . . . . . . . . . . . . . . . . . . . . . . . . . . . . . . . . . . . . . . . . . . . . . . . . . 33 Contents 3
Page 4 - Guide to the appliance
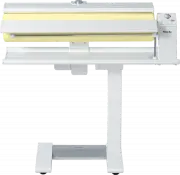
a Temperature selector b Emergency release c Control panel d Release catch e Mains connection cable f Foot pedal g Ironing table h Hanging bar i Feed-in table j Roller k Heater plate l Finger guard Guide to the appliance 4 a b c d e f g h i j k l
Page 5 - Control panel; Roller speed selector
Control panel a Roller speed selector b "On-Off" indicator light c "On-Off" button I-0 d o C "Temperature" indicator light Guide to the appliance 5 a b c d
Page 6 - Warning and Safety instructions
To avoid the risk of accidents anddamage to the ironer please readthese instructions carefully beforeusing it for the first time. Theycontain important information on itssafety, use and maintenance. Keep these instructions in a safeplace and ensure that new users arefamiliar with the content. Pass t...
Page 7 - Correct use
~ This ironer complies with all relevant local and national safety requirements.Unauthorised repairs could result inunforeseen dangers for the user, forwhich Miele cannot accept liability.Repairs should only be undertaken by aMiele approved service technician.Ensure current is not supplied to theiro...
Page 8 - Using accessories; Accessory parts may only be fitted
~ Do not lay the connection cable over the heater plate when it is heated up.This could damage the cable - dangerof electric shock.Use the cable holders on the ironer towind the cable away. ~ In countries where there are areas which may be subject to infestation bycockroaches or other vermin, paypar...
Page 9 - Caring for the environment
Disposal of the packingmaterial The transport and protective packinghas been selected from materials whichare environmentally friendly for disposaland can normally be recycled. Ratherthan just throwing these materials away,please ensure they are recycled.Ensure that any plastic wrappings,bags etc. a...
Page 10 - Safety; To remove it simply pull it off.; Moving the ironer
Safety Do not remove the safety deviceuntil the ironer has been set up onits rollers. ^ To remove it simply pull it off. Store it in a safe place for future use. Itshould be fitted to the ironer againbefore moving it (e.g. when movinghouse). Fold the ironer up before fittingit. Moving the ironer 10
Page 11 - The ironer is fitted with four rollers.
The ironer is fitted with four rollers. ^ Hold the ironer by the ironing table topush it or to pull it towards you. To overcome obstacles such as carpetedges and doorways, but also to steerit: ^ Tilt it slightly. The ironer can be moved either in theupright position or when folded up. ^ Hold the iro...
Page 12 - Connection cable; Dust cover; First remove the feed-in table by; Before using for the first time
Connection cable The mains connection cable is woundround a hook underneath the ironingtable. Unwind the cable.Do not insert the plug into the electricalsocket yet. Dust cover The dust cover which protects the rollerduring transit has to be removed. ^ First remove the feed-in table by lifting it out...
Page 14 - Preparing the laundry; Damping down; Before ironing
Preparation of the workingarea A height-adjustable chair is useful andalso a flat surface, e.g. a table, to laythe ironed laundry on. Make sure the ironer is level and secureand that it cannot roll sideways. Place close at hand: – a basket with the laundry ready for ironing to the left of the rotary...
Page 15 - Sorting
Pulling into shape and smoothingout Pull the dampened laundry into shapeas usual. Smooth out ties, straps, seams andhems. Large items such as table cloths, bedlinen etc should be folded lengthwaysinto a number of pleats so that they canbe ironed as easily as possible. Sorting Sort the laundry accord...
Page 16 - ßß; Ironing
Switching on and off The I-0 "On-Off" button is used for switching the ironer on and off. To switch on ^ Press the I-0 button in – The indicator light beside the button will come on. To switch off ^ Press and release the I-0 button – The indicator light beside the button will go out. Select ...
Page 17 - – pressing; To raise the heater plate:; Take your foot off the pedal.
Select the roller speed There are 5 roller speed settings, fromlow (approx. 2 m/min) to high (approx.4.5 m/min). A low speed makes it easier to ironcomplicated articles such as shirts andblouses. A lower speed should also beselected for folded items. Reducing thespeed will enable them to get dry and...
Page 18 - Feeding laundry in; Press the foot pedal down.; Removing the feed-in table; Hanging bar; Take care not to press down on; Useful tips
Feeding laundry in ^ Arrange laundry along the feed-intable so that it is straight and smooth. ^ Then carefully turn the roller by handuntil the laundry makes contact withthe heater plate (keep your fingersaway from the heater plate). Then: ^ Press the foot pedal down. Removing the feed-in table The...
Page 19 - and continue ironing small items at a; After ironing; Switch the ironer off.; Power cut; – This releases the pressure enabling
For small items, e.g. handkerchiefs,alternate between using the right andleft hand sides of the roller. Items with raised buttons should beironed face down on to the roller so thatthey are pressed into the cushionedsurface. A cloth should be placed over zips,metal buttons and hooks to protect thehea...
Page 20 - Ironing tips
The following tips are intended ashelpful suggestions to get youstarted. With practice you willprobably find alternative ways ofironing which suit your style ofworking. Tea towels, hand towels,handkerchiefs, serviettes etc. Place on the ironing table with thestraight grain of the fabric to the feedb...
Page 22 - Sleeves and cuffs; Shirts with a shoulder yoke:
Sleeves and cuffs ^ Pull sleeves smooth ready for ironing.Do not iron the cuff yet. ^ Iron the sleeves from the cuff seam tothe underarm seam. ^ Iron both sides of each sleeve.Double cuffs should be folded(button hole to button hole) andironed. Back / shoulder yoke Shirts with a shoulder yoke: ^ Fol...
Page 23 - Start with the front left.
Back Iron the back in two sections, from themiddle to the side seams. ^ Pull the shirt over the roller as far asthe yoke seam - or to the collar seamon shirts without a yoke - and smoothit out. ^ Iron from the middle of the back tothe armhole seam. Then iron the restof the back as far as the side se...
Page 24 - Collar; Turn the collar and press if wished.; Nightdresses; Iron from the top to the bottom.; Aprons
Collar Iron the collar from both sides. Do notiron any buttons! ^ Turn the collar and press if wished. Nightdresses Iron sleeves, yokes and back on anightdress as you would a shirt. To iron the front: ^ Pull the nightdress over the rollerleaving the sleeves and bodicehanging over the left hand side ...
Page 25 - Cover with a damp cloth.
Pressing trousers ^ Press each leg separately. Let thetop of the trousers hang over theedge of the roller. ^ Cover with a damp cloth and turn theroller by hand until the trouser leg iscovered by the heater plate. ^ Press to iron, then do the same to theother trouser leg. To press skirts Remove the f...
Page 26 - Disconnect the ironer from the; Cleaning the heater plate; Maintenance and care
, Disconnect the ironer from the electricity supply by switching off atthe wall socket and withdrawing theplug before any cleaning andmaintenance work. Cleaning the heater plate Limescale deposits and starch residuescan be removed from the heater plateusing a suitable proprietary cleaningagent. Make...
Page 27 - Replacing the ironing cover
Replacing the ironing cover The ironing cover should only bechanged when the appliance iscold. ^ Removing the feed-in table. ^ Undo the cords at each end of theroller cover. ^ Unwind the cover. ^ Completely unwind the cottonundercloth attached to the roller andlet it hang down smoothly. ^ Take hold ...
Page 28 - Switch on the ironer.; must; turned to the
^ Insert the raw edge of the newironing cloth into the retaining slotwith the wrong side down. Leave thecords hanging free and smooth outthe cloth. ^ Turn the roller by hand in thedirection you iron (see arrow) until thecover retaining slot is at the bottom. ^ Switch on the ironer. When the ironer i...
Page 30 - Wash the cover at 60°C.; Problem solving guide
With the help of the following notes, minor faults in the performance of the ironer,some of which may result from incorrect operation, can be put right withoutcontacting the Service Department. , Repair work to electrical appliances should only be carried out by a suitably qualified person in strict...
Page 31 - After sales service
In the event of a fault, please contact: – your Miele dealer or – the nearest Miele Service Department, (see address on theback page). When contacting Miele, please quotethe Model and Serial number of yourappliance, both of which are shown onthe data plate, located at the frontunderneath the ironing...
Page 32 - Non-rewireable plugs BS 1363; Electrical connection
Electrical connection U.K. All electrical work should be carried outby a suitably qualified and competentperson, in strict accordance withcurrent national and local safetyregulations (BS 7671 in the UK). Ensure power is not supplied to theappliance until after installation workhas been carried out. ...


 Miele WWD380 WCS PWash&Steam&9kg User Manual
 Miele W 1614 Manual
 Miele G 5266 SCVi SFP Active Plus User Manual
 Miele Classic C1 Turbo Team PowerLine - SBAN0 User Manual
![Miele PDR 307 [EL]](https://manualsarea.com/img/product/thumbs/48/ba/fd/bafde84806e8abc8b420f34eaf8fcd6e.webp) Miele PDR 307 [EL] User Manual
Miele PDR 307 [EL] User Manual Miele F 1911 Vi Manual
![Miele PDR 908 [EL MAR 3N AC 400V 50-60Hz]](https://manualsarea.com/img/product/thumbs/48/05/b7/05b705998b251f92b271e908423e1ecb.webp) Miele PDR 908 [EL MAR 3N AC 400V 50-60Hz] Installation Manual
Miele PDR 908 [EL MAR 3N AC 400V 50-60Hz] Installation Manual Miele K 9757 iD Manual
 Miele APWM 052 User Manual
 Miele APWM 065 Installation Manual
 Miele APWM 070 Installation Manual
 Miele AWG 102 User Manual
 Miele B 890 Manual
 Miele B 895 D Manual
 Miele B990 Manual
 Miele B 4826 FashionMaster User Manual
 Miele Blizzard CX1 User Manual
 Miele Blizzard CX1 Cat & Dog Flex User Manual
 Miele Blizzard CX1 Comfort XL User Manual
 Miele Blizzard CX1 Flex User Manual