Page 2 - SPECIFICATIONS; Applicable battery cartridge and charger; SAFETY WARNINGS; General power tool safety warnings; Save all warnings and instruc-
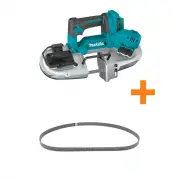
2 ENGLISH ENGLISH (Original instructions) SPECIFICATIONS Model: XBP04 Max. cutting capacity Round workpiece 66 mm (2-5/8″) dia. Rectangular workpiece 66 mm x 66 mm (2-5/8″ x 2-5/8″) Blade speed 0 - 3.2 m/s (0 - 190 m/min)(0 - 630 ft/min) Blade size Length 835 mm (32-7/8″) Width 13 mm (1/2″) Thicknes...
Page 4 - Cordless Portable Band Saw Safety; Important safety instructions for; SAVE THESE INSTRUCTIONS.
4 ENGLISH Cordless Portable Band Saw Safety Warnings 1. Hold power tool by insulated gripping sur- faces, when performing an operation where the cutting accessory may contact hidden wiring. Cutting accessories contacting a "live" wire may make exposed metal parts of the power tool "live&...
Page 5 - FUNCTIONAL; Installing or removing battery; Indicating the remaining battery capacity
5 ENGLISH FUNCTIONAL DESCRIPTION CAUTION: Always be sure that the tool is switched off and the battery cartridge is removed before adjusting or checking function on the tool. Installing or removing battery cartridge CAUTION: Always switch off the tool before installing or removing of the battery car...
Page 6 - Tool / battery protection system
6 ENGLISH When you pull the switch trigger, the LED display shows the remaining battery capacity. The remaining battery capacity is shown as the following table. Battery indicator status Remaining battery capacity On Off Blinking 50% to 100% 20% to 50% 0% to 20% Charge the battery NOTE: When the LED...
Page 7 - Switch action; Speed adjusting dial; ASSEMBLY
7 ENGLISH Switch action WARNING: Before installing the battery cartridge into the tool, always check to see that the switch trigger actuates properly and returns to the "OFF" position when released. WARNING: NEVER defeat the lock-off button by taping down or some other means. A switch with a...
Page 8 - Installing or removing the band saw blade
8 ENGLISH Installing or removing the band saw blade CAUTION: Oil on the band saw blade can cause the blade to slip or come off unexpectedly. Wipe off all excess oil with a cloth before install - ing the band saw blade. CAUTION: Always wear protective gloves when handling the band saw blade. CAUTION:...
Page 9 - Adjusting blade track; OPERATION
9 ENGLISH Adjusting blade track When the band saw blade tends to slip out from the wheel, adjust the blade track. To adjust, insert the hex wrench into the adjustment hole as illustrated and make a quarter turn clockwise. After that, check if the band saw blade does not slip out. If it still slips o...
Page 10 - Cutting lubricant; MAINTENANCE
10 ENGLISH Apply the band saw blade to the suitable cutting posi - tion on the workpiece as illustrated. 1. Hold the tool as illustrated. Before turning on the tool, always make sure that the stopper plate contacts the workpiece and the band saw blade is clear of the workpiece. 2. Turn the tool on. ...
Page 11 - Cleaning; Replacing rubber tires on the; OPTIONAL; MAKITA LIMITED WARRANTY
11 ENGLISH Cleaning CAUTION: Wax and chips on the rubber tires on the wheel may cause the band saw blade to slip and come off unexpectedly. Use a dry cloth to remove wax and chips from the rubber tires. After use, remove wax, chips and dust from the tool, rubber tires on the wheel and the band saw b...
Page 12 - ESPECIFICACIONES; Cartucho de batería y cargador aplicables; ADVERTENCIAS DE; Advertencias generales de seguridad; Conserve todas las advertencias
12 ESPAÑOL ESPAÑOL (Instrucciones originales) ESPECIFICACIONES Modelo: XBP04 Capacidad máxima de corte Pieza de trabajo redonda 66 mm (2-5/8″) de diámetro Pieza de trabajo rectangular 66 mm x 66 mm (2-5/8″ x 2-5/8″) Velocidad de la cuchilla 0 m/s - 3,2 m/s (0 m/min - 190 m/min)(0 ft/min - 630 ft/min...
Page 15 - Símbolos; Instrucciones importantes de; GUARDE ESTAS
15 ESPAÑOL Símbolos A continuación se muestran los símbolos utilizados para la herramienta. volts o voltios corriente directa o continua metros por segundo metros por minuto pies por minuto Instrucciones importantes de seguridad para el cartucho de batería 1. Antes de utilizar el cartucho de batería...
Page 16 - Instalación o extracción del; Indicación de la capacidad restante
16 ESPAÑOL DESCRIPCIÓN DEL FUNCIONAMIENTO PRECAUCIÓN: Asegúrese siempre de que la herramienta esté apagada y el cartucho de batería haya sido extraído antes de realizar cualquier ajuste o comprobación en la herramienta. Instalación o extracción del cartucho de batería PRECAUCIÓN: Apague siempre la h...
Page 17 - Sistema de protección para la
17 ESPAÑOL Indicación de la capacidad restante de la batería Específico del país 1 ► 1. Indicador de batería Cuando jale el gatillo interruptor, la luz LED indicadora mostrará la capacidad restante de la batería. La capa - cidad restante de la batería se muestra como se indica en la tabla a continua...
Page 19 - MONTAJE; Instalación o extracción de la
19 ESPAÑOL NOTA: Evite los impactos a la lámpara, ya que podrían causarle daños o acortar su vida útil. NOTA: Utilice un paño seco para quitar la suciedad de la lente de la lámpara. Tenga cuidado de no rayar la lente de la lámpara ya que la iluminación podría disminuir. NOTA: Cuando la herramienta s...
Page 20 - Ajuste de la pista de la cuchilla
20 ESPAÑOL 5. Presionando la parte media de la cuchilla de la sierra de banda, coloque la cuchilla alrededor de una rueda. Mover la rueda hacia el lado A facilitará esto. 2 1 A ► 1. Rueda 2. Neumático de goma 6. Coloque la cuchilla de la sierra de banda en la otra rueda de forma similar. 7. Coloque ...
Page 21 - Instalación de la empuñadura lateral; OPERACIÓN
21 ESPAÑOL Instalación de la empuñadura lateral (mango) Accesorio opcional Atornille firmemente la empuñadura lateral dentro de la posición de la herramienta tal como se muestra en la figura. OPERACIÓN PRECAUCIÓN: Siempre inserte completa- mente el cartucho de batería hasta que quede asegurado en su...
Page 22 - Lubricante para corte; MANTENIMIENTO; Limpieza; ACCESORIOS OPCIONALES
22 ESPAÑOL 2. Encienda la herramienta y espere a que la cuchilla de la sierra de banda alcance su velocidad completa. Descienda suavemente la cuchilla en el corte. El peso de la herramienta o una ligera presión sobre la misma aplicará la presión idónea para el corte. No fuerce la herramienta. 3. Con...
Page 23 - GARANTÍA LIMITADA DE MAKITA; Ésta Garantía no aplica para México
23 ESPAÑOL GARANTÍA LIMITADA DE MAKITA Ésta Garantía no aplica para México Consulte la hoja de la garantía anexa para ver los términos más vigentes de la garantía aplicable a este producto. En caso de no disponer de esta hoja de garantía anexa, consulte los detalles sobre la garantía descritos en el...
Page 24 - Makita Corporation
Some dust created by power sanding, sawing, grinding, drilling, and other construction activities contains chemicals known to the State of California to cause cancer, birth defects or other reproductive harm. Some examples of these chemicals are: • lead from lead-based paints, • crystalline silica f...