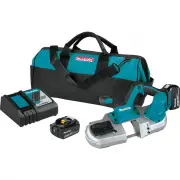
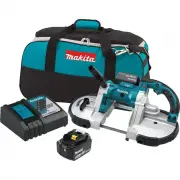
Page 2 - SPECIFICATIONS; Applicable battery cartridge and charger; SAFETY WARNINGS; General power tool safety warnings; Save all warnings and instruc-
2 ENGLISH ENGLISH (Original instructions) SPECIFICATIONS Model: XBP03 Max. cutting capacity Round workpiece 64 mm (2-1/2″) dia. Rectangular workpiece 64 mm x 64 mm (2-1/2″ x 2-1/2″) Blade speed 3.2 m/s (190 m/min)(630 ft/min) Blade size Length 835 mm (32-7/8″) Width 13 mm (1/2″) Thickness 0.5 mm (0....
Page 4 - Cordless Portable Band Saw Safety; Important safety instructions for; SAVE THESE INSTRUCTIONS.
4 ENGLISH Service 1. Have your power tool serviced by a qualified repair person using only identical replacement parts. This will ensure that the safety of the power tool is maintained. 2. Never service damaged battery packs. Service of battery packs should only be performed by the manufacturer or a...
Page 5 - Tips for maintaining maximum; FUNCTIONAL; Installing or removing battery; Indicating the remaining battery; Tool / battery protection system
5 ENGLISH Tips for maintaining maximum battery life 1. Charge the battery cartridge before completely discharged. Always stop tool operation and charge the battery cartridge when you notice less tool power. 2. Never recharge a fully charged battery car- tridge. Overcharging shortens the battery serv...
Page 6 - Overload protection; ASSEMBLY; Installing or removing the band saw
6 ENGLISH Overload protection When the battery is operated in a manner that causes it to draw an abnormally high current, the tool automat - ically stops without any indication. In this situation, turn the tool off and stop the application that caused the tool to become overloaded. Then turn the too...
Page 7 - Adjusting the stopper plate position
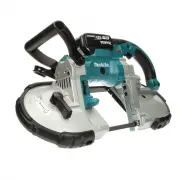
7 ENGLISH 3 1 2 ► 1. Tighten 2. Loosen 3. Blade tightening lever To install the band saw blade: 1. Open the wheel cover. 2. Turn the blade tightening lever clockwise until it stops to loosen the wheel. 3. Match the direction of the arrows on the band saw blade and on the wheels. 4. Insert the non-se...
Page 8 - Installing hook; OPERATION
8 ENGLISH Installing hook Optional accessory CAUTION: Do not use the hook for other pur- pose than temporarily hanging the tool. Doing so may cause the hook come off from the tool and result in personal injury. Hook is useful for hanging the tool. Hang the tool on a pipe vice or other suitable, stab...
Page 9 - Adjusting blade track
9 ENGLISH 2. Turn the tool on and wait until the band saw blade attains full speed. Gently lower the blade into the cut. The weight of the tool or slightly pressing the tool will supply adequate pressure for the cutting. Do not force the tool. 3. As you reach the end of a cut, release pres - sure an...
Page 10 - MAINTENANCE; Cleaning; OPTIONAL; MAKITA LIMITED WARRANTY
10 ENGLISH MAINTENANCE CAUTION: Always be sure that the tool is switched off and the battery cartridge is removed before attempting to perform inspection or maintenance. NOTICE: Never use gasoline, benzine, thinner, alcohol or the like. Discoloration, deformation or cracks may result. To maintain pr...
Page 11 - ESPECIFICACIONES; Cartucho de batería y cargador aplicables; ADVERTENCIAS DE; Advertencias generales de seguridad; Conserve todas las advertencias
11 ESPAÑOL ESPAÑOL (Instrucciones originales) ESPECIFICACIONES Modelo: XBP03 Capacidad máxima de corte Pieza de trabajo redonda 64 mm (2-1/2″) de diámetro Pieza de trabajo rectangular 64 mm x 64 mm (2-1/2″ x 2-1/2″) Velocidad de la cuchilla 3,2 m/s (190 m/min)(630 ft/min) Tamaño de la cuchilla Longi...
Page 14 - GUARDE ESTAS INSTRUCCIONES.; DESCRIPCIÓN DEL; Instalación o extracción del
14 ESPAÑOL Instrucciones importantes de seguridad para el cartucho de batería 1. Antes de utilizar el cartucho de batería, lea todas las instrucciones e indicaciones de precaución en el (1) el cargador de batería, (2) la batería, y (3) el producto con el que se utiliza la batería. 2. No desarme el c...
Page 15 - Sistema de protección para la
15 ESPAÑOL Para colocar el cartucho de batería, alinee la lengüeta sobre el cartucho de batería con la ranura en la carcasa y deslice en su lugar. Inserte por completo hasta que se fije en su lugar con un pequeño clic. Si puede ver el indicador rojo del lado superior del botón, esto indica que no ha...
Page 16 - Iluminación de la luz delantera; MONTAJE; Instalación o extracción de la
16 ESPAÑOL Iluminación de la luz delantera PRECAUCIÓN: No mire a la luz ni vea a la fuente de luz directamente. Jale el gatillo interruptor para encender la luz. La luz continúa iluminándose mientras se está jalando el gatillo interruptor. La luz se apaga una vez que se suelta el gatillo interruptor...
Page 18 - OPERACIÓN
18 ESPAÑOL OPERACIÓN PRECAUCIÓN: Siempre inserte completa- mente el cartucho de batería hasta que quede asegurado en su lugar. Si puede ver el indicador rojo del lado superior del botón, esto indica que no ha quedado completamente asegurado. Insértelo por completo hasta que el indicador rojo no pued...
Page 20 - MANTENIMIENTO; Limpieza; ACCESORIOS OPCIONALES; GARANTÍA LIMITADA DE MAKITA; Ésta Garantía no aplica para México
20 ESPAÑOL MANTENIMIENTO PRECAUCIÓN: Asegúrese siempre de que la herramienta esté apagada y el cartucho de batería extraído antes de intentar realizar una inspección o mantenimiento. AVISO: Nunca use gasolina, bencina, diluyente (tíner), alcohol o sustancias similares. Puede que esto ocasione grieta...
Page 24 - Makita Corporation
Some dust created by power sanding, sawing, grinding, drilling, and other construction activities contains chemicals known to the State of California to cause cancer, birth defects or other reproductive harm. Some examples of these chemicals are: • lead from lead-based paints, • crystalline silica f...